Monday, September 20, 2021

Rosemary - The Wonder Herb

Rosemary (Rosemary officinalis) is a perennial evergreen herb related to the mint (Labiatae) family. According to the United States Department of Agriculture (USDA) rosemary is hardy in Zones 7a through 11a, however from personal experience it can be overwintered in the Treasure Valley if somewhat protected. A rosemary plant can live for more than 30 years.   Rosemary requires well draining, slightly acidic soil and prefers at least six hours of full sun, however it will tolerate partial shade. Rosemary seeds are slow to germinate but it propagates easily from stem cuttings, layering and division. While rosemary is fairly resistant to pests and diseases, root rot is the most common cause of death.

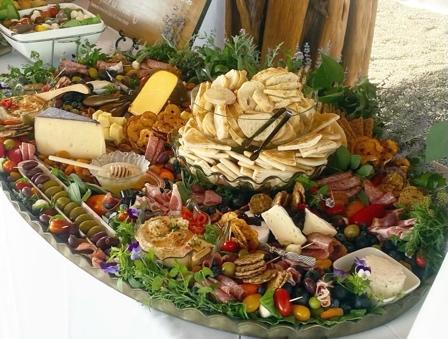
Rosemary’s culinary uses are well established. It is used to flavor meats, stews, teas, stuffing and many other gourmet feats ranging from savory to sweet. Rosemary can be used in breads, and also flavoring oils and butters. Sprigs of rosemary can be used as a graceful accent in presenting food such as a charcuterie board or in crafts like wreath making. 


Rosemary is an easy herb to grow in patio pots, vegetable gardens and as landscape shrubs.  Some cultivars can be grown as erect columns, rounded or irregular shrubs, and makes a fragrant topiary. It can also be used as ground cover, draping over a wall and in rock gardens. Outdoor pots can be brought indoors before first frost and kept as a fragrant house plant. Landscapers place rosemary in mountain gardens as it is resistant to damage by both deer and fire. The flowers are valued by butterflies and bees. Perfumes, hair care products, lotions, candles, potpourris, and sachets have long used rosemary oil. It takes over 100 pounds of raw rosemary to distill one pound of oil. 

Students in Roman times wore sprigs of rosemary thought to assist with memory; brides and grooms wore rosemary to encourage remembrance of wedding vows. Romans and Greeks considered rosemary a sacred plant that symbolizing both love and death. They threw sprigs into graves to signify their desire to remember the departed.
In the West, rosemary has been associated for centuries with faithfulness and friendship as in Ophelia’s much quoted line in Hamlet:

“There’s rosemary; that’s for remembrance. Pray, Love, Remember”

Thursday, September 2, 2021

How seeds saved me during the Pandemic...

Being a first-line healthcare provider during a worldwide virus pandemic, I self-quarantined, leaving me with spare time in the spring & summer of 2020. I enjoy flowers. I threw caution to the wind, mixed up my seeds, prepared my flower beds and got to sowing. What a successful experiment that resulted in colorful blooms. Seed-saving benefits include rapidly diversifying and enlarging flower beds while selecting from your favorite hearty blooms, at no cost! It delighted my soul during a very difficult time, so I had to know more
What type of flower seeds are best?
Whatever you love! Whatever you have! Best choices are annuals and easy-to-grow perennials. Consider starting with marigolds, zinnias, snapdragons, lavender, etc. For consistent blooms, choose open pollinated flowers and not hybrids, which differ from the parent plant. Check the package label on your initial flower seeds for Heirloom, or OP (open pollinated). If it says hybrid, F1 or F2, don’t save these seeds.
When choosing blooms for seed collection:
  • Use the largest and best blooms from healthy plants to ensure hearty genetics. 

  • Don’t use diseased plants. 

  • Leave the blooms on the plant until they have withered, turned brown and dried out. 

  • If you collect seeds from flowers that have not dried out on the stem, the seeds may be immature and may not germinate.

  • Be sure to label all seeds with the flower name, Latin name,

  • location and collection date as you save them.

  • Seed Saving is not just for flowers, click to learn about veggies too!

To collect, clip the dried flower heads from the stems. 

  • Marigolds and zinnias break open and remove the seeds from the center. Marigolds have long narrow seeds (bottom right) and zinnia seeds are arrow-shaped (top right). Sort out the large chaff by hand and use a small fan or just blow on the smaller bits to remove, leaving just the seeds. 

  • Snapdragons and lavender seeds will easily fall from the seed heads when shaken into a bowl. 

  • Spread seeds on paper towels to dry in a dark cool area. Make sure they are completely dried before storing to avoid mold which can ruin the seeds. 

  • Store in a labeled envelope or personalized seed packet. Mason jars, plastic baggies can be used if seeds are completely dried out. 

  • Proper, air-tight storage will help the seeds retain their viability, so choose a dark, dry, cool place protected from pests.

Sit back and watch your garden explode with flowers! Oh yes, and Christmas came early since I packaged up my seeds to share as gifts for my family and friends. Truly a gift of time and love!

Sunday, August 22, 2021

Iron Chlorosis in Maple Trees

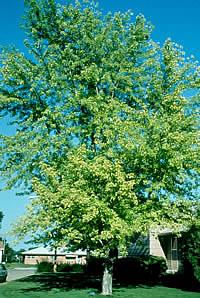
  Strolling the grounds of my one acre “estate” on a warm summer day, I was distressed to see something wrong with two of my Sycamore trees.  While two of the trees looked great, nice dark green leaves everywhere, the other two had sections of leaves that had yellowed.  Upon further inspection, I noted that the veins of the leaves were still green, but the areas between the veins had turned yellow.  In some cases the edges of the leaves were brown. “What is wrong?” I wondered.


What was wrong with my trees was something called, Iron Chlorosis. This problem is apparently common in places that have high alkalinity soil (pH above 7.0). My soil was significantly above this level. It is believed that there is a link between alkalinity and iron in the soil. The problem isn’t a lack of iron, but the inability of the plant to benefit from the iron that is there. For some reason, chemical reactions render the iron unusable to the tree.                                 

So, now that I know what is causing the trees’ problem, is there anything I can do about it? Yes, there are a number of things that can be done to deal with this problem. The best solution is prevention.  Do a soil test to determine the soil pH and then select species that will do well in a particular soil. However, if the trees are already there, like mine, you have several options.  One option is to add elemental Sulphur to the ground around the tree.  The Sulphur will help free up iron for the tree to take up.  This is a slow process and may take a year or more before seeing results.  Another option is to inject iron directly into the trunk.  This involves drilling a series of holes in the tree. This procedure should not be done more than once a year.  Finally, the foliage can be sprayed with an iron solution.  This usually provides the quickest results, however as new leaves come on they most likely will exhibit the problem. Solving the problem of iron chlorosis is a difficult and time consuming challenge.  Research and careful planning and follow up are keys to your success. Saving all of your beautiful plantings are worth the effort.  


Good luck!


Sunday, July 25, 2021

Victory Gardens for the 21st Century

During the difficult days of World War II, Americans rallied to support the nation’s war effort. One of the many ways they were encouraged to help out was to plant and utilize produce grown from their own efforts.  While it was a way to increase food production, it also enabled people to save money and to become more self-sufficient.  Additionally, it improved and increased the American diet with nutritious foods picked at their peak.

It is out of this effort, that the notion of a Victory Garden was introduced. Now, more than three-quarters of a century beyond the second world war, there is a resurgence in the desire to grow one’s own food. It is no surprise that, with the many impacts of the COVID pandemic, it has become quite popular to stretch the family food budget as far as possible. Many also seek to grow their own food to help the environment; to use fewer undesirable chemicals, to limit shipping produce from state to state and country to country, as well as to improve their own soil.

Victory Gardens can fit any landscape. The size of the garden can vary with the size of the lot where a person lives.  Vegetables can be tucked into a flower bed around the house. A collection of containers on a balcony or patio offers urban gardeners the chance to grow their favorite vegetables without a yard. Small garden plots can be taken out of grass. Community gardens give urban families a chance to garden with others to learn how to raise vegetables.  Many different settings and needs can be incorporated into the Victory Garden landscape.  

What do you need to start your own Victory Garden

1. Assess your property: Fruits and vegetables will need sunlight, water, soil and fertilizer. 

2. Poll your family on their likes and dislikes.  Plant what your family will eat.

3. Commit to the time needed to care for your plants.  


Supplies you may want to have for your garden.

  1. Shovel
  2. Hoe
  3. Trowel
  4. Bucket
  5. Seeds
  6. Compost
  7. Fertilizer

To get started, check out this video from Maine County Extension.

To prepare your garden site, see these tips or check out more options here.  Advice on getting started can also be obtained from your local County Extension Office.

Plants that are easy to grow include: 

  1. Beans- 50-80 days to maturity

  2. Beets- 50-70 days to maturity

  3. Cabbage- 45-65 days to maturity

  4. Cucumbers- 45-70 days to maturity

  5. Lettuce- 30-70 days to maturity

  6. Peas- 65-80 days to maturity

  7. Potatoes- 50-100 days to maturity

  8. Squash-Summer squash 40-75 days to maturity, Winter squash 70-120 days to maturity

  9. Tomatoes- 50-80 days to maturity 

Victory Gardens can fit anywhere and promote a healthy lifestyle that benefits all walks of life.

Saturday, July 10, 2021

Get your kids in the garden with you!

Share your love and passion for gardening with your kids by bringing them into the garden to discover the pleasure of growing food. Gardening may be the solution for parents struggling to find ways to encourage their kids to eat a healthy and balanced diet. Allowing your child to pick fresh produce from your garden will increase their desire to eat fresh vegetables.  Tomatoes warm from the sun are delicious.  My son loved green onions and once harvested and ate an entire row! Fresh peas are so delicious.  Help your child build a snack using 5 foods from my plate harvested from the garden or purchased from a local farmer’s market.  Think of all the brain-building vitamins, minerals and phytonutrients your kids will be eating and how that will improve their nutrition.

Give them a small piece of ground that is their own, along with gardening tools and gloves. Provide instruction on how to plant seeds and plants. For more information see the U of I Together Class offered August 10 to prepare a garden template using a paper towel, seeds, and glue. (More information and registration here.)  Show them the flowers, bugs, worms, and growing plants.  Let them dig a hole and plant something. It is about time to plant your fall garden. 

·       Allow the kids to emulate your garden activities in their own plot. Show them the difference between weeds and plants, pull and cultivate weeds, water, fertilize and care for their plants.  Don’t forget to show them the importance of bugs in the ecology of gardening.

·       Take your kids to an orchard and allow them to help you pick fresh fruit.  Build a snack around that. Observe the bees and teach them about making honey and pollination of plants. 

Spend time in the outdoors with your child and applaud their discoveries and experience. Provide ample opportunities for sensory experiences, such as varieties of colors, water features, insects, water skippers, frogs, polliwogs, fun textures and treasures.  Remember the mud pies you used to make as a child, those provide excellent sensory experiences. 

·       Kids who participated in gardening projects scored higher in science achievement than those who did not. Seeing a garden grow may spark your kids to ask questions like: Why do the plants need sun? How does the plant “drink” water? Why are worms good for the plants? Why are spiders needed in the garden? The questions your kids will ask will provide plenty of subjects for discussion. 

Saturday, June 19, 2021

What’s the “Buzz” About the Neighbors? Native Bees in Your Home Garden

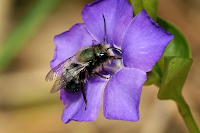
 It’s nice to know your neighbors! Every community is made up of organisms that need to live together. Your garden is exactly the same. It is created by all the plants and animals that make their home there. Some of the most beneficial neighbors in your garden are the bees, and Idaho’s native bees are great neighbors to have in our home gardens! These bees are major pollinators, carrying out an important function that is necessary for growing success. They keep things blooming and beautiful, as well as ensuring plant reproduction and food production. While most of us are familiar with our friends the honey bees, Idaho is home to many other interesting and beneficial species of bees, including mason and leaf cutting bees. Let’s meet the Megachilidea family. Chances are good that you will have opportunities to see these bees at work in your garden during the coming months.

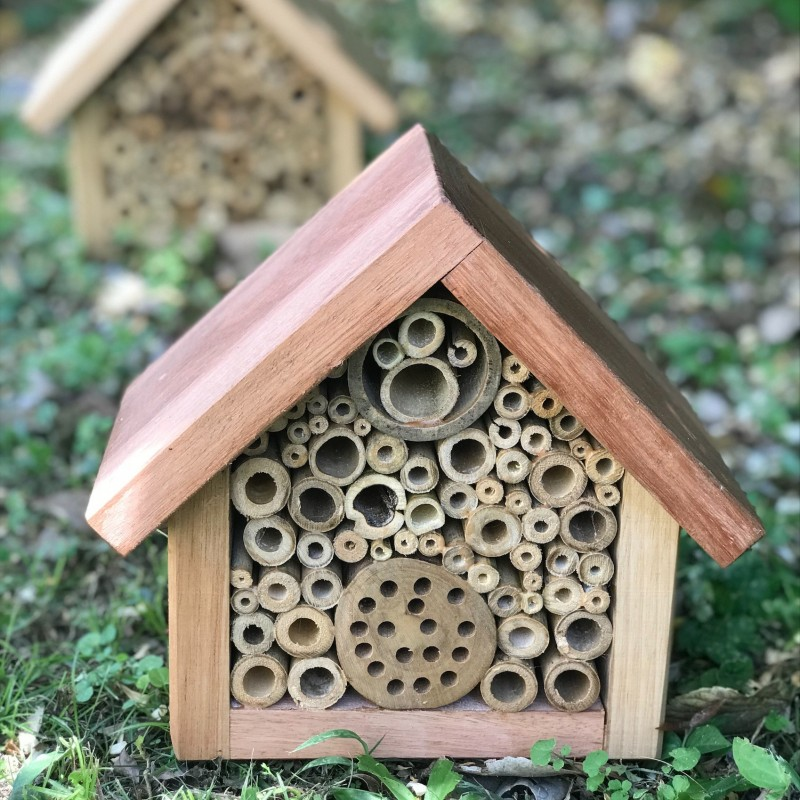
Next, invite them over! Good hosts always provide treats, and sometimes a safe place to stay. Because bees are so important to the success of any garden, it only makes sense that you would want them to come and be comfortable. There are many things you can do to create an environment where bees can thrive. These include:

  • providing sources for food and water,
  • space and materials for nesting,
  • limiting use of pesticides.
  • creating a Bee Habitat, or
  • a Pollinator Garden to help provide the essentials for a happy, healthy bee population.

Planting native trees, bushes, and flowers help attract native bees to your garden and provide the necessary elements for their success, and yours. You can also take steps to recognize, report, and limit instances of Bee Pesticide Poisoning. Always remember to limit use of pesticides and to only apply according to label directions.

Doing a few simple things can enhance the ability of native bee species to work and live in your garden. In return, you might notice significant improvements in the quality of your garden, such as greater flower and food production. Getting to know these neighbors will help your garden grow!

Thursday, June 3, 2021

Raised Garden Beds may be the answer!

Can’t kneel to garden? Poor soil a problem? Poor drainage? Short on space?

Raised beds might be the answer!! Some of the advantages of gardening in raised beds are:

  • improved soil conditions 

  • greater productivity in a smaller space 

  • saved water

  • the greatest advantage may be the ease of planting/maintaining a garden

  • easy to construct for most do-it-yourselfers

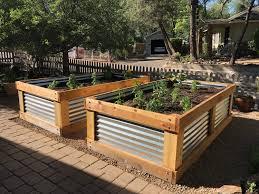
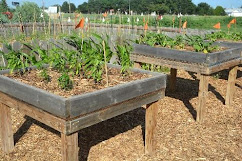
They can be built in many different configurations to fit conveniently into your landscape design and from materials which provide an attractive addition to your landscaping. Raised beds can be built to any height to accommodate your gardening needs and can be built directly upon the existing ground. However, by building beds waist high you overcome the need to bend over or kneel to garden. They can even be built to a height that would accommodate wheelchair gardening. Raised beds do need to have a minimum depth of least 8 inches to allow for proper plant root development.  They need to be somewhat deeper to grow root vegetables.  

When constructing raised garden beds, consider the materials from which the beds are to be built. Any lumber will do but, redwood or cedar will be more durable and will last much longer than beds built from softwoods like pine and fir. Recycled materials can be used in raised bed construction, but caution should be taken to assure that no treated materials of any kind are incorporated into your beds. You do not want toxic chemicals  leaching into your garden soil. Image result for raised garden beds site:edu

When considering the size, shape, and placement of the beds, an important consideration should be accessibility. The gardener should be able to access the beds from at least two sides and reach at least halfway across the bed. Three or four feet wide is a good width to assure ease of planting, weeding, and harvesting. Place your beds where they will receive 6-8 hours of direct sunlight daily.  

Raised garden beds should be filled with a combination of garden soil, compost, and soilless medium to provide optimum growing conditions for your plants. The proper soil combination should have the correct pH for your desired plants and supply your plants with nutrients.  A proper soil combination will also provide for ease in maintaining proper moisture content.

Raised planting bed divided into sixteen squaresWatering in raised beds is easily accomplished with a simple garden hose, however, a drip system will water your plants more uniformly and provide even greater convenience to your raised beds.


Additional advantages of raised beds are soils warm up faster and are easily covered with row covers to protect seedlings from spring frosts. This can also aid in extending the growing season in the fall. Raised bed allow you to grow more vegetables per square foot as you can plant plants more densely. Plants can be placed close enough to one another to shade out the weeds, yet just far enough apart to prevent overcrowding. 


With raised beds weed control and pest control is accomplished more easily making garden maintenance a snap.