Showing posts with label DCR. Show all posts

Friday, July 21, 2023

Why do we have so many earwigs this year?

Why do we have so many earwigs this year? Haven't we heard this every year? Well for one thing it has been a wet and slightly warmer spring. These weather conditions have made better than ideal living and growing media for the earwig. They like wet damp hiding places and with a little mulch or loose compost to hide in during the day.

How to identify good earwigs from bad earwigs.
They are all the same so to speak. They are opportunistic eaters. They live on dead decaying matter, eat aphids and other small prey and love young growth of certain plants, like Marigolds. This is shown in the picture with all the cans full of earwigs and decimated marigold plants. The shallow cans were placed next to plants that the earwigs thought were the most tasty.
Simple home remedies can be used to lower the earwigs population.  There are quite a few methods you can use depending on your preference and patience. I prefer a little beer in a small cat food can but there other preparations you can put in the cans. Since they prowl at night, they hide during the day. Place burlap bags, boards, newspapers or other materials on the ground, then daily collect individuals that congregate under the cover and discard.

Predatory insects help control the earwigs. Believe it or not, there are other insects and animals that prey on the earwigs. Since the earwigs are nocturnal, hungry birds have to hunt them out in their hiding places during the day. Evening birds and amphibians will be able to find them out and about in the duff on their favorite plants. Knowing the life cycle will help you manage earwigs!


Sunday, August 22, 2021

Iron Chlorosis in Maple Trees

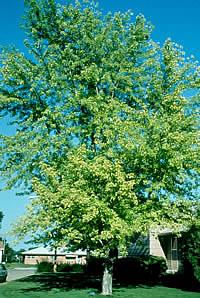
  Strolling the grounds of my one acre “estate” on a warm summer day, I was distressed to see something wrong with two of my Sycamore trees.  While two of the trees looked great, nice dark green leaves everywhere, the other two had sections of leaves that had yellowed.  Upon further inspection, I noted that the veins of the leaves were still green, but the areas between the veins had turned yellow.  In some cases the edges of the leaves were brown. “What is wrong?” I wondered.


What was wrong with my trees was something called, Iron Chlorosis. This problem is apparently common in places that have high alkalinity soil (pH above 7.0). My soil was significantly above this level. It is believed that there is a link between alkalinity and iron in the soil. The problem isn’t a lack of iron, but the inability of the plant to benefit from the iron that is there. For some reason, chemical reactions render the iron unusable to the tree.                                 

So, now that I know what is causing the trees’ problem, is there anything I can do about it? Yes, there are a number of things that can be done to deal with this problem. The best solution is prevention.  Do a soil test to determine the soil pH and then select species that will do well in a particular soil. However, if the trees are already there, like mine, you have several options.  One option is to add elemental Sulphur to the ground around the tree.  The Sulphur will help free up iron for the tree to take up.  This is a slow process and may take a year or more before seeing results.  Another option is to inject iron directly into the trunk.  This involves drilling a series of holes in the tree. This procedure should not be done more than once a year.  Finally, the foliage can be sprayed with an iron solution.  This usually provides the quickest results, however as new leaves come on they most likely will exhibit the problem. Solving the problem of iron chlorosis is a difficult and time consuming challenge.  Research and careful planning and follow up are keys to your success. Saving all of your beautiful plantings are worth the effort.  


Good luck!


Sunday, April 4, 2021

Why Gardening with Native Plants matter.

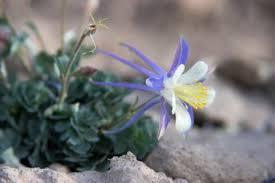
 Native plants provide many benefits to people and wildlife, while significantly adding to healthier soil and water.  Of the many benefits, my top six motivations for landscaping with native plants include: fewer fertilizers, pesticides, herbicides, and water. Plus, indigenous plants promote cleaner air, food, and shelter for wildlife, and they have proven to save money in many ways.


Excess phosphorus and nitrogen, main components of fertilizers added to our soil become toxic, and the runoff leaches into our waterways, causing excess algae growth. This surplus fertilizer depletes oxygen from our waters, harms aquatic life, and interferes with recreational uses.  Pesticide and herbicide runoff from lawns can contaminate our rivers and lakes with poisonous substances. Native plants have deeper roots and require less water.


As to cleaner air, our native landscapes do not require mowing, and they do not need nearly as much maintenance.  Lawns must be regularly mowed, weed-whacked, and often blown with leaf blowers.  These tools cause harmful emissions and air pollutants like carbon monoxide, carbon dioxide, nitrous oxides, sulfur dioxide, volatile organic compounds, and air toxins like benzene and particulates created from power tools. 


Our native plants attract a variety of birds, butterflies, and other wildlife by providing diverse habitats, food, and pollinator sources. In contrast, non-native plants offer little or no food or shelter to most native wildlife.


Essential to many home gardeners is the need to save time and money.  When compared to the high-maintenance of lawns and the added care necessary for exotic plants, it is easy to measure the economic benefits of landscaping with native plants.  Planting with selective native plants can create a beautiful and scenic landscape.


References that were used in creating this article.

It is easier to list them here for your use than to insert them into the text, this way you can choose which one you want to follow.

University of Idaho Extension | Short-Season, High-Altitude Gardening

http://www.extension.uidaho.edu/publishing/pdf/BUL/BUL0862.pdf 


Idaho Native Plant Society | Boise Area Native Plants Local Chapter: Pahove.  http://www.idahonativeplants.org


U.S. Fish and Wildlife Service | Native Garden Guide for Southwestern Idaho.

http://www.fws.gov/pacific/pdf/BLM_USFWS_Native%20Garden%20Guide_SW%20Idaho_2019_web.pdf


U.S. Forest Service | Basic Instructions for Native Plant Landscaping Projects.

https://www.fs.fed.us/wildflowers/Native_Plant_Materials/Native_Gardening/instructions.shtml


East Multnomah Soil & Water Conservation District (EMSWCD) Portland, OR.
emswcd.org select ‘Native Plants’

Pictures from the Idaho Native Plant Society and College of Agricultural and Life Sciences – University of Idaho


Sunday, July 26, 2020

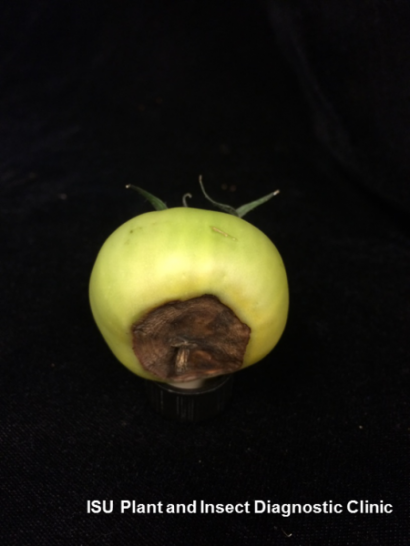
Blossom End Rot

Blossom End Rot - A Common Disease in Southern Idaho Tomatoes.

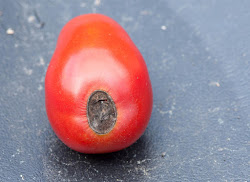
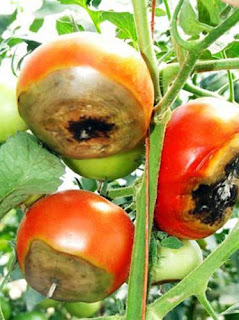
Few things are more discouraging than babying your tomatoes all season only to find that the new fruit
has developed brown, leathery bottoms. To be a tomato grower in Southern Idaho is to know this
discouragement at some point. The good news is that this physiological disease, called Blossom End Rot,
is not contagious and is preventable.

Prevention,
If you are still planning your garden and have not yet planted your tomatoes, preventing Blossom End Rot starts with ensuring that your soil has good drainage and contains enough available calcium. It is recommended that you get a soil test to understand the nutrient content of your soil before you plant anything or attempt to make any adjustments. For more information on conducting a soils test. If a soil test determines that your garden is low in calcium, you can add pulverized limestone to the top 8-12 inches of your garden soil and mix it in thoroughly before planting.

Once your tomatoes are planted in well-draining soil, your next preventative measure will be to focus on consistent watering throughout the growing season. Soil should be consistently moist to the depth of 2 feet below the surface-- not too wet nor too dry. This can be tricky in Southern Idaho where summer often starts out cool but quickly becomes very hot and dry. This requires deep soaking rather than shorter, shallow watering cycles. Applying mulch can help hold moisture in the soil as well.

If I Already Have Blossom End Rot, Can My Plants Recover?
The above pointers are great if you’re reading this in the early spring before your garden is planted, however, if you found this article after discovering that the disease has already affected your tomatoes, not to fear! The following tips will help salvage your tomatoes mid-season after discovering Blossom End Rot:
1. Pick and discard the tomatoes that have Blossom End Rot. This will stop the plant from sending any more energy to the damaged fruit.
2. Address you're watering immediately to ensure the plants get consistently moist soil to the depth of 2 feet.
3. Avoid deep cultivation around tomato plants as root damage leads to insufficient water uptake and subsequent risk of Blossom End Rot.
4. Tomatoes require a lot of nutrients as they grow, so to keep them healthy and growing, be sure to fertilize your tomatoes with a balanced fertilizer.
5. Foliar calcium can be sprayed on leaves to help increase tissue calcium in plants affected with
Blossom End Rot.

Blossom End Rot is certainly not a fun thing to discover in your tomatoes, but it is also not the end of the world. Like all gardening adventures, you can learn to manage and hopefully prevent this disease so you can enjoy many tomatoes from your garden.


Sunday, June 7, 2020

Voles, friend or nuisance?

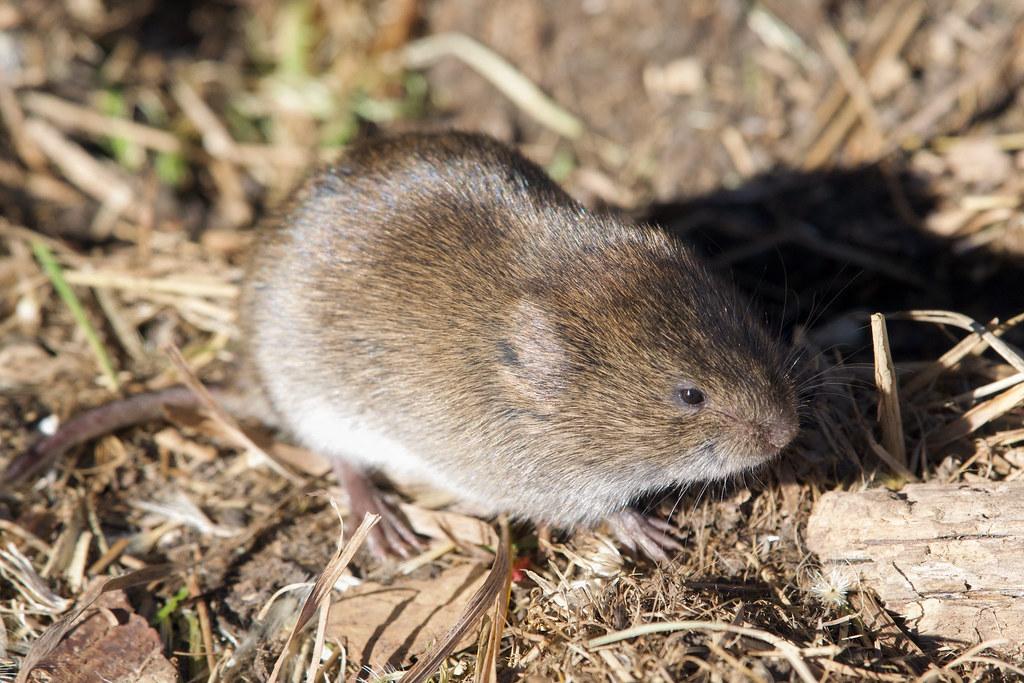
Voles are small rodents that measure 4-8 inches long and range in color from brown to gray.  In Alaska we had northern red-backed voles which are also found in Canada, Scandinavia, and northern Russia. They are sometimes referred to as Meadow Mice and their Latin name is Microtus pennsylvanicus.  “Microtus” translates to “small ear”.  They are pudgy with blunt faces, small eyes and ears, short legs and a short tail.  Vole numbers fluctuate from year to year and their populations can increase rapidly.  They can breed anytime of the year, but they typically breed in the Spring.  They are extremely prolific.  Female voles mature in 35 to 40 days, have 5 to 10 litters a year with 3 to 6 young per litter.
A rodent standing on a dry grass field

Description automatically generated
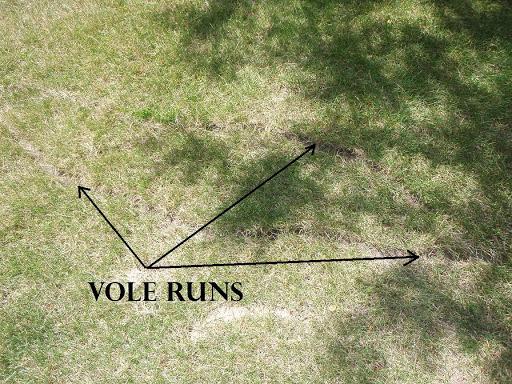
If you have turf, fruit trees, a home garden, grow crops commercially, and generally care about your landscape, you should be alert for the presence of voles.  They are herbivorous and feed on grasses, bulbs, tubers, tree bark, and tree roots.  They are active year-round, day and night.  A sure sign of voles “occupying an area” is their runways that connect numerous shallow borrows.  They don’t like to be seen and make their nest underground in dense vegetation and grasses and under snow in the winter.
A close up of some grass

Description automatically generated
It is best to mitigate vole population by use of a number of “management methods”.  One of the easiest ways to do this is to make your area less inviting.  You can do this by removing weeds, heavy mulch and dense vegetative cover.  This removes food sources, cover from predators, and makes it more challenging for them to connect trails.  This is generally referred to as “habitat modification”.  
You can also try fencing areas and adding approximately 12” of small mesh size (1/4” or smaller) to the bottom of the fencing  However, you would also need to bury the fence below the ground for 6-10” as voles tunnel.  
Protect young trees from girdling (removing the bark near the base) by using cylinders of metal, plastic, or hardware cloth and surrounding the trunk.  However, you also need to allow for tree growth and, again, remember to bury the cylinder below ground.  
If the voles have not “totally taken over the area” trapping can be effective.  A simple mouse trap baited with peanut butter has been successful.  Do not handle a caught vole w/o gloves as they do carry infectious pathogens and/or parasites.  Also, be sure to keep small children and pets out of the areas where you have traps set.
Finally, if you have a large area to eradicate and trapping will not be effective, there are two toxicants, zinc phosphide and anti-coagulants that are considered lethal control.  Please note, these are not recommended for residential areas.
Additionally, zinc phosphide is toxic to ground-feeding birds. Read labels carefully and contact your County Extension Office for further assistance!
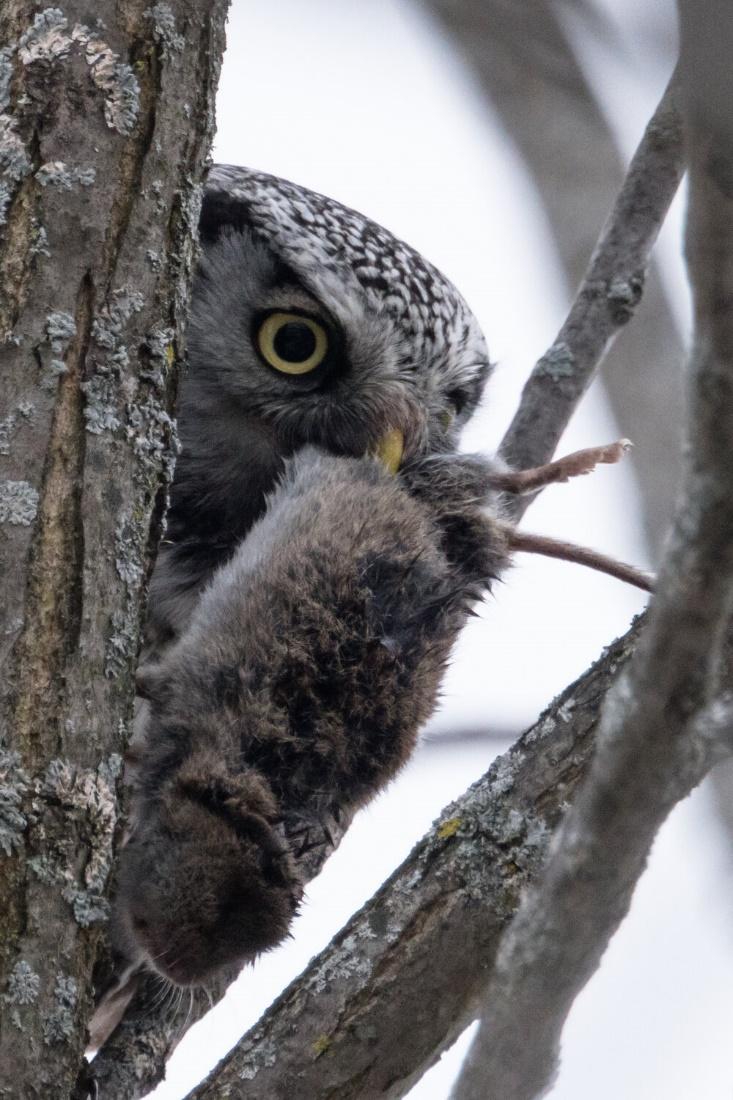
Bottom line, voles are generally pest.  However, ask a predator such as a coyote, fox, snake, owl or hawk and they would say they are beneficial! 
An owl perched on a tree branch

Description automatically generated


Sunday, August 11, 2019

Turf and Tree Summer Season

New season for Turf and Tree team 2019

This is Turf and Tree teams 3rd season where we meet every Monday morning to go through local residents call-ins or emails asking for help with their turf or tree problems. So far we have stayed quite busy with site visits to clients properties throughout the county and steady stream of call-ins/emails to extension office.  Unfortunately the team is having to struggle again with a small group of dedicated members to get through a long list of clients needing help. But we have been able to manage and so far the folks we have visited and talked with on the phone seems very much appreciative of what we are doing for them.

This update will cover a couple of site visits we did recently that took us to large acre home site in south Caldwell and winery in Sunnyslope area. We’ll cover what looks to be our biggest issues so far this season.
      
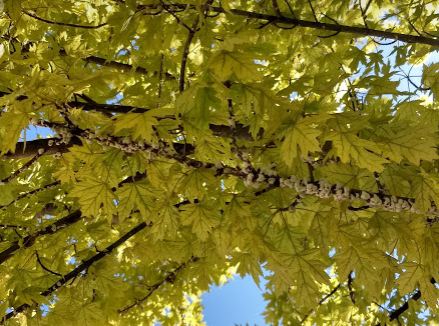
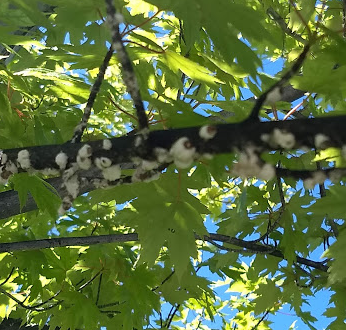
  The cottony scale name comes from the shape and color that is on the tree branches that looks like cotton balls glued to branches. These so called cotton balls are egg sacks filled with harmful insect. This issue seems to be more prone to silver and red maple trees. There are multiple ways to control this issue by cultural control or Biological control. 


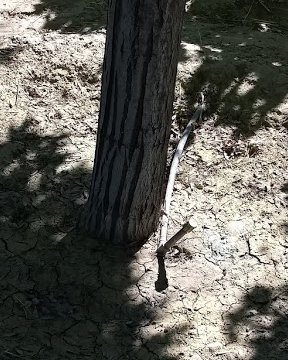
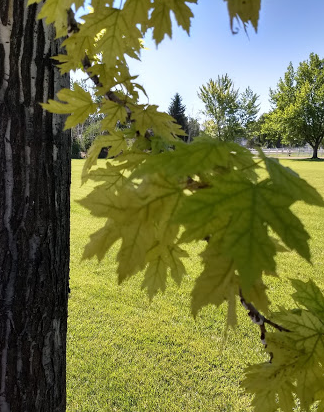
The other big issue we are seeing is either severe over watering or having your water emitters/sprinklers in the wrong spot. The picture on the left shows maple tree where the water emitter is in the wrong spot for the tree to take in water. It should be at the tree's dripline near the end of the branches where they extent out. This is where our trees are taking in and release vidal water and nutrients. The picture in the middle shows this tree under stress and trying to protect itself by releasing sap to try to drive the attacking insects out. The picture on the right shows signs of severe overwatering causing iron nutrient not to be taken up through tree roots that causes iron chlorosis

         
           Emitter in wrong spot       Sap from tree     Over watering causing 
Iron chlorosis 


Above data from following sources:

From Ohio State Extension: On Cottony Scale

From University of Idaho extension: Proper watering needs for your lawn

From Utah State extension: Placing your water emitters

From Idaho Growin blog: On Iron Chlorosis

From US forest division: On Iron Chlorosis


Thursday, April 11, 2019

Your Lawn Needs Care Now!

Image result for early spring lawn
Spring is here! The days are getting warmer and longer. We look out at our lawn coming out of a long winter that has not been fed for a while. Its color is off and we think: if I hit it with lots of water, dump some fertilizer on it that will fix it. But wait… there are a few things to consider about feeding and watering your lawn before you start.

When to Fertilize
C:\Users\jbbow\AppData\Local\Microsoft\Windows\INetCache\Content.MSO\A278CA17.tmpA program that applies fertilizer four times a year, using the holidays of Easter, Memorial Day, Halloween and Thanksgiving as a guide is desirable.
An application of a quick release formula, where the nitrogen is quickly available to the plants, is best in the spring and slow release formulas, where the release of nitrogen is slower can be used for the rest of the applications.  It is better if the late fall application is slow release so the nutrients are released into the soil during the winter to help with lawn recovery in the spring.

What Type of Fertilizer
Image result for lawn fertilizerThe ratio of nutrients on any plant food is represented by Nitrogen- Phosphorus- Potassium (N-P-K) in numbers. The numbers state the amount of each. For instance, a 10-10-10 is a balanced food with equal parts nitrogen, phosphorus and potassium. A fourth number would represent Sulfur (S).
Nitrogen promotes foliar growth and color. Phosphorus is useful in encouraging flower and root growth. Potassium in lawns enhances the plant’s ability to use nitrogen.
Lawns in southern Idaho can be fertilized by following one of two strategies: soil testing or nutrient ratios. In one, fertilizer rates for the lawn are based on a laboratory analysis of a soil sample. The other is based on the fact that lawns do best when fertilized with a fertilizer having a 3:1:2: ratio of N, P, K.  Spring applications can use a ratio where the phosphorus ratio is higher to promote root growth.                                 
Watering
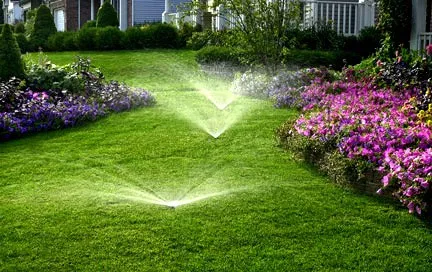
Water deeply and less often to promote deep roots. Apply between 1”-1 1/2” of water weekly, depending on weather conditions, soil type, and landscape terrain (slopes, etc.). Soil should be moistened to a depth of about six inches. To test sprinkler output, place empty tuna fish cans or cat food tins along the water arc to see how long it takes your sprinkler to put down this amount of water. Output is greater the farthest point from the sprinkler head. (You can allow the cans to fill 1/4” or 1/2” and multiple accordingly.) One application a week may be all that is necessary, or you can divide the time into two or three applications per week. Also, take into consideration the areas where sprinklers overlap an area, and that sprinkler output varies. During hot weather, increase the water to 2” per week and apply more frequently if necessary. Visual clues that the lawn needs watering are when the grass begins to take on a blue-green color or has lost its spring, leaving an imprint behind when walked upon.

Aeration
Core aeration opens up avenues for water and fertilizer to reach down to the root zone, thus stimulating the activity of soil microorganisms and increasing root development. Lawns that have not been aerated before or those that get heavy foot traffic may benefit by aerating twice per year, once in the spring and again in the fall for the first two or three years, then drop back to once per year. On lawns that are regularly core aerated once per year in the spring is enough. Do not rake up plugs afterwards, these are topsoil and will decompose naturally, mow over them and they will soon disappear. An application of no more than a ¼” of compost after spring aeration is beneficial for all lawns.
Thatch
Thatch is not caused by leaving grass clippings on the lawn, as is commonly believed. It is an accumulation of dead and partly decomposed leaves, stems and roots above the soil surface but below the green leaves. Up to 1/2 inch of thatch is beneficial, acting as natural mulch, insulating the soil, reducing water evaporation and soil compaction, and increasing the lawns spring and wear tolerance.
Image result for lawnToo much thatch serves as a barrier preventing air and moisture from moving into the root zone of the plants, causing the turf to dry out much too rapidly. This provides a haven for insects and disease. If thatch is over 1/2 inch, power raking in early spring is advised. Power raking every year is not necessary and may actually damage the lawn.
Giving your lawn an application of a slow release fertilizer in the fall will give your lawn a jump-start in the spring.