Friday, October 27, 2023

Soil health? Now is the time to prepare!

The season is winding down. The weather is getting colder and it's about time to start putting away your yard and garden tools. But hold your horses! Now is an excellent time to prepare your soil for next year! 
I recommend 2 articles written by Ron Patterson - from the University of Idaho Extension office. The first article talks about the importance of soil health (found here), and the second article talks about the good and bad (mostly good!) of planting cover crops (found here).
Having healthy soil is worth every effort.  From better tasting vegetables to fewer weeds, it is absolutely worth it! 

Monday, October 23, 2023

Extending Your Tomato Harvest - the Great Tomato Ripening Experiment!

Results from the Great Tomato Ripening Experiment! It’s almost mid-January and I’m still enjoying tomatoes from the plants I grew this past summer. I just gathered a handful and made some tasty, fresh salsa to complement the vegan tacos I made for our dinner. So how is it that I’m still reaping the benefits of my garden? In late October/early November, I embarked on Grety’s Great Tomato Ripening Experiment. 
 
I asked all my friends on social media, “How do you extend the life of your (green) tomatoes?” For as many pounds as I still had on the vine, I got responses. The techniques were varied and came with a lot of guarantees. So, I put each method to the test. Most of the ideas required me using high-dollar real estate in the garage. I managed to claim a few square feet for the experiment.

The majority of green tomatoes came from my prolific, San Marzano plant but any tomato will work. I placed some in a plain, brown paper bag. Several friends swore by this method.

 Other friends told me, I should add a piece of fruit like a banana or an apple, into the bag. The theory is that the fruit releases ethylene, a chemical that will help green tomatoes ripen. So, I did one of each. I placed tomatoes in a single layer on paper.

I stacked them in several layers with heavy paper separating the produce. 

 I placed them along my windowsill near the kitchen.

 Lastly, I even took whole vines and hung them upside down from bicycles in the garage. 
 
By this time, my husband thought I’d lost it.

 With each method, I tried to leave on some of the stem of the tomato and I situated the San Manzanos so they didn’t touch one another. In an effort to not attract fruit flies, I washed each tomato before I placed them on the windowsill. I didn’t have any fruit fly problems.

In the end, the very best method was actually a combination of a few. The windowsill tomatoes ripened quickly. They still tasted garden-fresh and we used them in salads and such.

 The next two methods that have worked for me are the single layer and the stacking of single layers. It takes up more space than I would like, but my family has feasted on tomatoes, non-stop.

None of the bag methods really worked for me—nor did hanging the vines from the bikes. Those tomatoes dried up before they were finally ripened. I should add, that the tomatoes I’m using in January aren’t as flavorful as the ones that ripened in November. But, I’ll guarantee you they are better than the plum or Roma tomatoes available at local markets. They are delicious in salsas or pan roasted for sauces and soups.

I’m sure tomato variety and garage temperature play a large role in success rates of ripening green tomatoes. But, I’ve concluded that I won’t let any more produce wither on the vine. From now on, every year when October rolls around, I’ll be clearing a spot in the garage to continue reaping the benefits of my summer’s labors.

Friday, October 13, 2023

Frost, Freeze, or Hard Frost? It's that time of year...!

 According to the National Weather Service, here are the definitions:

Frost:  Frost occurs when there is a solid deposition of water vapor from the air. Frost will form when solid surfaces are cooled below the dew point. An air temperature range of 33°- 36°, along with very light winds, is usually needed to initiate frost formation. At least minor damage is possible to plants. One must keep in mind that a frost is not guaranteed at these temperatures if moisture in the air is lacking and/or winds are strong.

Freeze:  Freeze occurs when the air temperature drops to 32°-or-lower. A freeze will result in significant damage to many unprotected plants, especially if the temperature remains at-or-below the freezing mark for several hours.

Hard Freeze:  Hard freeze occurs when the temperature reaches 28°-or-lower for at least a few hours. It usually means that many types of plants and most seasonal vegetation will be destroyed.

Mark Longstroth with Michigan State University Extension posted the following information explaining the differences more clearly than just a definition.

A frost is when we get a visible frost. A freeze is when the air temperature drops below freezing. Sometimes we get frost when the temperatures are above freezing and we often have a freeze without frost. It all has to do with the amount of water in the air.

At the dew point, water vapor in the air condenses on the ground and other surfaces as dew. If the dew point is below freezing, the water vapor condenses as ice, freezing as frost. So the air can be above freezing and the surface of your car (or the roof of your house) can be colder than the air and colder than freezing causing a frost even though the air temperature is above freezing. That is how we get a frost without a freeze. If the dew point is much below freezing then we can get freezing temperatures cold enough to freeze plants without any frost. This is also called a black frost, a freeze without a frost. When frozen plants thaw they have a water-soaked, black appearance as they die. Sometimes we get a freeze under windy conditions. This is caused by the movement of a cold air mass into the area with subfreezing temperatures. These freezes are called wind freezes.

Idaho Average First Frost Date Map will give you accurate information for your county.

Steps to take to help your plants survive as long as they can.
1.    Of course cover your plants with a frost fabric or sheets or plastic.
2.    Bring what plants you can indoors
3.    Water extra with warm water
4.    Keep water running at a trickle if possible for a few days.  Be careful not to over water.
5.    Wrap the trunks of young trees.
6.    Wrap pots that cannot be moved indoors.
Protect your plants!

Sunday, October 8, 2023

Potato harvest time! How do you like them?

One of my favorite vegetables is the humble and oh so delicious potato!  Watch this video for tips on when and how to harvest. You can harvest young potatoes when the vines are still green - or wait until the vines die for final harvest...or both!  

Here's an article about how to have a successful potato garden. Also there are many ways to store and then enjoy throughout the seasons.

My family enjoys it mashed, cubed, roasted, shredded...I don't think there is a potato preparation they would turn down. One of the simplest - and most delicious - is oven roasted potatoes. Easy to prepare and oh so delicious!

Roasted potatoes in a convection oven

3-4 large potatoes, cubed

1 tablespoon of olive oil

salt and pepper to taste

dried or fresh herbs (optional). We love Rosemary or Thyme

Directions: add your cubed potatoes to a large bowl.  Pour the olive oil over the potatoes and then toss them until they are evenly coated.  Evenly coat them with salt and pepper.  

Put them on a rack (we use a cooling rack that is oven safe) on a cookie sheet. Place in a convection oven at 400 degrees for 35-40 minutes or until the edges of the potatoes are crisp and brown.

Remove from oven, and enjoy!  Find more delicious potato recipes here!

Friday, September 29, 2023

Is this true...Chrysanthemums don't help Pollinators?

I read this on the internet and wondered "Is this True?"
I do love the Autumn Asters in my yard and the constant buzzing of pollinators around them - I, also, have several chrysanthemums planted that come back every year and when area nurseries bring out new colors, I'm so tempted. So let's talk...

Some main points:
  • Pollination is the process that takes place when pollen is moved between flowers for successful seed and food production and ensures that a plant or tree will produce mature fruit and a viable set of seeds that are capable of germination. What do birds and bees have to do with this? Birds, domestic honeybees, butterflies, and other insects and animals are responsible for the moving of the pollen among the flowers. Without the pollinators, there is no plant growth.
  • Pollinators prefer some flowers over others, a concept known as Pollinator Syndromes. For example, because a butterfly has a long, slender mouth part (proboscis), they prefer flowers that are long and tube-like, also think hummingbirds. Some flies, on the other hand, have short, round mouth parts much like a sponge. For these pollinators and most bees, a wide-open flower is preferred. Or, for other pollinators, like moths, a flower that is open at night is preferred because that is when moths are active.
  • My primary goal is to create a backyard ecology that promotes all pollinators - bees, birds, mammals, reptiles, insects - with plants that sustain them - whether native or non-native throughout the flowering seasons. 
One of my go-to resources is Nature's Best Hope: A New Approach to Conservation That Starts in Your Yard by Douglas W. Tallamy. He believes that "every homeowner can turn their yards into conservation corridors" that promote diversity with native plants as well as other cultivars that contribute to the food web. 

Echinacea choices - Tufts Pollinator Initiative
Some cultivars have been removed from evolutionary history with insects; humans have bred cultivars in labs and greenhouses to meet our aesthetic preferences. And sometimes, by selecting for traits that we deem impressive, like double or triple petals, we inadvertently produce plants that broadcast false advertising and eliminate access. Recent work has demonstrated how cultivars—even ones that look quite visually similar—can vary dramatically in the abundance and diversity of insects that they are able to support, so it’s important to choose carefully. References from Tufts Pollinator Initiative article are in the link below.
While cultivars are great for people, they are not always great for pollinators. According to Tufts Pollinator Initiative, native plants and their pollinators share a long evolutionary history, and many flowers have evolved particular traits that signal honest advertisements of a high quality food resources. For instance, the smell and color of wild geranium tell a bee that nectar and pollen awaits and the dark lines on the petals help them to quickly locate their meal. 
However, some pollinators are "generalists" that will feed on a variety of nectars and pollens. That explains why you'll see bees, butterflies and other insects flying around such non-natives as butterfly bush, catmint, lavender, sedum, salvia, Russian sage, mints, lantana, pentas, daisies, alyssum and zinnias. See Cornell Cooperative Extension list for moreAlthough pollinators prefer natives, says Tallamy, "If their mouthparts work, they don't care if it's native or non-native." 
My new favorite bush 
Caryopteris 'Blue Mist'
Potted greenhouse mums that we see everywhere this time of year are not bred for their pollen, nectar, or accessibility to pollinators. Most are bred to have multiple petals which reduce accessibility to pollinators. Some good features about these mums is that they are bushy and provide cover for a variety of  predators and parasites that naturally keep plant pests under control. 
Try an old fashioned Mum instead...or Autumn Asters...or Autumn Sedum!

Friday, September 22, 2023

Planting trees in the fall? Let's do this!

Fall is a great time to plant trees. What is the best way to plant them? Whether you plant them yourself, or you use a landscape contractor to plant your trees for you, there are recommended practices you should follow. Improper planting of trees, both in the nursery setting, and in the landscape setting, contribute to more tree deaths than all other factors combined!

Let’s review what are currently the best management practices and minimum standards which should be followed when planting a tree.

First, call 811 before you dig. Your spouse will be extremely unhappy with you if you should cut the internet cable, or worse, hit a gas line.

Next, look up. Make sure you have vertical clearance for your trees. Avoid planting them under the utility’s right of way.

Once you have done a site analysis to ensure you have selected the right tree for the right place and that you are not going to disrupt any utilities, head to the nursery to buy your plant material.

Here is where it becomes important to know what to look for when purchasing plant material. Look and shop around. Examine plant material carefully. You are making an investment that could add $20,000 or more to the value of your property, treat the experience as you would buying a new car! Check your tree for signs of girdling or circling roots. Make sure the tree is free from broken, rubbing, or damaged branches, and any place where the trunk has been injured. A tree should have good structure with a single trunk. Avoid co-dominant trunks.

The next step is to dig a proper hole. Standards state that the planting hole should be a minimum of 1.5 times the diameter of the root ball. Research from land-grant universities suggest a saucer shaped planting hole three times the diameter of the root ball. This allows the roots to establish quicker and avoid post planting stress. In our poor soils and arid climate, establishing the root system and minimizing stress factors is extremely important.

Be sure you are planting the tree at the proper depth. As mentioned above, planting trees too deep, either in the nursery setting, or in the landscape setting can lead to circling, and/or girdling roots and eventually, death. Check the depth of roots in the root ball by using a blunt probing instrument, such as a screwdriver. Do not assume it was planted correctly in the nursery! Two to three structural roots should be no deeper than one inch measured four inches out from the trunk of the tree. If roots are deeper than that, you will want to remove soil from the top of the root ball and adjust the depth of the planting hole. 

Handling the tree carefully by the root ball, place the tree in the planting hole with the root ball rising above the soil grade one to two inches on firm, undug soil. Once the tree is in place, remove the burlap and wire baskets from the top third of the root ball. Fabric, paper pulp pots, and containers should carefully be removed.  

Once the tree is properly in place, begin backfilling the planting hole. It is not recommended to add amendments to the planting hole as this creates a second container roots to have to grow through to establish. Planting holes should be amended with no more than 10% organic matter.  When backfilling, add the soil in small amounts and use water to settle it. Avoid compacting the soil around the roots.

Now you may add mulch. Just avoid mulch volcanoes
and don't allow mulch to touch the trunk of the tree. Mulch should be kept a minimum of four inches away from the tree's trunk. Not following this practice allows for disease and decay organisms to rot the trunk of the tree. Mulch should be applied at a depth of four inches. For young trees prone to winter damage, or in areas where animals can cause damage to the tree, consider protecting them. Tree staking is not recommended except in wind prone or high traffic areas. 

With this information, you are ready to go out and plant a new tree. Although these steps are an increase in labor, the return on the investment is a higher quality, longer lasting landscape.

Monday, September 18, 2023

What Pollinators Need in the Fall

Fall flowers for pollinators
 Pollinators Feed Us as We Feed Them Now is a critical time for Pollinator Bee Care! Here's what we need to do to keep the bees and the butterflies in our garden and help them prepare for winter.

Give Them Food.  Plant many different colors of flowers and different shapes and sizes to increase pollinator diversity.  Provide a variety of blooming plants throughout spring to fall.  Of particular importance are early spring blooming plants because they provide an immediate food source after the long winter.  Plant a variety of annuals, perennials, and flowering trees and shrubs. Late summer and early autumn (end of August through October) are very important periods for the production of adult worker bees that form wintering clusters in their colonies. Click the picture caption for more.
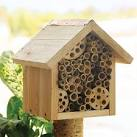
Make a Bee Hotel.  Your bee hotel might be as simple as a couple holes in some untreated wood or something more decorative and elaborate. - build one.  The bees won’t care what it looks like as long as it’s sheltered from too much sunlight and the elements - mainly moisture.  Or leave an area of bare dry soil or a brush pile to encourage ground nesting.  It doesn’t have to be unsightly.  An area behind a shed or out of the way so it’s not as noticeable will do wonders to attract bees.  Just make sure it’s in an area that doesn’t have a lot of human interaction so bees will be encouraged to stay.
Plant Native Species.  Plant different flowers, shapes, sizes, colors, and group together in a sunny location.  By planting in groups, you’ll provide the nectar all in one easily accessible area.  Native plants not only survive more easily than non-native plants, they attract more pollinators.  
Open face roofed wooden shelter for bees
Bee Hotel
Avoid Pesticides.  Sometimes we rush to use a chemical as a quick-fix instead of realizing a plant that is stressed needs a diagnosis.  Your local extension office can help determine the problem with your plants so bring your sample in, and if detected early there is often a non-chemical solution.  If pesticides can’t be avoided, make sure to follow the instructions and apply the right amount during a cooler time of day.  Applying more chemicals than instructed won’t help get rid of them faster, but it might result in a chemical drift to other areas and plants you don’t want to be affected.  Make sure if you do apply it’s not to flowers or weeds that are already in bloom.  Keep in mind, spraying insecticides can cause an outbreak of aphids or spider mites because beneficial insects have been killed. Wise pesticide use is key.  
Provide Water Sources.  Bees need water to make honey, and other insects besides bees also need water to pollinate.  Even if you don’t have a pond or stream, you can hang a dripping bottle or just leave a small container of water in the open for pollinators to drink from.  Or, install a bird bath. Keep in mind, bugs can’t get out of a water dish unless there are stepping stones for them to get in and out.  Even placing a sponge inside of a dish of water can make it easier.  Here's a short video of bees drinking!