Saturday, June 19, 2021

What’s the “Buzz” About the Neighbors? Native Bees in Your Home Garden

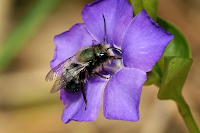
 It’s nice to know your neighbors! Every community is made up of organisms that need to live together. Your garden is exactly the same. It is created by all the plants and animals that make their home there. Some of the most beneficial neighbors in your garden are the bees, and Idaho’s native bees are great neighbors to have in our home gardens! These bees are major pollinators, carrying out an important function that is necessary for growing success. They keep things blooming and beautiful, as well as ensuring plant reproduction and food production. While most of us are familiar with our friends the honey bees, Idaho is home to many other interesting and beneficial species of bees, including mason and leaf cutting bees. Let’s meet the Megachilidea family. Chances are good that you will have opportunities to see these bees at work in your garden during the coming months.

Next, invite them over! Good hosts always provide treats, and sometimes a safe place to stay. Because bees are so important to the success of any garden, it only makes sense that you would want them to come and be comfortable. There are many things you can do to create an environment where bees can thrive. These include:

  • providing sources for food and water,
  • space and materials for nesting,
  • limiting use of pesticides.
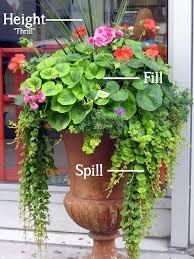
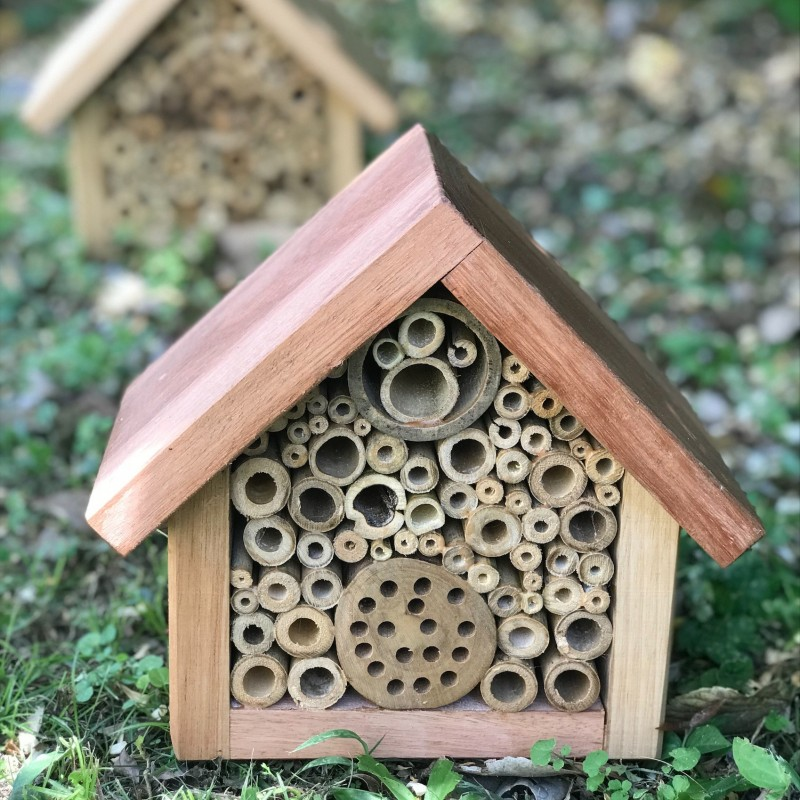
  • creating a Bee Habitat, or
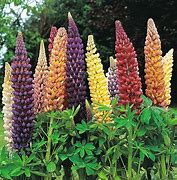
  • a Pollinator Garden to help provide the essentials for a happy, healthy bee population.

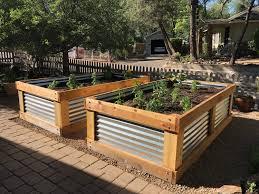
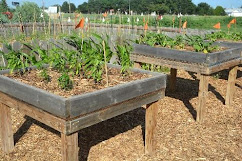
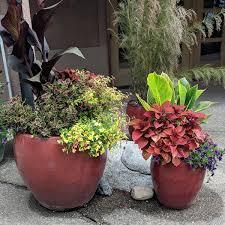
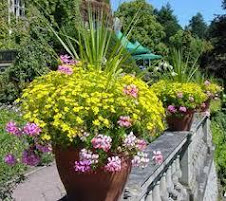
Planting native trees, bushes, and flowers help attract native bees to your garden and provide the necessary elements for their success, and yours. You can also take steps to recognize, report, and limit instances of Bee Pesticide Poisoning. Always remember to limit use of pesticides and to only apply according to label directions.

Doing a few simple things can enhance the ability of native bee species to work and live in your garden. In return, you might notice significant improvements in the quality of your garden, such as greater flower and food production. Getting to know these neighbors will help your garden grow!

Thursday, June 3, 2021

Raised Garden Beds may be the answer!

Can’t kneel to garden? Poor soil a problem? Poor drainage? Short on space?

Raised beds might be the answer!! Some of the advantages of gardening in raised beds are:

  • improved soil conditions 

  • greater productivity in a smaller space 

  • saved water

  • the greatest advantage may be the ease of planting/maintaining a garden

  • easy to construct for most do-it-yourselfers

They can be built in many different configurations to fit conveniently into your landscape design and from materials which provide an attractive addition to your landscaping. Raised beds can be built to any height to accommodate your gardening needs and can be built directly upon the existing ground. However, by building beds waist high you overcome the need to bend over or kneel to garden. They can even be built to a height that would accommodate wheelchair gardening. Raised beds do need to have a minimum depth of least 8 inches to allow for proper plant root development.  They need to be somewhat deeper to grow root vegetables.  

When constructing raised garden beds, consider the materials from which the beds are to be built. Any lumber will do but, redwood or cedar will be more durable and will last much longer than beds built from softwoods like pine and fir. Recycled materials can be used in raised bed construction, but caution should be taken to assure that no treated materials of any kind are incorporated into your beds. You do not want toxic chemicals  leaching into your garden soil. Image result for raised garden beds site:edu

When considering the size, shape, and placement of the beds, an important consideration should be accessibility. The gardener should be able to access the beds from at least two sides and reach at least halfway across the bed. Three or four feet wide is a good width to assure ease of planting, weeding, and harvesting. Place your beds where they will receive 6-8 hours of direct sunlight daily.  

Raised garden beds should be filled with a combination of garden soil, compost, and soilless medium to provide optimum growing conditions for your plants. The proper soil combination should have the correct pH for your desired plants and supply your plants with nutrients.  A proper soil combination will also provide for ease in maintaining proper moisture content.

Raised planting bed divided into sixteen squaresWatering in raised beds is easily accomplished with a simple garden hose, however, a drip system will water your plants more uniformly and provide even greater convenience to your raised beds.


Additional advantages of raised beds are soils warm up faster and are easily covered with row covers to protect seedlings from spring frosts. This can also aid in extending the growing season in the fall. Raised bed allow you to grow more vegetables per square foot as you can plant plants more densely. Plants can be placed close enough to one another to shade out the weeds, yet just far enough apart to prevent overcrowding. 


With raised beds weed control and pest control is accomplished more easily making garden maintenance a snap. 

Sunday, May 23, 2021

Container Gardening could be your Answer!

Want to add color to your landscape without fighting Idaho’s heavy clay soil?

Container Gardening Guide, Elisabeth C. Miller LibraryContainer gardening may be the answer! More than just for areas with limited space, containers are great for adding height in an existing garden, as a way to plant areas with difficult in-ground soil conditions, or as a portable home for plants that cannot survive the winter months outdoors. They also allow gardeners an opportunity to experiment with combinations of colors and textures on a small scale before taking on a bigger planting.

Additionally, I use container gardens within my own landscape in order to create visual levels of plantings within my border, as well as an alternative to battling digging out and amending the hard clay soil.


Key considerations when gardening in containers: 

  1. Location: When determining where to place your containers, it is important to consider the amount of sunlight the location gets during the day. 

  2. Container: Containers should have adequate drainage and not be too much larger in size (around) than the combined area needed for the plants that will be planted in the container.

  3. Soil: The soil should be mostly a potting soil mix, that can be amended with organic material (compost, peat moss). When adding material to the potting soil, the soil and organic material should be well combined in order to have a uniform texture and allow for proper drainage. 

  4. Plant selection: Based on the amount of sun that the container will get during the day, select plants that have similar amounts of sunlight and water required. 

Container Gardening, Too! Webinar | Cooperative Extension | The University  of Arizona

How to Design a Container Garden:

Designing a container garden lets the gardener be free to create playful and eye-catching garden spaces. 

The primary design elements of a container garden are the thrill, fill, and spill

  1. The thrill is usually a planting that creates height in the container, it is a planting that is often centered in the container and is taller than the rest. 

  2. The fill is a plant or plants that are similar in height, but shorter than the thrill. The fill occupies the middle section of the container planting and may have pops of color contrast that draw the eye toward the container. 

  3. The spill is typically a trailing plant that spills over the side of the container and adds both drama and texture.   

For plant recommendations and ideas, check out this list from Oregon State University.

Trying to decide which is right for you - container gardening or raised beds? Check out these five tips.

3 Ways to Enhance your Floral Arrangement Designs

Wednesday, May 5, 2021

It's Summer! Aren't you gladiolus!

No flower is more stunning in an arrangement than the gladiolus. Here's a video from planting to blooms! They are popular cut flowers for all occasions, from weddings to funerals. Though mostly known as a cut flower, gladiolus look beautiful in the flower garden as well, especially when grouped together and planted next to complimentary flowers. Varieties are available in almost any color of the rainbow, with many having frilly flowers and bi-colored blooms. The sword-like leaves yield a spiky flower stalk with individual flowers that bloom from the bottom up.

Gladiolus is an easy-to-grow flowering bulb that produced an abundant display of beautiful blooms for the home garden or for commercial florists. They are also known as Sword Lilies. They are part of the Iris family (Iridaceae). 

Gladiolus range from 2’-5’ tall with graceful trumpet-shaped blossoms borne in a double row along the stem. Flowers come on upright spikes, usually one per corm. Gladiolus grows from a bulb-like underground structure known as a corm. With the onset of spring growth, stems emerge from the corms and give rise to 1 - 9 narrow un-branched, sword-shaped, longitudinal grooved leaves enclosed in a sheath. They will need full sun in moist well-drained soil. Very sandy or heavy clay soils should be amended with organic materials such as compost or peat moss. 

Plant corms after soil warms up in the spring, from mid-April to mid-June. Place corms at a depth of three to four times their diameter, and 4 to 6 inches apart. Work a complete fertilizer. Corms can be planted every 10 to 14 days for a succession of blooms. Corms bloom 65-100 days after planting. Plant the last set to bloom before frost. Gladiolus can be planted in rows but usually will need support. It is important to water gladiolus regularly during growth. Continue watering after flowering as long as leaves are green. Gladiolus thrips are the most common problem and are usually present wherever gladiolus are grown. Thrips feed by rasping the leaves, flowers & corms. 

To save gladiolus corms for next year, dig the corms after the foliage has dried in late summer or fall. Spread the corms out on the garage or storage-room floor and allow to dry for 3 to 4 days. Place the corms in boxes with dry peat moss or sawdust. Store in a dry, cool place at a temperature of 45 to 50 degrees F. Check them periodically during the winter for signs of rotting or rodent damage, and discard those affected. Enjoy!

Wednesday, April 14, 2021

Invest In Your Health By Growing Blueberries!

Home Gardening: Rabbiteye Blueberries - Alabama Cooperative Extension System

Blueberries are one of the healthiest garden planting options. Not only are they highly nutritious, they rank #1 in antioxidant activity (neutralizing harmful metabolic by-products that can lead to cancer and age-related diseases), slow loss of mental capacity with age, reduce cholesterol build-up, prevent infections, improve eyesight, and provide numerous other health and even cosmetic benefits.

Growing this superfood successfully in Idaho does however require a fair amount of effort in planning, preparation, and maintenance

  • Select a site with full sun exposure to develop good fruit flavor and high yields. 

  • Cool, moist, well-drained sandy loam or silt loam soils with about 3% organic matter and an acidic pH between 4.5 and 5.2 are best. Since alkaline soils are common in southern Idaho, soil acidification with sulfur 1 to 2 years before planting may be necessary. A soil test will tell what you’ll need to do or not do – add limestone to increase the pH or elemental sulfur to decrease the pH and if you need to increase magnesium concentration with potassium magnesium or magnesium sulfate. 

  • Highbush varieties can grow 10 feet tall and 6 feet wide and should be spaced 4 to 5 feet apart. Select early, mid, and late season cultivars for optimal yields throughout the growing season. Yields for different cultivars vary from 2 to 20+ pounds per bush so determining how many bushes you’ll need is an important part of planning. On average, 1 pound of frozen blueberries yields 1 pint. I eat ½ pint/day 5 days/week – that math works out to 130 pounds annually for just my breakfast.

  • Blueberries are intolerant of standing water and drought conditions so irrigation needs to be installed and operational before planting. 

  • For the first two springs after planting, strip off all blossoms to establish healthy canes and increase long-term yields. Afterwards, yearly, moderate pruning in late winter or early spring will maintain health and productivity. Older, dead, or diseased wood should be removed. 

  • Organic mulch should be applied to control weeds with any that thrive under the mulch removed by hand or eradicated with glyphosate herbicide. 

  • Blueberries are heavy feeders and prefer ammonium sulfate (21% N) fertilization because it not only adds nitrogen but acidifies the soil. Alkaline irrigation water makes regular fertilization even more critical.

After the planning, preparation, and maintenance effort, it will take 2 to 3 years to get harvestable fruit and 6 to 8 years to reach maximum production, so patience is also required.


Once your bushes are established and productive, preserve your health and harvest off-season by individually quick freezing your blueberry bounty. This and other easy preservation techniques will keep you supplied with superfood all year long. Here's a great jam recipe to try.

No matter how you like to prepare or eat them, invest in your health by making the effort to grow blueberries.

Sunday, April 4, 2021

Why Gardening with Native Plants matter.

 Native plants provide many benefits to people and wildlife, while significantly adding to healthier soil and water.  Of the many benefits, my top six motivations for landscaping with native plants include: fewer fertilizers, pesticides, herbicides, and water. Plus, indigenous plants promote cleaner air, food, and shelter for wildlife, and they have proven to save money in many ways.


Excess phosphorus and nitrogen, main components of fertilizers added to our soil become toxic, and the runoff leaches into our waterways, causing excess algae growth. This surplus fertilizer depletes oxygen from our waters, harms aquatic life, and interferes with recreational uses.  Pesticide and herbicide runoff from lawns can contaminate our rivers and lakes with poisonous substances. Native plants have deeper roots and require less water.


As to cleaner air, our native landscapes do not require mowing, and they do not need nearly as much maintenance.  Lawns must be regularly mowed, weed-whacked, and often blown with leaf blowers.  These tools cause harmful emissions and air pollutants like carbon monoxide, carbon dioxide, nitrous oxides, sulfur dioxide, volatile organic compounds, and air toxins like benzene and particulates created from power tools. 


Our native plants attract a variety of birds, butterflies, and other wildlife by providing diverse habitats, food, and pollinator sources. In contrast, non-native plants offer little or no food or shelter to most native wildlife.


Essential to many home gardeners is the need to save time and money.  When compared to the high-maintenance of lawns and the added care necessary for exotic plants, it is easy to measure the economic benefits of landscaping with native plants.  Planting with selective native plants can create a beautiful and scenic landscape.


References that were used in creating this article.

It is easier to list them here for your use than to insert them into the text, this way you can choose which one you want to follow.

University of Idaho Extension | Short-Season, High-Altitude Gardening

http://www.extension.uidaho.edu/publishing/pdf/BUL/BUL0862.pdf 


Idaho Native Plant Society | Boise Area Native Plants Local Chapter: Pahove.  http://www.idahonativeplants.org


U.S. Fish and Wildlife Service | Native Garden Guide for Southwestern Idaho.

http://www.fws.gov/pacific/pdf/BLM_USFWS_Native%20Garden%20Guide_SW%20Idaho_2019_web.pdf


U.S. Forest Service | Basic Instructions for Native Plant Landscaping Projects.

https://www.fs.fed.us/wildflowers/Native_Plant_Materials/Native_Gardening/instructions.shtml


East Multnomah Soil & Water Conservation District (EMSWCD) Portland, OR.
emswcd.org select ‘Native Plants’

Pictures from the Idaho Native Plant Society and College of Agricultural and Life Sciences – University of Idaho


Sunday, February 28, 2021

Shamrock luck!

Shamrocks  are for  good luck and are a popular house plant, especially during St. Patrick’s Day. 

Shamrocks are easy to grow if you follow these five simple and easy to remember steps:
·       Shamrocks prefer direct sunlight, be sure to place your plant in a window where it will receive plenty of light. Shamrocks will flower, even during winter, if they receive enough light. Each night the plant's leaflets fold up , then reopen in sunlight the following day.
·       Shamrocks like food! Fertilize them regularly with either a liquid houseplant or time release fertilizer during their growing season- always following label instructions.
·     As a houseplant, they prefer moist soil. Avoid allowing your shamrock to dry out during the growing season.
·       Give your shamrock a growing temperature between 50 and 70 °during the growing season. They can be placed outside after danger of frost has passed and are a beautiful addition to your pots or in a grouping of pots.
·       Shamrocks have a dormant period. When your shamrock
 goes dormant, usually in late summer, don’t fret! Just place 
it in a cool, dry location out of direct sunlight for 2-3 months. The purple-leaf types only need one month of dormancy!

Since your shamrock grows from small bulbs, it's easy to divide and create new plants. 

Here's a short video with how-to steps for propagating
Happy St. Paddy's Day to you!