Monday, September 18, 2023

What Pollinators Need in the Fall

Fall flowers for pollinators
 Pollinators Feed Us as We Feed Them Now is a critical time for Pollinator Bee Care! Here's what we need to do to keep the bees and the butterflies in our garden and help them prepare for winter.

Give Them Food.  Plant many different colors of flowers and different shapes and sizes to increase pollinator diversity.  Provide a variety of blooming plants throughout spring to fall.  Of particular importance are early spring blooming plants because they provide an immediate food source after the long winter.  Plant a variety of annuals, perennials, and flowering trees and shrubs. Late summer and early autumn (end of August through October) are very important periods for the production of adult worker bees that form wintering clusters in their colonies. Click the picture caption for more.
Make a Bee Hotel.  Your bee hotel might be as simple as a couple holes in some untreated wood or something more decorative and elaborate. - build one.  The bees won’t care what it looks like as long as it’s sheltered from too much sunlight and the elements - mainly moisture.  Or leave an area of bare dry soil or a brush pile to encourage ground nesting.  It doesn’t have to be unsightly.  An area behind a shed or out of the way so it’s not as noticeable will do wonders to attract bees.  Just make sure it’s in an area that doesn’t have a lot of human interaction so bees will be encouraged to stay.
Plant Native Species.  Plant different flowers, shapes, sizes, colors, and group together in a sunny location.  By planting in groups, you’ll provide the nectar all in one easily accessible area.  Native plants not only survive more easily than non-native plants, they attract more pollinators.  
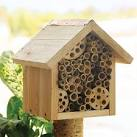
Open face roofed wooden shelter for bees
Bee Hotel
Avoid Pesticides.  Sometimes we rush to use a chemical as a quick-fix instead of realizing a plant that is stressed needs a diagnosis.  Your local extension office can help determine the problem with your plants so bring your sample in, and if detected early there is often a non-chemical solution.  If pesticides can’t be avoided, make sure to follow the instructions and apply the right amount during a cooler time of day.  Applying more chemicals than instructed won’t help get rid of them faster, but it might result in a chemical drift to other areas and plants you don’t want to be affected.  Make sure if you do apply it’s not to flowers or weeds that are already in bloom.  Keep in mind, spraying insecticides can cause an outbreak of aphids or spider mites because beneficial insects have been killed. Wise pesticide use is key.  
Provide Water Sources.  Bees need water to make honey, and other insects besides bees also need water to pollinate.  Even if you don’t have a pond or stream, you can hang a dripping bottle or just leave a small container of water in the open for pollinators to drink from.  Or, install a bird bath. Keep in mind, bugs can’t get out of a water dish unless there are stepping stones for them to get in and out.  Even placing a sponge inside of a dish of water can make it easier.  Here's a short video of bees drinking!

Friday, September 8, 2023

Intro to Seed Saving

Do you want to save seeds from this year’s garden? Seed saving is easier than you might think! It just takes a little time to gather the seeds and a little space to process them. Follow the links throughout this introductory article to learn more.

Tomato Seeds
Tomatoes are a popular seed-saving choice and a good place to start. For tomato seeds, you will need a pint sized canning jar (with its ring) and a piece of paper towel large enough to cover the top. You will also want to have a sharp knife, a spoon, a fork, and a cutting board. Finally, you’ll need a  paper towel for drying, labeling paper, and an envelope to store your dry seeds.

The process starts while your tomatoes are still growing on the vine. Choose the tomato that you want to save seeds from and remember no to pick it. It will need to  continue to grow till it is just past its ripened state  before you cut it off the vine. The next steps are to cut it in half, scoop out the insides into the pint jar and add water until it is half to two thirds full. Using the fork, mash/puree the seed mixture in the jar till it is all separated. Swirl the jar to see if the mix is even. Put the paper towel over the top and fasten it in place with the ring. Let the jar sit on your kitchen counter where you can watch it and swirl it at least once a day for the first two to three days. Let it sit then until it develops a fuzzy moldy looking top. Then add a little more water, swirl, and then let it sit for a minute or so, so the heavy viable seeds settle to the bottom. You can use the fork to lift out and dispose of the slime from the top. Add water, swirl, and let it sit again, then pour off the top mixture leaving the seeds on the bottom. You may have to do this several times until clear water and seeds on the bottom are all that remain. Then pour off the water and dump the seeds on your drying towel. Once they are dry, place them in a labeled and dated envelope and store them in a cool, dry place until you’re ready to plant them next season.


Pepper Seeds
Peppers (Bell, Jalapeno, Poblano, Anaheim, etc.) are another popular seed-saving choice. Just as described above, you want to choose the pepper that you like and want to grow again next year. Cut the pepper open so you can remove the seeds. Put the seeds on a paper towel to dry. Make sure you label your seeds. When they are dry, usually in a couple weeks, soak them in water for a day or so. The seeds that sink to the bottom are your most viable seeds, these are the ones you want to save.


Tomatoes and peppers are a great place to start, but you can 
save seeds from all of your favorite plants, with a little research. Seed Sowing and Seed Saving, written by Carole Turner, is a good book on how to save seeds and plant them. Also consider your local University of Idaho County Extension Office, your local library, and your favorite bookstore.
 
The advantage of saving seeds from your garden is that you know they grow well in the microclimate of your garden. You also save money and get the satisfaction of being self-sufficient. Seed-saving year after year is called Landrace seed saving and planting. If you have extra seeds, share with your friends or join a local seed bank. 

Wednesday, September 6, 2023

Pet-Safe Gardening this Fall


What do Lilies, Tulips, Azaleas, and Daffodils have in common besides being favorites in the garden? They are toxic to pets.

Keep your pets in mind when planning your garden!  You will both be much happier with the end result. There are tons of options when it comes to mulch, plants, and pest management, but some of those options are deadly to your pets.
The ASPCA has a highly inclusive list of toxic and non-toxic plants for dogs, cats, and horses too. Penn State has some really good ideas for pet-scaping and pet friendly gardens. Most importantly, do your research and plan before putting anything in your garden.
Kelly McGowan, horticulture specialist with MU Extension, talks about keeping dogs like Buddy safe around plants in this short video.

Monday, August 21, 2023

Roasted Tomato Sauce Preservation the EASY Way!

 It’s that wonderful time of year, when we are beyond the scorching hot days of our summer and we’ve settled into the 90s. This is also the time when tomatoes come on with a fury! If you’ve planted many varieties, as so many of us do, then it’s almost a sprint to keep up with the daily harvest. As an advanced Master Gardener and advanced Master Food Safety Advisor with the University of Idaho Extension program, I’m always looking for the quick and easy way to use what comes from my garden.

I’ve grown it. Now…what? Many years ago, I made and water bath canned my own tomato sauce. It was a lot of work. Since then, I’ve procured the mother of all freezers and now, what I would have canned years ago, I freeze. This way, I have the fresh taste of my garden, all year round. And, the bonus is, I know exactly what goes into what I freeze.

Making and freezing the sauce begins as soon as I have enough tomatoes for a batch. You can use any variety and any size of tomato. I’ll wash, core and quarter the big ones. The Sun Sugar cherry tomatoes, (that I’m so fond of) go into this procedure, whole.

I have peeled garlic, olive oil, salt and pepper at hand. Often, I’ll tuck basil leaves under the tomatoes, if my plan is to make the base for a drop-dead-delicious marinara sauce.

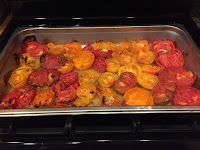
red/yellow tomatoes in roasting panI’ll use a small pan, if I have a smaller batch. I’ll save energy and roast the tomatoes in my toaster oven. Conversely, I’ll use a large restaurant size pan when roasting in my larger, convection oven.
Once I’ve filled the pan with tomatoes, garlic and (sometimes) basil, I drizzle a very conservative amount of olive oil on top. This year, I’ll use a pump atomizer to coat the ingredients with oil, I think it will be more effective and cut down on the amount of oil used. If you use fresh basil, tuck it under the tomatoes, as it can tend to burn during the roasting process.

I pop the entire pan into a preheated, 400° oven and set a timer for 20-minutes. I use this time to revel in the glory of the smells that come from the oven…even opening a window to entice neighbors. I will also tidy my work space during the roasting time. After 20 minutes, I check for signs of roasting. Look for small char marks on the tomatoes and garlic. Check for tenderness in the tomatoes.

mesh sieve with red tomato pureeNow, I’m in the home stretch! After removing the pan from the oven and letting it cool to touch, I’ll put the contents of it in my blender. I whiz it until it’s pureed.
The next step is not entirely necessary. But, I do it to achieve a velvety smooth consistency. I pour the mixture through a wider gauge strainer to catch any seed or skins that didn’t get blended. This step really does kick it up a notch in terms of quality. Because the skin stayed on the tomatoes during the entire process, there are still plenty of vitamins in the sauce.
I put my sauce in freezer-safe containers with ½ inch head space (for possible freezing expansion), and I label EXACTLY what I added to the mix. This way, I know if I’ll use the sauce for stews, chili, Italian or Mexican recipes. Plus, nothing goes in my freezer without a date. Try to use the sauce within a year’s time.  
The quality of the sauce really holds up with this procedure. The other night, I made homemade pizza. The container I thawed (from my 2016 harvest) was a bit thin for pizza sauce. I simply put the contents in a saucepan and added a small amount of cornstarch. In minutes, I had thick, delicious homemade pizza sauce. The results were delectable!

Friday, August 4, 2023

Let my kids help in the garden? Why not?

Share your love and passion for gardening with your kids by bringing them into the garden to discover the pleasure of growing food. Gardening may be the solution for parents struggling to find ways to encourage their kids to eat a healthy and balanced diet. Allowing your child to pick fresh produce from your garden will increase their desire to eat fresh vegetables. Tomatoes warm from the sun are delicious. My son loved green onions and once harvested and ate an entire row! Fresh peas are so delicious.
 
Give them a small piece of ground that is their own, along with gardening tools and gloves. Provide instruction on how to plant seeds and plants. Show them the flowers, bugs, worms, and growing plants. Let them dig a hole and plant something!

Show your child the difference between weeds and plants, pull and cultivate weeds, water, fertilize and care for their plants. Don’t forget to show them the importance of bugs in the ecology of gardening. Observe the bees and teach them about making honey and pollination of plants.

Kids who participated in gardening projects scored higher in science achievement than those who did not. Seeing a garden grow may spark your kids to ask questions like: Why do the plants need sun? How does the plant “drink” water? Why are worms good for the plants? Why are spiders needed in the garden? The questions your kids will ask will provide plenty of subjects for discussion.

Friday, July 21, 2023

Why do we have so many earwigs this year?

Why do we have so many earwigs this year? Haven't we heard this every year? Well for one thing it has been a wet and slightly warmer spring. These weather conditions have made better than ideal living and growing media for the earwig. They like wet damp hiding places and with a little mulch or loose compost to hide in during the day.

How to identify good earwigs from bad earwigs.
They are all the same so to speak. They are opportunistic eaters. They live on dead decaying matter, eat aphids and other small prey and love young growth of certain plants, like Marigolds. This is shown in the picture with all the cans full of earwigs and decimated marigold plants. The shallow cans were placed next to plants that the earwigs thought were the most tasty.
Simple home remedies can be used to lower the earwigs population.  There are quite a few methods you can use depending on your preference and patience. I prefer a little beer in a small cat food can but there other preparations you can put in the cans. Since they prowl at night, they hide during the day. Place burlap bags, boards, newspapers or other materials on the ground, then daily collect individuals that congregate under the cover and discard.

Predatory insects help control the earwigs. Believe it or not, there are other insects and animals that prey on the earwigs. Since the earwigs are nocturnal, hungry birds have to hunt them out in their hiding places during the day. Evening birds and amphibians will be able to find them out and about in the duff on their favorite plants. Knowing the life cycle will help you manage earwigs!


Saturday, July 15, 2023

Bindweed - Beauty or Pest?

(Convolvulus arvensis, origins from Eurasia)
Field Bindweed likes nooks and crannies and wraps around plants as it reaches upward on taller plants.  A perennial broadleaf with creeping and twining stems, it is considered a noxious weed and one of the hardest to control.

Often mistakenly called Creeping Jenny or wild morning glory, it reproduces from seed and creeping underground rhizomes (underground stems) that can reach deeper than 20 feet but 70% of its root mass is in the top 2 feet of soil. Flowers are a pretty pink to white with arrowhead shaped leaves. Unfortunately any time a root is cut, it creates more roots and then leaves and blooms. Field bindweed likes disturbed soils. If a field bindweed plant should appear: 1. Remove seedlings as soon as they emerge. 2. Remove plants before they flower. 3. Remove flowering plants before they set seed...and keep cultivating as new plants emerge!

Control methods:
Cultural- Growing bunch grass or legumes to help choke it out or other tall shade producing plants assists control.  Mechanical control is cultivation every three weeks for 2 years during the growing season. Clear plastic is recommended, known as soil sterilization or fabric weed barrier can help by keeping from sunlight.

Biological- The bindweed mite, Aceria malherbae, is a microscopic mite that feeds on field bindweed. This process is being tried but takes years to see results. 

Chemical- Fall is the best time of year to control it as it moves the herbicides into the roots. Some are: 2,4-D for lawns but for long term, systemic herbicides can be used such as dicamba and picloram, glyphosates are a couple that work better in fields and pastures. It is important to read and follow all precautions before applying any of these herbicides. But if you wait until fall, it has already gone to seed and spread all over. Treat it as soon as you see it.
Idaho Weed Awareness has an excellent list of all noxious weeds for Idaho - check it out along with Field Bindweed.