Showing posts with label University of Idaho Canyon County Extension. Show all posts

Friday, March 13, 2026

Soil blocking for your Spring Seed Starting

Soil blocking presents several advantages for home gardeners, making it an attractive option for those seeking efficient, sustainable, and rewarding gardening practices.

Space Optimization: For home gardeners with limited space, seed blocking offers a compact and efficient way to start seeds indoors. By using soil blocks rather than traditional pots or trays, gardeners can maximize their growing area and cultivate a greater variety of plants in a smaller space.

Cost-Effectiveness: While initial investment in seed-blocking equipment may be required, the long-term savings are significant. Soil blocks can be made using simple tools or purchased commercially, eliminating the need for disposable seed trays and pots. Moreover, seed blocking reduces seed waste by ensuring each seed is planted with precision, saving money on seed purchases in the long run.

Improved Seedling Health: Seedlings grown in soil blocks tend to experience less transplant
shock compared to those grown in traditional seed trays. The intact soil blocks protect delicate roots during transplanting, resulting in healthier, more resilient seedlings with higher survival rates.


Water Efficiency: Soil blocks retain moisture more effectively than traditional planting mediums, reducing the frequency of watering needed for seedlings. This is especially beneficial for home gardeners who may have limited time for watering or live in regions with water restrictions.

Ease of Transplanting: Transplanting seedlings from soil blocks is straightforward and minimizes root disturbance. Gardeners can simply place the soil block directly into the planting hole, eliminating the need to handle delicate seedlings or disturb their roots. This reduces transplant shock and ensures a smoother transition to the garden bed or container.


Reduced Disease Spread: Traditional seed trays and pots can harbor pathogens and promote the spread of soil-borne diseases. In contrast, soil blocks are less likely to harbor harmful microbes, reducing the risk of disease transmission among seedlings. 

Environmental Sustainability: By reducing the use of plastic pots and trays, as well as minimizing seed and water waste, seed blocking aligns with environmentally friendly gardening practices. Home gardeners can feel good about minimizing their ecological footprint while enjoying the benefits of healthier plants and bountiful harvests.  

Summary: Soil blocking offers home gardeners an array of benefits. With its simplicity and effectiveness, seed blocking is an excellent choice for gardeners looking to maximize their gardening success while minimizing their impact on the environment.    

Saturday, February 28, 2026

Three Tough Beauties for Your Yard

Choosing the right tree in the Treasure Valley is about more than looks. Our landscapes demand plants that can handle real conditions due to their tolerance for drought, salt, and poor soils, while still providing shade, habitat, and long-term beauty. A great example is the honey locust (Gleditsia triacanthos var. inermis ‘Shademaster’), a thornless tree that balances function and form with ease, with golden color in the fall. Its fine-textured leaves create light, filtered shade that supports lawns and garden beds beneath it, making it an excellent choice for yards where multiple layers of plants need to coexist. It is also relatively low-mess compared to many shade trees, and its dappled canopy helps reduce water stress on turf and understory plantings during peak summer heat. It’s a quiet workhorse that brings both comfort and resilience to the landscape and the 
edible pulp in its seed pods, which are a food source for wildlife. 

The Treasure Valley climate brings hot, dry summers, cold winters, and alkaline soils that can stress less-adapted species. One way to build resilience into your landscape is to incorporate native trees that are already attuned to our region. Black or Douglas hawthorn (Crataegus douglasii) is a native gem that brings both beauty and backbone to a yard. This small, multi-stemmed tree thrives in irrigated areas or low spots that hold a bit of moisture, making it a great choice for swales, borders, or naturalized edges. 

In spring, it lights up with clusters of showy white blossoms that draw in pollinators, followed by dark berries 
that feed birds and wildlife. Its dense, thorny branches create excellent nesting habitat and can double as a living screen or informal hedge. While it won’t cast deep shade, black hawthorn adds structure, seasonal interest, and ecological value as part of a layered, living landscape. There is a a hawthorn called 'Paul's Scarlet' with striking pink blooms too!

For those with large areas, selecting species that are well-adapted to local conditions means less water, less maintenance, and greater long-term success. The bur oak (Quercus macrocarpa) embodies this principle with its deep roots, drought tolerance, and remarkable longevity. It not only withstands Treasure Valley conditions, but also supports wildlife and adds lasting structure to a landscape. Over time, it can become a true anchor tree, offering shade, habitat, and a sense of permanence that grows with the landscape itself. This is a tree that rewards patience and strengthens the resilience of your yard for decades to come.

When you match the right tree to the right place, you’re not just planting shade, you’re building a resilient Treasure Valley ecosystem from the ground up.

More information is available here:

https://www.blm.gov/sites/default/files/documents/files/NativePlantLandscaping.pdf

Friday, December 5, 2025

Indoor Herbs for Winter Cooking

If you love using fresh herbs in your kitchen year-round, consider growing your own herbs inside your home. Some of the best winter meals are made with the snip of a fresh branch grown in your windowsill!

For an indoor culinary garden, consider growing garlic, chives, basil, oregano, parsley, sage, rosemary or thyme. If you want to grow a tea garden you may want to plant spearmint, peppermint, lemon balm, lemon verbena, chamomile or catnip.

To start your indoor herbs, you can either buy pre-started herbs, or you can start from seeds. Either way works, but if you prefer more unique herbs, then starting from seed may be your only option.

If you decide to grow herbs that have already been started, then make sure the container has good drainage and is large enough for the plant to grow. If the container is too small, simply choose a different pot and transplant it. Be sure to water the plants regularly. 

Light is very important, so place your herbs in a sunny location that receives at least half a day of sun. New information about indoor lighting has made it easier for the home gardeners. Those labeled "cool white" work well. "Warm white" and "Daylight" may also work. Lamps tailored to a plant's needs are also available. 

A bonus to indoor herb gardens is that they can be moved outside after the threat of frost passes. Simply place your herb pots outdoors and enjoy fresh herbs all year round.


For more information on starting seeds the University of Idaho Extension provides this excellent resource: Start Seeds Indoor With Success 

Friday, September 12, 2025

Roasted Tomato Sauce Preservation the EASY Way!

 It’s that wonderful time of year, when we are beyond the  scorching hot days of our summer and we’ve settled into the 90s. This is also the time when tomatoes come on with a fury! If you’ve planted many varieties, as so many of us do, then it’s almost a sprint to keep up with the daily harvest. As an advanced Master Gardener and advanced Master Food Safety Advisor with the University of Idaho Extension program, I’m always looking for the quick and easy way to use what comes from my garden.

I’ve grown it. Now…what? Many years ago, I made and water bath canned my own tomato sauce. It was a lot of work. Since then, I’ve procured the mother of all freezers and now, what I would have canned years ago, I freeze. This way, I have the fresh taste of my garden, all year round. And, the bonus is, I know exactly what goes into what I freeze.

Making and freezing the sauce begins as soon as I have enough tomatoes for a batch. You can use any variety and any size of tomato. I’ll wash, core and quarter the big ones. The Sun Sugar cherry tomatoes, (that I’m so fond of) go into this procedure, whole.

I have peeled garlic, olive oil, salt and pepper at hand. Often, I’ll tuck basil leaves under the tomatoes, if my plan is to make the base for a drop-dead-delicious marinara sauce.

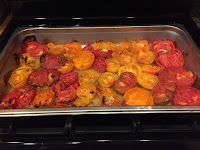
red/yellow tomatoes in roasting panI’ll use a small pan, if I have a smaller batch. I’ll save energy and roast the tomatoes in my toaster oven. Conversely, I’ll use a large restaurant size pan when roasting in my larger, convection oven.
Once I’ve filled the pan with tomatoes, garlic and (sometimes) basil, I drizzle a very conservative amount of olive oil on top. This year, I’ll use a pump atomizer to coat the ingredients with oil, I think it will be more effective and cut down on the amount of oil used. If you use fresh basil, tuck it under the tomatoes, as it can tend to burn during the roasting process.

I pop the entire pan into a preheated, 400° oven and set a timer for 20-minutes. I use this time to revel in the glory of the smells that come from the oven…even opening a window to entice neighbors. I will also tidy my work space during the roasting time. After 20 minutes, I check for signs of roasting. Look for small char marks on the tomatoes and garlic. Check for tenderness in the tomatoes.

mesh sieve with red tomato pureeNow, I’m in the home stretch! After removing the pan from the oven and letting it cool to touch, I’ll put the contents of it in my blender. I whiz it until it’s pureed.
The next step is not entirely necessary. But, I do it to achieve a velvety smooth consistency. I pour the mixture through a wider gauge strainer to catch any seed or skins that didn’t get blended. This step really does kick it up a notch in terms of quality. Because the skin stayed on the tomatoes during the entire process, there are still plenty of vitamins in the sauce.
I put my sauce in freezer-safe containers with ½ inch head space (for possible freezing expansion), and I label EXACTLY what I added to the mix. This way, I know if I’ll use the sauce for stews, chili, Italian or Mexican recipes. Plus, nothing goes in my freezer without a date. Try to use the sauce within a year’s time.  
The quality of the sauce really holds up with this procedure. The other night, I made homemade pizza. The container I thawed (from my 2016 harvest) was a bit thin for pizza sauce. I simply put the contents in a saucepan and added a small amount of cornstarch. In minutes, I had thick, delicious homemade pizza sauce. The results were delectable!

Sunday, July 27, 2025

Know How to Grow - Become a 2C Master Gardener!

Have you ever been elbow deep in dirt and wondered why or what is happening to your plant? Do you wish you knew more about your soil and how to make your plants happier? Are you looking for research-based information that will allow you to reduce pesticide use and help work together with beneficial bugs? If you said yes to any of the above, YOU ARE NOT ALONE! 

Become an Idaho Master Gardener in Canyon County - learn the art and science of horticulture! Our series of classes provide you with a variety of ways to improve your gardening skills...and share your passion and knowledge with others. Do you want to connect with other gardeners in your community? Then you will not want to miss this opportunity! 

Classroom learning
The Idaho Master Gardener program consists of TWO phases:
  
Phase One: This 50 hours of classroom training provides a stress-free, engaging learning environment. Fresh coffee, water, and tea at each session is also a great perk! Maybe even food...

Phase Two: After the classroom training, you will complete 30 hours of practicum education via volunteer service. 

Hands-on field trips
2cTurf & Team site visit
You will also have the opportunity to choose from focus areas in which you would like to complete your hands-on experiences with various teams: Tree & Turf, Integrated Pest Management, Junior Master Gardener, Outreach, Plant Sale, and Social Media. Teams build comradery and skills. FUN, too!
Start Date: University of Idaho Extension, Canyon County (Caldwell, ID) Idaho Student Master Gardener classes start September 10, 2025 and run through April 15, 2026.  Classes are held on every other Wednesday morning from 8:30am-12pm at the University of Idaho Research & Extension Center, 1904 E. Chicago Street, Caldwell, Idaho 83605.  

Cost: The cost for the 2026 Canyon County Master Gardener program is $280 to be paid by 8/29/2025 (scholarships and payment plans are available).  This cost includes a handbook, a soil test, several hands-on labs, field trips, a background check, a Master Gardener t-shirt and a name badge at the end of the course.

Application Deadline: The deadline to apply for the Canyon County Idaho Master Gardener program is August 15, 2025Get your spot early as space is limited in class.  We at the U of I Extension want everyone to be comfortable and safe while learning about horticulture. We offer in-person classes (while spots are available).  Complete your application today!

IPM Scouting Walk
The Idaho Master Gardener program is NOT a gardening class, rather a VOLUNTEER and DEVELOPMENT PROGRAM.  The University of Idaho Master Gardener Volunteer Program serves as an educational and volunteer organization. All course participants must be willing and able to contribute 30 hours of practicum volunteer service prior to September 30, 2026, to complete certification. There will be plenty of time and lots of opportunities to complete your hours. We look forward to having you join our team.
Helping people grow is what we do. 

Apply here 👉https://forms.office.com/r/E84saNVKKatext or https://bit.ly/2025-26_MGapplication.

Call us today 👉  (208) 459-6003 

Follow us here 👉

Facebook @2CMasterGardeners   

 Instagram @2cMasterGardeners 

Friday, April 18, 2025

From Indoors to Outdoors: How to Start Melons, Squash, and Pumpkins for a Perfect Transplant

As winter fades and spring temperatures rise, mid-April is the ideal time to prepare for warm-season crops like squash, melons, and pumpkins. While it is still too early to plant them directly outdoors, taking steps now will ensure a strong start to the growing season.

Since squash, melons, and pumpkins thrive in warm soil (60–70°F), starting them indoors 3 to 4 weeks before your last frost date provides a head start. The University of Idaho Extension recommends this method to establish strong plants before transplanting.

These crops do not like their roots disturbed, so careful handling during transplanting is essential. To minimize stress, peat pots or other biodegradable containers are recommended.

Seed Starting Steps:

Containers: Peat pots or biodegradable pots reduce root disturbance during transplanting. If plastic containers are used, seedlings should be handled gently.
Soil: A light, well-draining seed-starting mix promotes healthy root development.
Temperature: Soil should be kept at 75–85°F for optimal germination. A heat mat can help maintain consistent warmth.
Lighting: Grow lights should be positioned 2–3 inches above seedlings for strong, compact growth.
Watering: Soil should remain moist but not soggy to prevent disease.

Seeds should be planted 1 inch deep, with 1–2 seeds per pot. Once seedlings emerge, thinning to one strong plant per pot will ensure healthy growth.

Preparing the Garden Bed

While seeds germinate indoors, garden beds should be prepared for transplanting in mid-to-late May. The University of Idaho’s vegetable gardening guide highlights the importance of well-drained, nutrient-rich soil and full sun exposure for these crops. 

Soil Preparation Steps:

✔ Remove weeds to prevent competition.
✔ Loosen soil and incorporate compost for improved fertility.
✔ Rake soil smooth and ensure good drainage.


Since squash, melons, and pumpkins are heavy feeders, preparing the soil early allows nutrients to integrate before transplanting.

Mulching Plan: A Natural Approach

Mulch helps retain moisture, suppress weeds, and regulate soil temperature while protecting delicate roots from disturbance. Consider using one or a combination of the following:

  • Compost (1–2 inches): Feeds soil and improves structure.
  • Shredded leaves or dried grass clippings (2 inches): Insulates and holds moisture.
  • Straw or hay (3 inches): Prevents rot by keeping fruit off the soil.

Choose the best option for your garden, or layer multiple types for added benefits.

Looking Ahead: Preparing for Transplanting

Since squash, melons, and pumpkins do not like their roots disturbed, extra care must be taken when transplanting. When moving plants outdoors, the entire peat pot should be planted directly into the soil to avoid disrupting the roots. If plastic trays were used, seedlings should be gently removed and transplanted with as much of their root system intact as possible.

A week before transplanting, seedlings should be hardened off by gradually introducing them to outdoor conditions, starting with a few hours each day in a sheltered location.

With seeds started indoors and garden beds prepared, everything will be in place for a successful growing season. Careful transplanting will ensure these plants establish quickly, leading to a productive harvest of squash, melons, and pumpkins by late summer.

Friday, July 26, 2024

Shade Loving Perennials

Shade loving perennials are described as a hardy plant that persists for several years in little to no sunlight areas. These plants will grow bigger and bigger every year and some even until you can divide and split them to plant more. Shade loving perennials will take the cold a lot better and won’t need as much water compared to sun loving perennials. These perennials can be planted under trees or along a house where it is cool and moist.


Ferns have stems, leaves, and roots but do not produce seeds. On the underside of the leaves are spores that contain the genetics needed to grow a new fern. They may be green, yellow, black, brown, orange, or red in color. Ferns are very beautiful, green, and lush plants. They have deep fibrous roots and love wet woodland type areas. Ferns will go dormant in hot, dry weather however will perk back up in the late summer to fall rain.


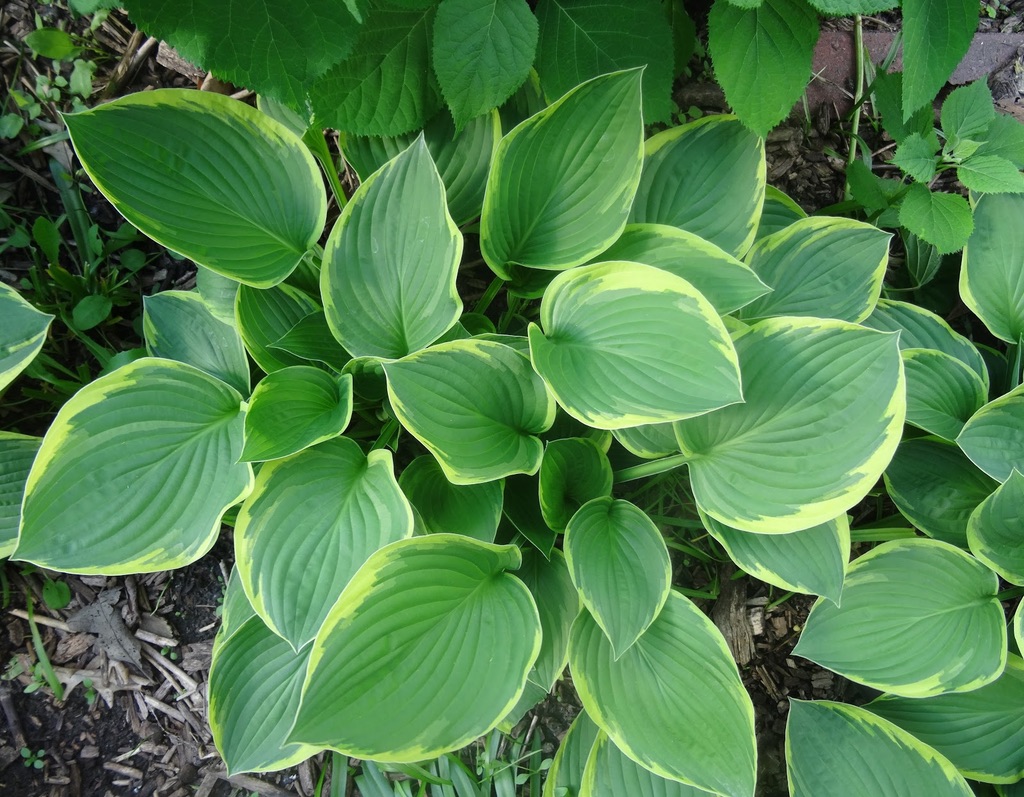
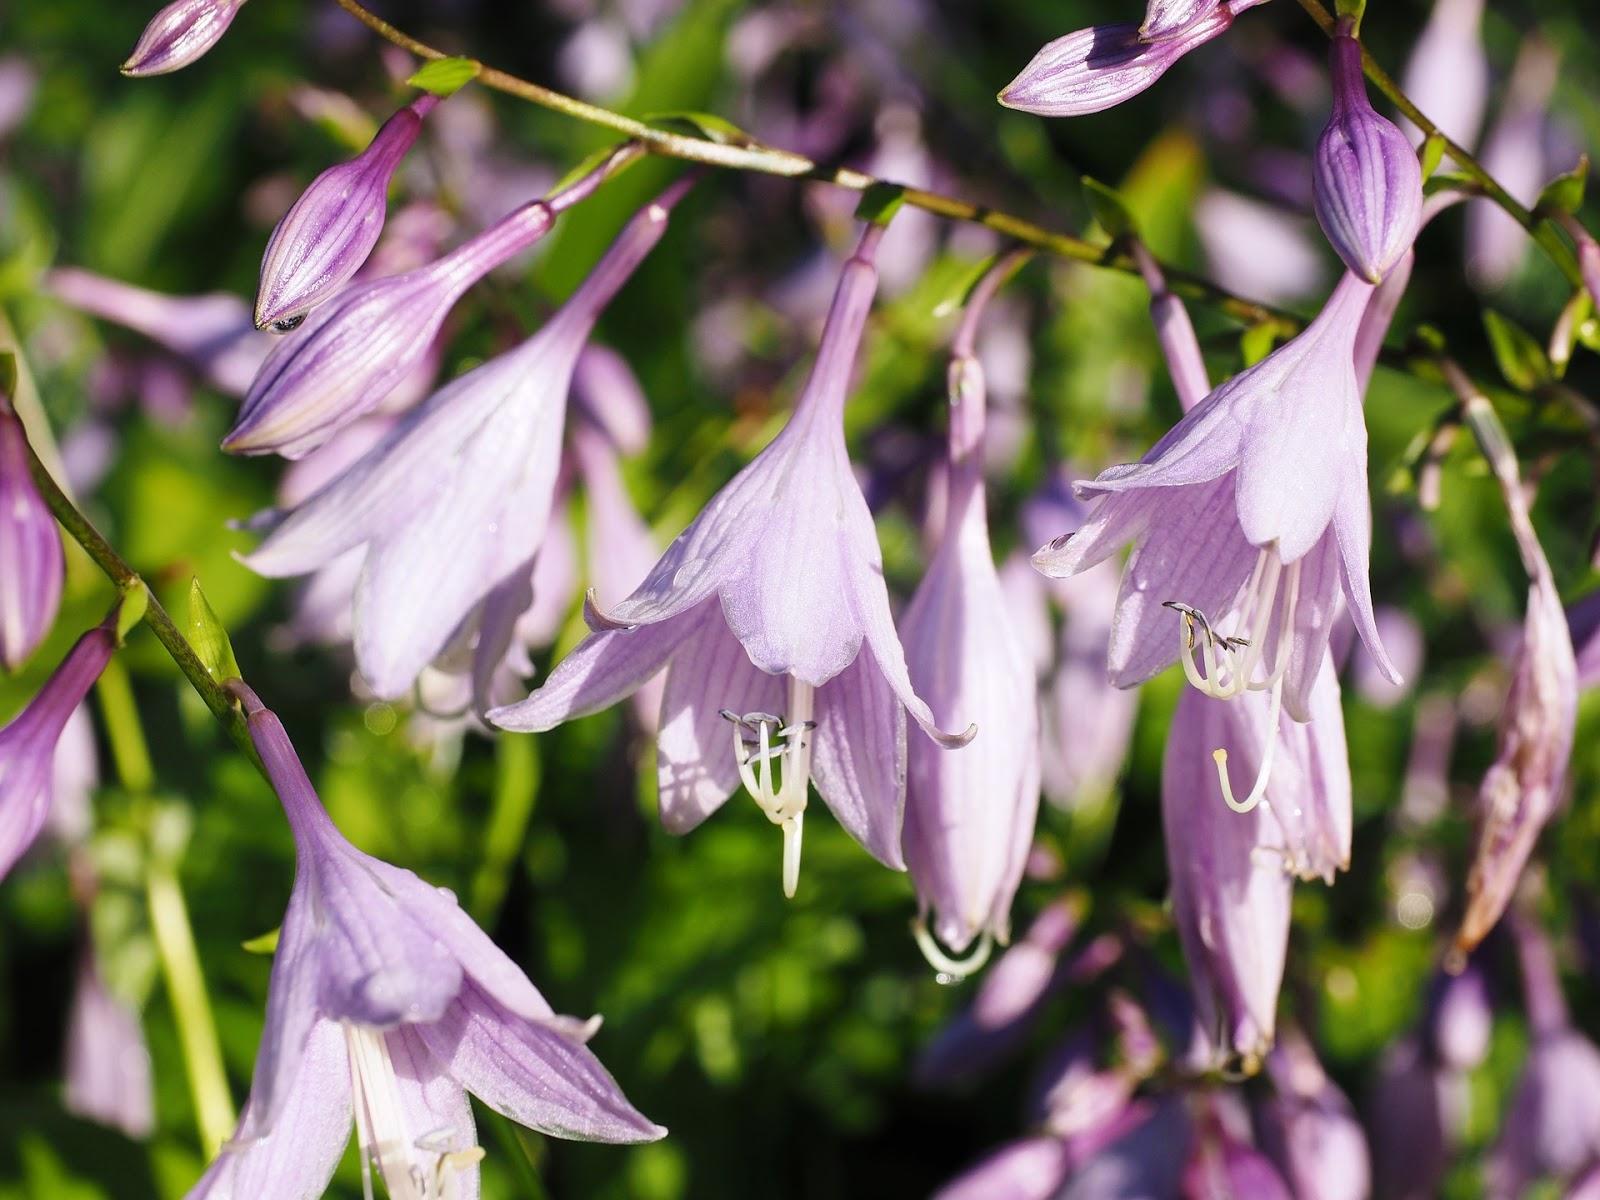
Hostas can bring lots of color and texture to your flower bed. They are low growing and clump forming which means they can be divided and planted. They have large leaf coverage, and some varieties even produce flowers that are very pleasing to the eye as well as fragrant. Leaf tips of hostas will become sun scalded and scorched in full sun. They will develop deep, rich colored leaves in cool, dark areas. Leaf lengths can range from inches to feet. Their leaves can also have many well as shapes. Textures include smooth, veined, or kinds of textures as puckered. Shapes include heart shaped, cupped, or lance like. 


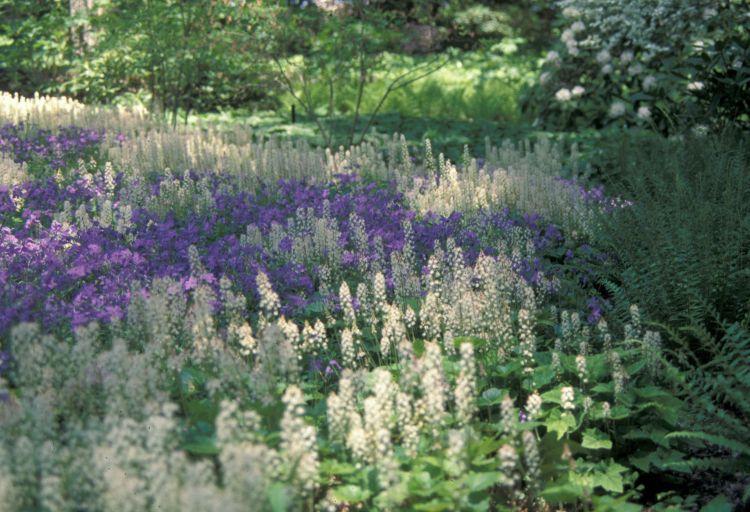
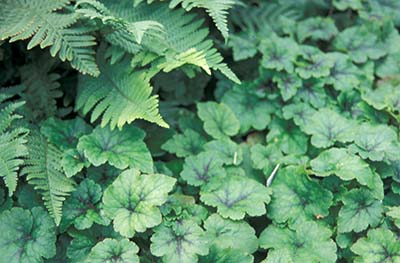
Ferns and hostas will be a great addition to your flower bed. Bringing in a variety of colorful leaves are well as fragrant flowers. It will be very easy to maintain as well since you won’t have to water as much or worry about deadheading as you do most flowers. Another perk is you will save money on having to buy more plants since hostas will multiply and ferns can reproduce with their spores! Other shade perennials [see link for list] include bleeding hearts, hellebores, columbine, coral bells.


Tuesday, March 19, 2024

Soil blocking for your Spring Seed Starting

Soil blocking presents several advantages for home gardeners, making it an attractive option for those seeking efficient, sustainable, and rewarding gardening practices.
Space Optimization: For home gardeners with limited space, seed blocking offers a compact and efficient way to start seeds indoors. By using soil blocks rather than traditional pots or trays, gardeners can maximize their growing area and cultivate a greater variety of plants in a smaller space.
Cost-Effectiveness: While initial investment in seed-blocking equipment may be required, the long-term savings are significant. Soil blocks can be made using simple tools or purchased commercially, eliminating the need for disposable seed trays and pots. Moreover, seed blocking reduces seed waste by ensuring each seed is planted with precision, saving money on seed purchases in the long run.
Improved Seedling Health: Seedlings grown in soil blocks tend to experience less transplant
shock compared to those grown in traditional seed trays. The intact soil blocks protect delicate roots during transplanting, resulting in healthier, more resilient seedlings with higher survival rates.
Water Efficiency: Soil blocks retain moisture more effectively than traditional planting 
mediums, reducing the frequency of watering needed for seedlings. This is especially 
beneficial for home gardeners who may have limited time for watering or live in regions with water restrictions.
Ease of Transplanting: Transplanting seedlings from soil blocks is straightforward and minimizes root disturbance. Gardeners can simply place the soil block directly into the planting hole, eliminating the need to handle delicate seedlings or disturb their roots. This reduces transplant shock and ensures a smoother transition to the garden bed or container.
Reduced Disease Spread: Traditional seed trays and pots can harbor pathogens and promote the spread of soil-borne diseases. In contrast, soil blocks are less likely to harbor harmful microbes, reducing the risk of disease transmission among seedlings. 
Environmental Sustainability: By reducing the use of plastic pots and trays, as well as minimizing seed and water waste, seed blocking aligns with environmentally friendly gardening practices. Home gardeners can feel good about minimizing their ecological footprint while enjoying the benefits of healthier plants and bountiful harvests.  
Summary: Soil blocking offers home gardeners an array of benefits. With its simplicity and effectiveness, seed blocking is an excellent choice for gardeners looking to maximize their gardening success while minimizing their impact on the environment. 


Friday, November 24, 2023

Growing herbs for holidays meals...and as gifts!

Do you love using fresh herbs in your culinary creations? Consider growing your herbs indoors where you can snip a fresh branch as you're cooking your meals! PSST- they're wonderful gifts for that hard-to-shop-for person!

For an indoor culinary garden consider growing garlic, chives, basil, oregano, parsley, sage, rosemary or thyme. If you want to grow a tea garden you may want to plant spearmint, peppermint, lemon balm, lemon verbena, chamomile or catnip. It's not too late to start from seeds. 

Be sure to choose a container that provides good drainage, and fill with one or more of your favorite herbs. Light is very important so place your herb garden in a sunny location that receives at least half a day of sun. New information about indoor lighting has made it easier for the home gardeners. For grow lights, those labeled "cool white" work well. "Warm white" and "Daylight" may also work. Lamps tailored to a plant's needs are also available. Be to water regularly. After the threat of frost passes, you can place your garden outdoors and enjoy fresh herbs all year round.

With Christmas just around the corner, herb starts in pots are a welcome gift, both for hosts and under the tree. It also encourages growing fresh food in our homes.


For more information on herb gardening in Idaho, the University of Idaho Extension provides this excellent resource: Idaho Green Thumb How-To's.