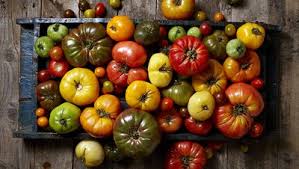
Showing posts with label Doug Ranck. Show all posts

Friday, September 8, 2023

Intro to Seed Saving

Do you want to save seeds from this year’s garden? Seed saving is easier than you might think! It just takes a little time to gather the seeds and a little space to process them. Follow the links throughout this introductory article to learn more.

Tomato Seeds
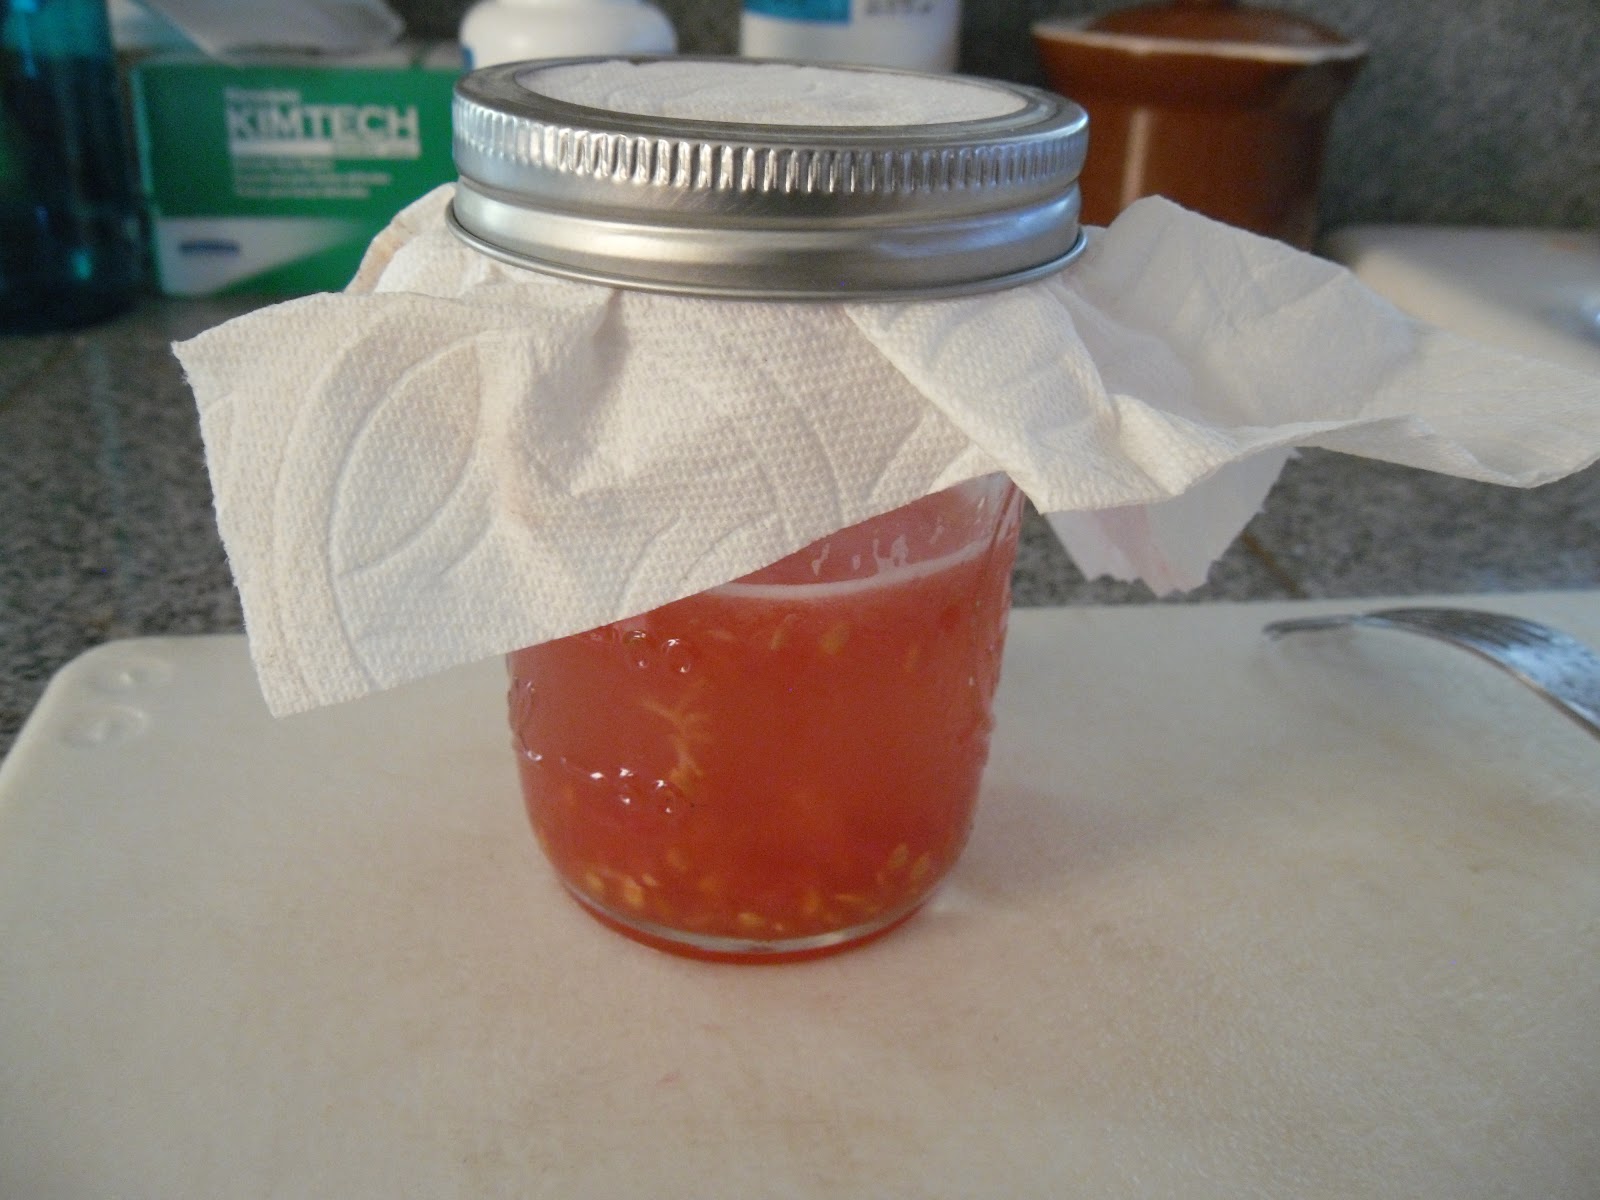
Tomatoes are a popular seed-saving choice and a good place to start. For tomato seeds, you will need a pint sized canning jar (with its ring) and a piece of paper towel large enough to cover the top. You will also want to have a sharp knife, a spoon, a fork, and a cutting board. Finally, you’ll need a  paper towel for drying, labeling paper, and an envelope to store your dry seeds.

The process starts while your tomatoes are still growing on the vine. Choose the tomato that you want to save seeds from and remember no to pick it. It will need to  continue to grow till it is just past its ripened state  before you cut it off the vine. The next steps are to cut it in half, scoop out the insides into the pint jar and add water until it is half to two thirds full. Using the fork, mash/puree the seed mixture in the jar till it is all separated. Swirl the jar to see if the mix is even. Put the paper towel over the top and fasten it in place with the ring. Let the jar sit on your kitchen counter where you can watch it and swirl it at least once a day for the first two to three days. Let it sit then until it develops a fuzzy moldy looking top. Then add a little more water, swirl, and then let it sit for a minute or so, so the heavy viable seeds settle to the bottom. You can use the fork to lift out and dispose of the slime from the top. Add water, swirl, and let it sit again, then pour off the top mixture leaving the seeds on the bottom. You may have to do this several times until clear water and seeds on the bottom are all that remain. Then pour off the water and dump the seeds on your drying towel. Once they are dry, place them in a labeled and dated envelope and store them in a cool, dry place until you’re ready to plant them next season.
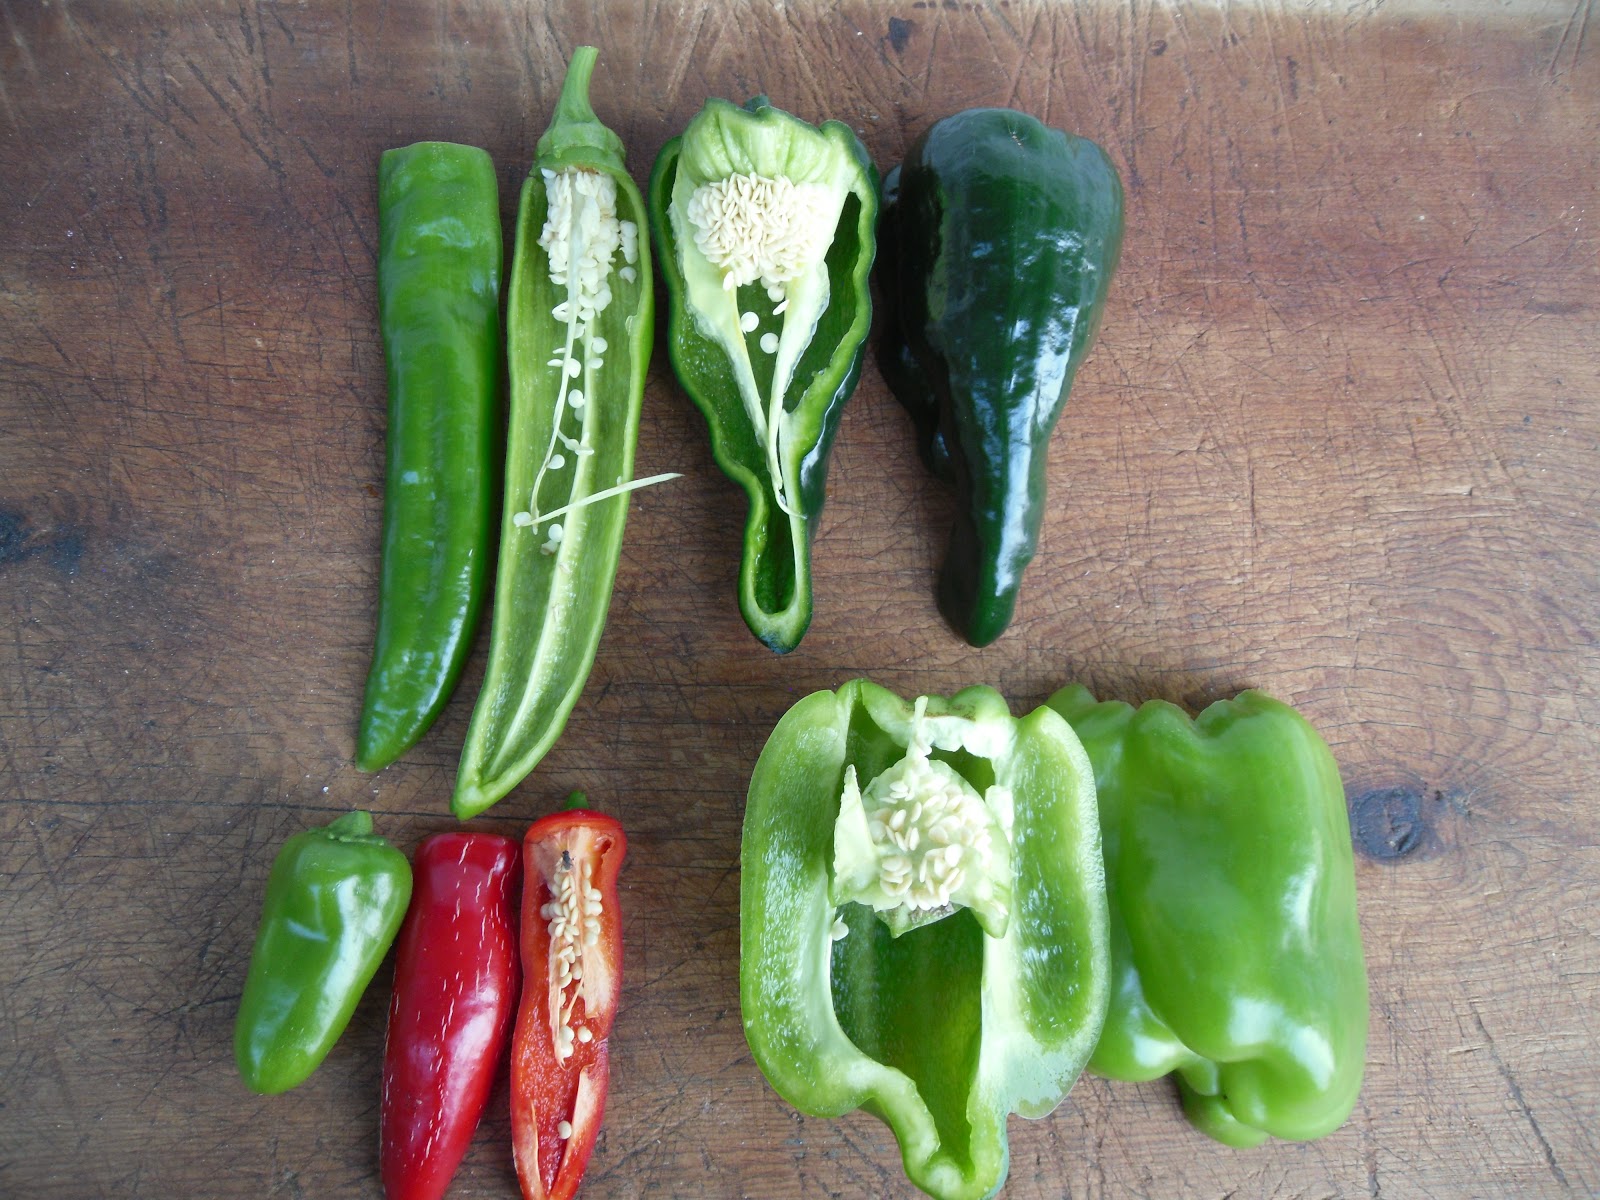
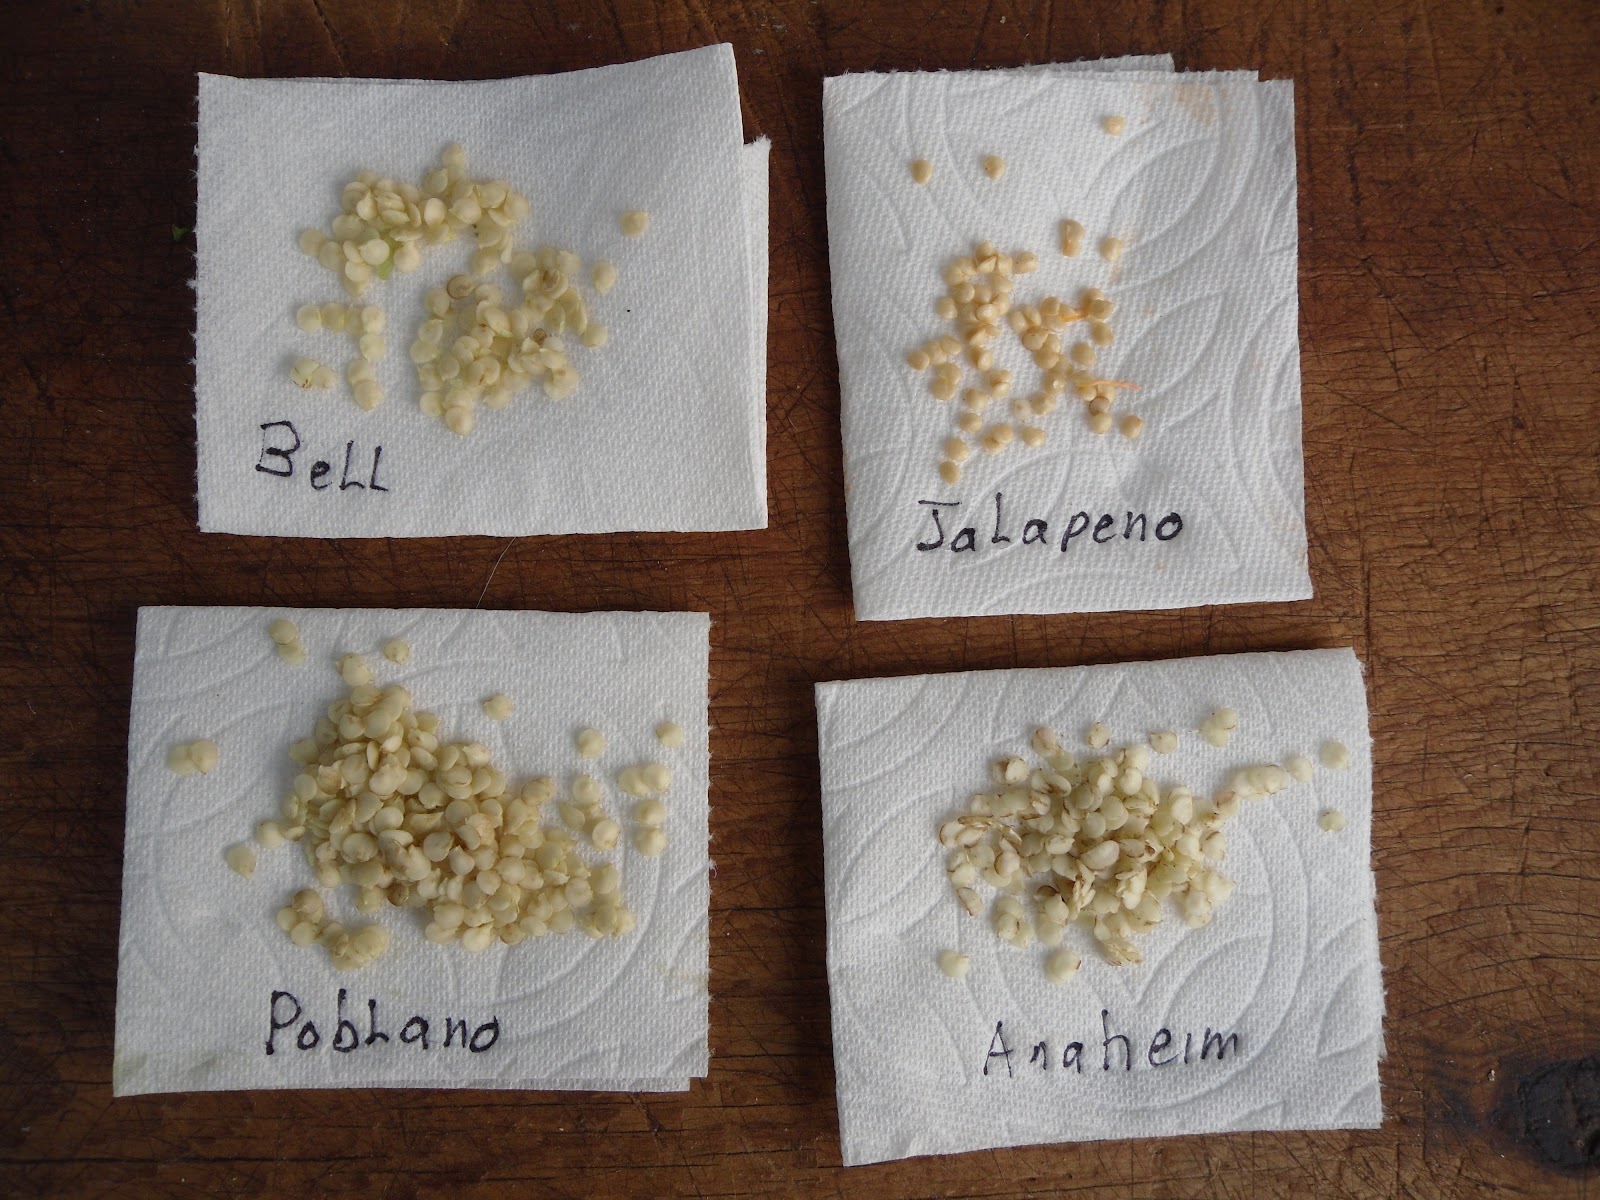

Pepper Seeds
Peppers (Bell, Jalapeno, Poblano, Anaheim, etc.) are another popular seed-saving choice. Just as described above, you want to choose the pepper that you like and want to grow again next year. Cut the pepper open so you can remove the seeds. Put the seeds on a paper towel to dry. Make sure you label your seeds. When they are dry, usually in a couple weeks, soak them in water for a day or so. The seeds that sink to the bottom are your most viable seeds, these are the ones you want to save.


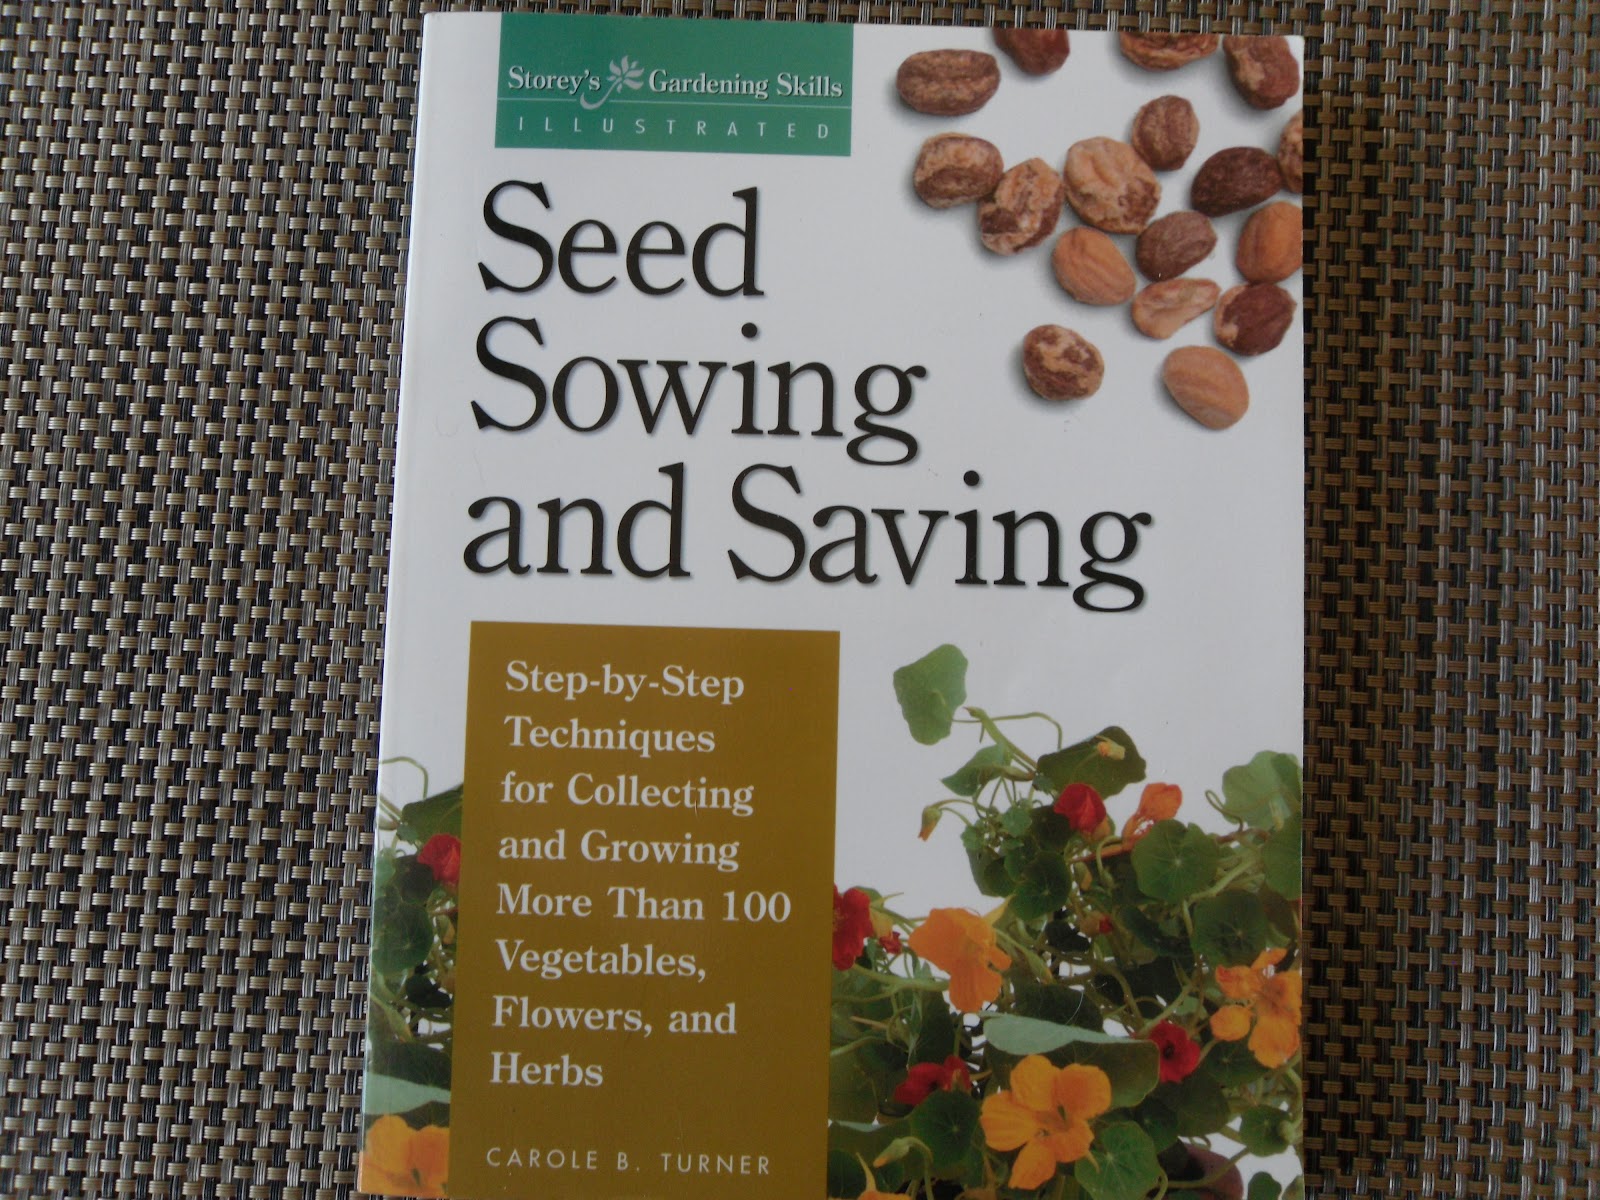
Tomatoes and peppers are a great place to start, but you can 
save seeds from all of your favorite plants, with a little research. Seed Sowing and Seed Saving, written by Carole Turner, is a good book on how to save seeds and plant them. Also consider your local University of Idaho County Extension Office, your local library, and your favorite bookstore.
 
The advantage of saving seeds from your garden is that you know they grow well in the microclimate of your garden. You also save money and get the satisfaction of being self-sufficient. Seed-saving year after year is called Landrace seed saving and planting. If you have extra seeds, share with your friends or join a local seed bank. 

Monday, October 3, 2022

Seed Saving 101: Saving seeds for yourself and others

Have you wanted to start saving seeds from your favorite plants? Seed saving is easier than you think. All it takes is a little time to gather and then the space to process and store the seeds. Follow the links throughout the the text to learn more as we progress through this short introductory article.

For starters we are going to use the ever tasteful and all time favorite, tomato, as our introductory example.
Items you will need, a pint jar with its ring and a piece of paper towel large enough to cover the top, sharp knife, spoon, fork and cutting board. Later items needed, paper towel for drying, labeling paper and an envelope to store your dry seeds.

First you will need to decide which tomato on the vine you want to save seeds from. Make sure everyone at home knows which ones they are. Let it continue to grow till it is just past ripe before you cut it off of the vine. Put it on the cutting board and cut it in half, scooping out the insides where the seed are. You can eat the rest, just sans seeds.

Put these seeds in the pint jar and fill it with water till it is half to two thirds full. Using the fork, mash/puree the seed mixture in the jar till it is all separated. Swirl the jar to see if all of the mix is even. Put the paper towel over the top and fasten in place with the ring. Let the jar sit on your kitchen counter where you can watch it and swirl it at least once a day for the first two to three days. Let it sit then till it develops a fuzzy moldy looking top. Now comes the fun part. Add a little more water and swirl, then let sit for a minute or so, so the heavy viable seeds settle to the bottom. You can use the fork to lift out and dispose of the slime off of the top. Add water again and swirl and let sit, then pour off the top mixture leaving the seeds on the bottom. You may have to do this several times till all you have left is clear water and seeds on the bottom. Pour off the water and dump the seeds on your drying towel.

Remember to label and date these right from the start, especially if you have more than one batch going at the same time.


Now, let's take a quick look at how to save seeds from a few types of peppers. Bell , Jalapeno, Poblano and Anaheim Peppers will be featured as the example. Here again, you want to pick the pepper that you like and want to grow again next year. Cut the pepper open so you can remove the seeds. Put the seeds on a paper towel to dry. Make sure you label your seeds. When they are dry, usually in a couple weeks, soak them in water for a day or so. The seeds that sink to the bottom are your most viable seeds, these are the ones you want to save.
You can save seeds from all of your favorite plants, with a little extra research and reading.
There you go, you are saving seeds from your garden that are suited to the micro-climate of your garden. When you do this again next year with your favorite plants and on and on, this is called Landrace seed saving and planting. If you have extra seeds, share with your friends or join a local Seed Bank.

This book is a good resource material book on how to save seeds and plant them.

Other resources are your local U of I county Extension office, the local library, your favorite bookstore and your favorite online shop.

Happy Seed Saving and Gardening. 

Sunday, July 28, 2019

Earwigs are invading my garden

Earwigs are in my garden.

 Why do we have so many earwigs this year?
 Well for one thing it has been a wet and slightly warmer spring. These weather conditions have made better that ideal living and growing media for the earwig. They like wet damp hiding places and with a little mulch or lose compost to hid in during the day.


 How to identify good earwigs from bad earwigs.
 They are all the same so to speak. They are opportunistic eaters. They live on dead decaying matter, eat aphids and other small prey and love young growth of certain plants, like Marigolds. This is shown in the picture with all the cans full of earwigs and decimated marigold plants. The cans were placed next to plants that the earwigs thought were there most tasty.


 Simple home remedies used to lower the earwigs population.
 There are quit a few methods you can use depending on your preference and patience. I prefer a little beer in a small cat food can but there other preparations you can put in the cans.


 Predatory insects that help control the earwigs.
 Believe it or not, there are other insects and animals that prey on the earwigs. Since the earwigs are nocturnal, hungry birds have to hunt them out in their hiding places during the day. Evening birds and amphibians will be able to find them out and about in the duff on on their favorite plants.


Follow the reference links for more in-depth information.


Monday, July 8, 2019

Iron Chlorosis is in my Tree

WHAT I THINK ABOUT IRON CHLOROSIS
Strolling the grounds of my one acre “estate” on a warm summer day, I was distressed to see something wrong with two of my Sycamore trees.  While two of the trees looked great, nice dark green leaves everywhere, the other two had sections of leaves that had yellowed. Upon further inspection, I noted that the veins of the leaves were still green, but the areas between the veins had turned yellow.  In some cases the edges of the leaves were brown. “What is wrong?” I wondered.
What is wrong with my trees was something called, Iron Chlorosis. This problem is apparently common in places that have high alkalinity soil (pH above 7.0). My soil was significantly above this level. It is believed that there is a link between alkalinity and iron in the soil. The problem isn’t a lack of iron, but the inability of the plant to benefit from the iron that is there. For some reason, higher pH changes the chemical reactions which then render the iron unusable to the tree.                                 
So, now that I know what is causing the trees’ problem, is there anything I can do about it? Yes, there are a number of things that can be done to deal with this problem.  The best solution is prevention. Do a soil test to determine the soil pH and then select a species that will do well in a particular soil.
DIY soil test kits can be purchased from many garden outlets or your local U of I Extension Office can point you in the right direction to get the the test for a fee. There are several reputable labs that do a great job and send you the results and they are reasonable in cost. However, if the trees are already there, like mine, you have several options.  According to North Dakota State University (NDSU) one option is to add elemental Sulfur to the ground around the tree. The Sulfur will help free up iron for the tree to take up. This is a slow process and may take a year or more before seeing results. Another option from NDSU is to inject iron directly into the trunk. This involves drilling a series of holes in the tree. This procedure should not be done more than once a year.  Finally, the foliage can be sprayed with an iron solution. This usually provides the quickest results, however as new leaves come on they most likely will exhibit the problem.
Solving the problem of iron chlorosis is a difficult and time consuming challenge.  Research and careful planning and follow up are keys to your success. Saving your beautiful plantings are worth the effort.  Good luck!


Monday, April 2, 2018

What is wrong with my trees today? Part 1

Can you tell what is wrong with my trees? 


Tree owner:
I water them and feed them and talk to them and they are still in decline. These trees are Columnar Blue Spruce that I planted a couple of years ago to use as wind and visual breaks. I called the Canyon County Extension office and asked for help. Members of the Turf/Tree Team corresponded with me and they came to my house for a site visit.

Turf/Tree Team members' site visit assessment:
The worst of the Columnar Blue Spruce trees was next to a propane tank. Thinking that this may have been the cause, we walked around the tree and noticed that the damage was all around the tree. So much for an easy explanation, blaming it on a propane leak. Some of the other trees were starting to show signs of the same problem. 


Upon examining several of the trees and talking to the owner about the trees, soil, watering and fertilizing habits and cultural habits. We took cuttings from some of the best spots on these trees to bring back to the office for further examination.


To be continued. The final outcome will be shared in Part 2.


Sunday, March 4, 2018

Pruning Fruit Trees, an Introduction

Did you know that it's that time of year, again, to prune your fruit trees.
Nampa Parks and Recreation Dept. is offering a free course on tree care.
Another source of informaton is the University of Minnesota Extension.

Happy pruning, stay warm and please make sure that your pruning tools are clean and sharp.


Monday, January 8, 2018

A Winter-time Activity

Loomcraft Loom
Here's a Winter-time Activity that may be new to you. 
Do you feel the need to start a new project, maybe something to do with your hands besides playing in the garden? Maybe that new hobby in your future is Looming, "weaving on a loom", one that that can be fun and rewarding...and one that you can feel a sense of accomplishment yet have fun with. You will be able to see your progress while you learn something new and then give it away to friends. This also can become a way to make another income, however large or small it is.


Louet S11 Spinning Wheel
Are you yarning to spin your own yarn for that knitting project? Raw wool can be purchased to use, but you will have to clean it and prepare it, or you may opt to buy wool already processed and ready for you to spin into your favorite yarn.
Don't feel sheepish, you may like it after all.


Front to back, Jerry, Ben, Shawn, Mary.
We can all say that this is truly a Farm to Table type of hobby. And if you own your sheep, there is an added benefit called good compost for your garden. You just have to put in a compost pile and let it age to the proper consistency.

Ben's first cutting of wool.


Keep Idaho Growin

Tuesday, January 2, 2018

Welcome to 2018

Hi Everyone and Welcome to 2018!

It is a new year and one that you can be proud to be a part of.
Have any of you made the traditional New Years Resolution? 
Did you include any that are going to be easy to uphold? How about some of these ideas for the New Year.

Let's plant a new kind of tomato, preferably an Heirloom
or a Landrace variety. Don't know what that means? Click on the word link to find out more. 

Maybe you are into Flowers and want to explore new colors for the garden or new strains for the plant show. What's stopping you? Just do it! Remember, it is your garden and you can do what you want to, and next year is a new year again.


Did you plan your garden layout and planting design for this coming year only to get more information that made you change your mind? There are a lot of services and educational opportunities available locally and online


Lets get out there and keep Idaho Growin!


Monday, December 11, 2017

Have you seen my pet Gopher Snake?

Gopher Snake (Pituophis catenifer)

These snakes live in our area and they are a beneficial predator. Gopher snakes are muscular, long serpents that can be intimidating because of their size; however, but there’s little to fear because they are nonvenomous. In fact, they are important to keeping the rodent population in check and maintaining their local ecosystems.

Gopher snakes are large, powerful snakes and typically reach lengths of 36-96 inches [3 to 8 feet]. Compared to other snakes of the same size, they have relatively large eyes with large, distinct heads with narrow necks. They often have two dark lines on their faces that go from the top of their head around either side of their eyes. Gopher snakes’ coloring can depend on their subspecies and location. Often their colors blend in with local vegetation. They range from cream to light brown and have dark blotches on their backs and smaller dark spots along their sides. They generally have light-colored bellies, sometimes with spots.
Gopher snakes are sexually alike, with both males and females being around the same size. They have keeled (ridged) scales.
One way to check if a snake is nonvenomous is by the shape of their eyes. Round eyes and a head shaped like this one pictured are the norm.
“Gopher snakes are nonvenomous constrictors. This means that they squeeze their prey to death. There are some common misconceptions about how constricting works. One is that constrictors crush or break the bones of their prey. Another is that they suffocate it, squeezing the prey’s lungs too tightly to work. “It turns out that the squeezing overwhelms the circulatory system. “Blood cannot get to the brain, and the animal dies within seconds due to ischemia.”
Gopher snakes feed on small mammals, birds, bird eggs, lizards and of course gophers. They actively seek out prey and often follow small mammals down their runways or burrows.
Gopher snakes mate during July and August. It is the only time of year they socialize. Females emit a chemical through their skin that draws males to them and stimulates mating behaviors. Males will mate with as many females as they can each year. Males sometimes engage in ritualistic wrestling for the female.
Gopher snakes are oviparous, meaning they lay eggs. Females sometimes lay two batches (called clutches) of eggs per season. Eggs incubate in nests, which are sometimes communal with other gopher snakes. After a 65-75 day incubation period, 2 to 24 young hatch and are instantly independent. Gopher snakes have no parental involvement after laying eggs. Babies are born 12-18 inches (30 to 45 cm) long and can be up to 3 feet (92 cm) long after one year.

Female gopher snakes reach sexual maturity between 3 and 5 years of age. Males reach it between 1 and 2 years of age. In the wild, they live up to 15 years. They have been known to live up to 33 years in captivity.


Range/ Habitat

 The gopher snake is one of the most widespread snakes in North America. Its range extends from the Atlantic to Pacific oceans, as far north as southern Canada, and as far south as Veracruz and southern Sinaloa, Mexico, including Baja California. This species occurs in a lot of different habitats, including prairies, conifer forests and deserts, but it seems most common in semi-arid brushy areas adjacent to farms. Gopher snakes tend to spend about 90% of their time living in underground dens or burrows and they probable hibernate there during the cold months. When it is warm out, we tend to see them sunning themselves on roadways and dirt lots, but give them space so they can do what they do best. Happy Gopher Snake Day.
The taxonomy of the gopher snake,
Kingdom: Animalia
Subkingdom: Bilateria
Infrakingdom: Deuterostomia
Phylum: Chordata
Subphylum: Vertebrata
Infraphylum: Gnathostomata
Superclass: Tetrapoda
Class: Reptilia
Order: Squamata
Suborder: Serpentes
Infraorder: Alethinophidia
Family: Colubridae
Genus & speciesPituophis catenifer

Monday, November 13, 2017

Idaho Ice-cream Potato


If you went to the Idaho State Fair in Boise and ate an Idaho Ice-cream Potato, you probably bought it from a stand that looked like this. 

You paid the person at the window the small nominal fee for the potato and they handed you an Ice-Cream Potato that probable looked like this one. It's the picture over here on the right with 2 spoons in it and it was good enough to share with that special someone. I don't think I could have eaten the whole thing by myself, although I could have given it a go.

I was there this year and greatly enjoyed the potato that I thought
it would make a good story for you to enjoy. I contacted Chef Lou at the Westside Drive in and asked Lou these questions.

1. Who invented the ice-cream potato, when and where?
It was invented in the 1940's by the chef at the Gamekeeper Restaurant in the Owyhee Plaza, for a banquet, for the Governor. It was called the "Gamekeeper Surprise". It was made with Maple Nut ice cream, served on chocolate fudge sauce, topped with whipped cream and almonds.

2. Did you get a patent, copy-right etc. for it or is it out there for all to enjoy? 
I tried to get a patent, but it is very hard to patent food. Once it has been in existence for a year, it is almost un-patentable. I got a trademark on the name "Idaho Ice Cream Potato" in 1991, but, pretty much anyone can make it. It is served coast to coast in restaurants. They just can't call it the "Idaho Ice Cream Potato". It was served at George Bush's 1st inaugural dinner. Martha Stewart, Sandra Lee, and many others, including the David Letterman Show have made it.

3. Are there many variation of style and ingredients and if so what are they? I noticed through searching the internet there are several different ways to make it.

There are countless ways to make it. I won an American Heart Association contest by making it with frozen yogurt and carob powder.

4. How many places that you know of make the ice-cream potato and are they offered year round? You offer it at both of your locations.
Yes, we do, and several restaurants around the state serve it. We make them at a production facility and sell them to Sysco, who distributes them.

So if you any of you get a chance to eat an Idaho Ice-cream Potato from one of
their restaurants, it is highly recommended to do it.