Showing posts with label 2C Master Gardener. Show all posts

Friday, August 15, 2025

Late Summer Perennial Division: Give Your Plants a Fresh Start

By mid- to late August in Boise, most of our early summer blooms have finished their show. The garden settles into a slower, late-season rhythm: greens deepen, seed heads form, and those long, golden evenings hint at autumn’s arrival. It’s the perfect time to give some of your hard-working perennials a fresh start by dividing them.

Division is like a spa day for plants—it reinvigorates growth, prevents overcrowding, and even gives you extra divisions to plant elsewhere or share with friends. In our high-desert climate, with hot summers and fast-cooling autumn nights, late-summer division is a smart move. The warm soil helps roots reestablish, and cooler evenings reduce transplant stress. As the University of Minnesota Extension points out, dividing perennials stimulates new growth, encourages more vigorous blooming, and improves airflow to help reduce disease pressure. 

The best candidates for this timing are spring- and early summer-bloomers. Day-lilies, bearded iris (divided right after their flowers fade), cheerful Shasta daisies, and peonies all respond well to late August or early September division. Creeping phlox, shade-loving hostas, and sturdy yarrow also benefit from this seasonal refresh. Fall bloomers like asters and mums are best left until spring so their floral display isn’t interrupted.

Some of our native perennials can be treated the same way. Coneflowers and goldenrod both respond beautifully to late-summer division, sending up vigorous new shoots the following spring. Blanket flower and prairie smoke also divide well now. Others—like penstemon, globe mallow, and showy milkweed—tend to resist root disturbance and are better propagated from seed or cuttings rather than being dug and split.

Your plants will often tell you when they need attention. A thinning or bare center in the clump, smaller or fewer blooms, or an enthusiastic spread that’s crowding out its neighbors are all signs that a division is in order. When you’re ready, start by watering thoroughly the day before so the roots are well-hydrated. Work carefully with a spade or fork to lift the entire root ball, keeping as much root intact as possible. Then gently tease the clump apart by hand or use a sharp knife to create new sections, each with healthy roots and several strong growing points. Prepare the planting area with compost to give your divisions a nutrient boost, and replant promptly at the same depth they were growing before. If you’re not ready to place them in the garden, you can also pot up divisions in containers, keeping them watered and sheltered until you’re ready to plant, donate, or share them. Water deeply, and keep the soil consistently moist until you see new growth.

For the smoothest recovery, work in the cool of morning or evening, and if the sun is intense, offer a bit of temporary shade for a few days. A light mulch will help regulate soil temperature and hold in moisture.

By tending to this now, you’ll set the stage for stronger, healthier plants next spring—and perhaps even have a few extras to share with friends or donate to a community plant sale. Sometimes, the best way to help a plant thrive is to give it the gift of space and a fresh beginning.

We've included links to show you more:

Saturday, May 24, 2025

Do Plant Brews Really Work? What the Science Says

If you’ve spent any time on gardening forums or social media, you’ve likely come across homemade plant brews like weed tea, compost tea, banana peel tea, and even eggshell tea or Epsom salts. These DIY fertilizers are praised for being natural, cost-effective, and sustainable—but how well do they actually work? Let’s look at what current research says about these popular garden elixirs.

Weed Tea: Free Fertilizer or Just Funky Water?

Weed tea is made by soaking or fermenting common weeds—such as dandelions, chickweed, or comfrey—in water, with the idea that the nutrients weeds extract from the soil will leach into the liquid and feed your plants. While weeds are nutrient accumulators, there’s little published research confirming the nutrient content or effectiveness of weed tea. Some studies on plants like Tithonia diversifolia (Mexican sunflower) used as green manure show benefits when incorporated directly into soil, but not as fermented teas. At best, weed tea may provide a mild boost, but results are unpredictable and largely anecdotal.

Compost Tea: Some Scientific Backing

Compost teaparticularly the aerated kind (ACT), is one of the most researched DIY fertilizers. It’s made by soaking compost (plant-based or worm castings, not always manure) in water, sometimes with added sugars and oxygen to increase microbial growth. Studies have found that compost tea can improve microbial life in soil, help suppress certain plant diseases, and occasionally increase plant growth. However, its success depends on how it’s brewed and applied. Using fully matured, pathogen-free compost is key, especially when used on edible crops. While compost tea shows promise, it’s not a substitute for nutrient-rich compost or balanced fertilizers.

Banana Peel Tea: Some Promise, If Processed Properly

Banana peels are high in potassium and other minerals. Recent studies suggest that processed banana peel fertilizers can improve soil quality and plant growth. For example, a 2024 review published in the journal Agriculture by MDPI discusses the potential of banana peel-based biofertilizers and their effectiveness when properly processed. Other studies support their use in nano-fertilizer or composted forms for boosting yields and plant health. That said, soaking banana peels in water for a few days may not extract meaningful nutrients. Composting them is a far more effective way to return their value to the soil.

Eggshell Tea and Epsom Salts: Popular, but Situational

Eggshell tea is made by soaking crushed eggshells in water to extract calcium. While eggshells are rich in calcium carbonate, it breaks down slowly. Studies show that unless finely ground, eggshells don’t readily release nutrients into water or soil. Composting or grinding them into powder is more effective. Epsom salts (magnesium sulfate) are also frequently used, especially for tomatoes and peppers. While magnesium is an essential nutrient, overuse can disrupt soil nutrient balance. Unless a soil test shows magnesium deficiency, regular use isn’t necessary and may cause harm.

The Bottom Line: Good Garden Practices First

DIY fertilizers like weed tea, compost tea, banana peel tea, eggshell tea, and Epsom salts can be part of a sustainable gardening routine. However, their effectiveness varies widely, and most are only mildly beneficial unless processed and applied properly. Before adding any homebrew fertilizer to your garden, remember: healthy plants start with healthy soil. Compost and organic matter are your foundation. Always test your soil before adding amendments, it’s the only way to know what your plants actually need. Use DIY fertilizers as supplements, not substitutes, for a well-balanced approach.

Friday, February 7, 2025

Dormant Oil - Timing and Uses

Dormant oils are an effective treatment for pests on plants, particularly during the dormant season. These oils are applied in late fall or early spring, before bud swelling and bud break. This timing is crucial for controlling overwintering insects and insect eggs on fruit trees and woody ornamentals while minimizing risks to plants and beneficial insects.

Using dormant oils can help manage harmful pests and reduce the need for pesticides during the growing season. However, a single treatment may not ensure complete control, so consistent monitoring is essential to prevent further infestations. Dormant oils are effective only when they make direct contact with pests at the correct life stage.

Why Timing Matters 

Applying dormant oil at the right stage in a pest’s life cycle is critical for success. For some pests, the oil works by blocking the spiracles—the air holes they use to breathe. In other cases, it acts as a poison by interacting with fatty acids and disrupting metabolism.

Correct application targets specific pests and their life stages. Avoid indiscriminate spraying, as blanket applications may not be effective and are environmentally irresponsible. As with any pesticide, remember: “A prescription without diagnosis is malpractice.”

Application Guidelines

Avoid using dormant oil in combination with sulfur or sulfur-containing pesticides, as this can cause phytotoxicity, negatively impacting plant health.

Do not apply dormant oil on sensitive plants such as junipers, cedars, Japanese and red maples, smoke trees, and spruce, especially dwarf Alberta spruce.

Apply when temperatures remain above 40°F for at least 24 hours. If applied just before freezing, the oil’s emulsion can break down, causing it to adhere improperly to bark or leaves instead of targeting pests.

Benefits and Considerations

Monitoring trees is vital. Symptoms from pests like autumn mites may only become evident in spring or summer. Fall applications can prevent such damage by suppressing mite adults, immatures, and eggs. The physical mode of action of oils, causing suffocation, requires thorough coverage to be effective.

Various oils are available for garden use, including spray oil and highly refined supreme oil. While older oils were unsuitable for use after dormancy, modern lightweight oils are safer for foliage. These advancements make it easier for gardeners to apply dormant oils with confidence.

Thursday, January 23, 2025

Harnessing Technology for a Smarter Garden: Tips for Modern Green Thumbs

Gardening, often viewed as a traditional and hands-on activity, is now experiencing a transformation with the help of innovative technology. From advanced sensors to smartphone apps, technology in the garden is making it easier for gardeners to maintain thriving plants and lush landscapes. Whether you are a seasoned gardener or just starting, here are some of the ways you can integrate technology to create a smart, efficient garden.

Smart Irrigation Systems: Efficient Watering

One of the biggest challenges for any gardener is watering plants adequately. Overwatering or underwatering can damage plant health, and manual watering schedules are often hard to maintain. Smart irrigation systems use soil moisture sensors, weather data, and even historical climate information to regulate water delivery automatically.

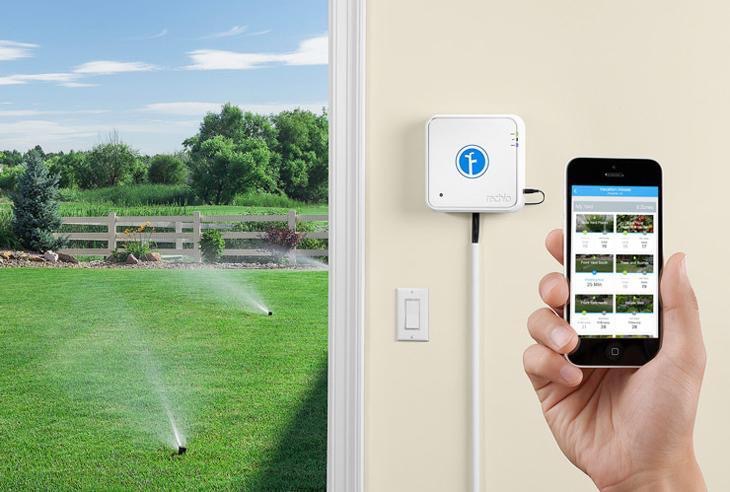
Smart sprinklers, such as Rachio, RainMachine,or B-hyve, connect to your smartphone and adjust watering schedules based on weather forecasts. If rain is expected, they pause the system; if there is a heatwave, they adjust to keep the plants hydrated. These systems help save water, lower utility bills, and keep your plants at peak health, reducing the need for replacements later.

Soil Sensors: Real-Time Insights into Soil Health

Healthy soil is the foundation of a vibrant garden. Soil sensors provide real-time data on moisture levels, temperature, and nutrient content, helping gardeners understand their soil's condition. Gadgets like the Xiaomi Mi Plant Sensor connect to your phone and offer alerts or advice when plants need water, fertilization, or a temperature adjustment.

These insights are particularly helpful for container gardening or plants with specific needs. Knowing exact conditions eliminates guesswork, resulting in healthier plants and fewer challenges for gardeners.

Gardening Apps: Information and Guidance at Your Fingertips

Gardening apps have evolved from simple plant identification tools to comprehensive garden management systems. Apps such as PlantSnap and PictureThis use image recognition technology to identify plants, while Gardenate and Gardener’s Journal offer tips on planting schedules, tracking plant growth, and setting reminders for watering or fertilizing.

Some apps even provide pest and disease identification, helping users diagnose and treat issues early. By using these resources, you can easily plan your garden layout, get timely reminders, and access tailored care advice.

Automated Lighting: Enhancing Growth Indoors

Free Photo energy efficient light bulb lying on grass
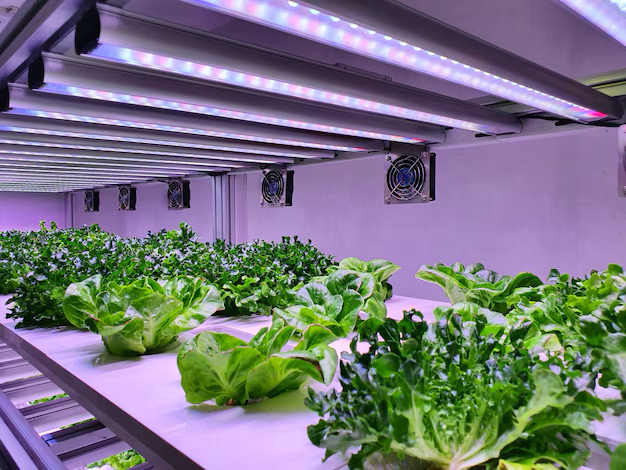
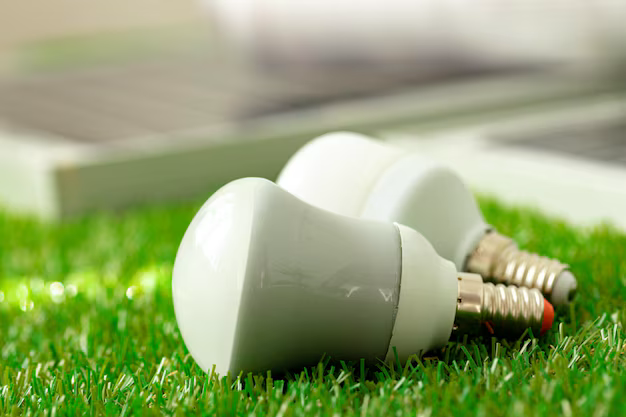
For those with indoor or greenhouse gardens, LED grow lights controlled by smart systems are a game-changer. These systems simulate the sun’s natural light cycle, providing plants with the light they need even on gloomy days or during winter months.

Using apps or smart plugs, gardeners can set timers, adjust light intensity, and monitor the spectrum to optimize growth for each type of plant. Brands like Philips Hue and GE offer customizable LED grow lights suitable for a range of plants and setups.

Free Photo special room equipped for growing plants in good conditionsSmart Greenhouses: Complete Climate Control

For the ultimate tech-savvy gardener, smart greenhouses offer a controlled environment for year-round growth. Using automated ventilation, humidity control, heating, and irrigation, these greenhouses are ideal for plants that require specific climates. Sensors and systems can be programmed for automatic responses, helping maintain optimal growing conditions.

Many smart greenhouses also connect to mobile apps, allowing gardeners to monitor and adjust conditions remotely. They make it possible to grow anything from tomatoes to exotic plants with ease, regardless of external weather.

Drone quad copter with high resolution digital camera on green corn field, agroDrones and Cameras: Aerial Views and Pest Control

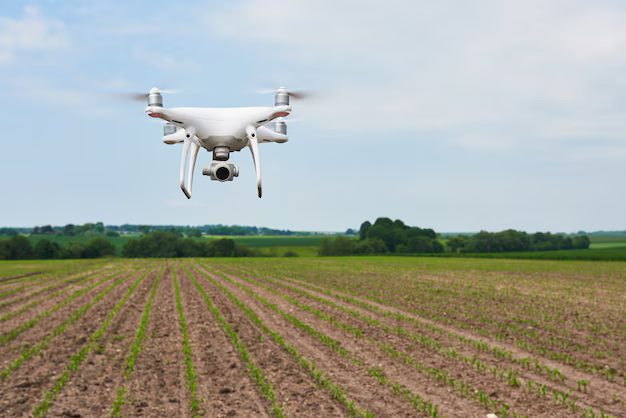
While drones may sound futuristic, they are becoming popular for large gardens or farms, providing aerial views that help spot issues like pest infestations or overwatering in hard-to-reach areas. Gardeners can also use motion-detection cameras to monitor for intruders, such as deer or rabbits, alerting them before significant plant damage occurs.

For larger properties, drones with specialized imaging can identify early signs of plant stress, enabling timely interventions that would be difficult to notice from ground level.


Technology is opening new doors for gardeners by making it easier to understand, monitor, and maintain their plants. Smart irrigation, soil sensors, gardening apps, and even drones are redefining what is possible in the backyard. For those passionate about growing plants, embracing these tools not only makes gardening more accessible and enjoyable but also promotes healthier plants and more sustainable practices.

With technology by your side, you can be a green thumb in today’s digital world – making gardening a rewarding hobby or even a year-round passion project. Whether it’s a smartphone app or an entire smart greenhouse, there is always a technological solution ready to help you cultivate your garden paradise.

Friday, November 29, 2024

Amaryllis Magic: Winter Cheer

Winter is a magical time for indoor gardening, and the amaryllis stands out as one of the most stunning winter-blooming plants. Known for its impressive, large flowers that can range from pristine white to deep red, the amaryllis adds vibrant color to holiday decor and offers a rewarding gardening experience.

To begin your amaryllis journey, plant the bulb in the fall, ideally in late October or early November. This timing allows the plant to bloom beautifully during the winter months. 

Select a healthy bulb from a reputable source and choose a pot that is about 1-2 inches wider than the bulb. Use a well-draining potting mix, and when potting, ensure that the top one-third of the bulb remains above the soil to prevent rot. Place the pot in a warm, bright location—around 70°F (21°C) is ideal. Water thoroughly after planting, making sure excess water can drain away.

As the plant grows, thick, sturdy stalks will emerge, followed by large, trumpet-shaped flowers. These blooms can last for several weeks, creating a cheerful atmosphere in your home. To maintain the plant’s appearance, remember to turn it regularly to ensure even light exposure and prevent it from leaning toward the light source.

Once the flowers fade, proper care for the foliage is essential. Allow the leaves to die back naturally, as they play a crucial role in photosynthesis, storing energy in the bulb for future growth. When the leaves turn yellow and begin to wither, you can cut them back to the bulb.

For those looking for an easier option, waxed amaryllis bulbs have become increasingly popular. Coated in colorful wax, these bulbs require no soil or potting and can simply be displayed in bright, indirect light. The wax helps retain moisture, allowing the bulb to grow without the need for watering. While waxed bulbs are typically intended to be discarded after blooming, they can be revived with a bit of effort.

After the flowers fade, you can remove the wax and any wire from the bulb. If the bulb is still firm, you can plant it in a well-draining potting mix, treating it like a traditional amaryllis bulb. Plant it with the top one-third exposed above the soil, place it in a warm, bright location, and resume regular care. With proper attention, the bulb may produce new growth and bloom again.

If you choose to save a traditional amaryllis for next year, give it a resting period of about eight weeks in a cool, dark place after the blooms fade. Repot the bulb in fresh soil, lightly water it, and return it to a warm, bright location to stimulate new growth.

With the right care, both traditional and waxed amaryllis bulbs can bloom again, bringing joy and beauty to your home year after year. Understanding their unique needs—from planting in the fall to post-bloom care—allows you to enjoy the spectacular flowers of the amaryllis long after the holiday season has passed, making it a cherished addition to your indoor garden.

Friday, November 1, 2024

Chill Out! Cold Stratification for Native Plants

Cold stratification is an important step for growing many native plants in USDA Hardiness Zone 7. This process mimics winter conditions, helping seeds break dormancy and ensuring they germinate at the right time in spring. In the Boise area, which is situated in Ecoregion Level III 12 (Snake River Plain) and borders Ecoregion Level II 10.1 (Cold Deserts), you have a unique opportunity to cultivate a variety of native plants. Whether you’re interested in wild sunflowers, asters, goldenrods, lupines, purple coneflowers, milkweed, or penstemon, following these steps will help you successfully propagate these beautiful species in your garden.

Understanding the Ecoregion

Ecoregion 12 features a mix of desert and semi-arid environments, characterized by cold winters and warm, dry summers. The region's soils vary from sandy to clayey, which influences the native plant communities that thrive here. Plants in this area have adapted to withstand drought and temperature extremes, making them well-suited for home gardens that aim to support local wildlife and conserve water.

Starting Seeds Indoors or in a Greenhouse

Starting your native seeds indoors or in a greenhouse allows you to control conditions better. Follow these steps:

  1. Gather Your Seeds: Collect seeds from native plants in the fall, ensuring they are fully mature and dry.

  2. Prepare Your Pots: Use seed-starting pots filled with a seed-starting mix. Make sure the pots have drainage holes.

  3. Moisten the Medium: Lightly moisten the seed-starting mix so it's damp but not soggy.

  4. Cold Stratification:

    • Option A: Directly in Pots: Sow the seeds in the pots, covering them lightly with soil only if they don’t require light to germinate. If they do need light, surface sow seeds and place the pots in the refrigerator for 4-12 weeks. Keep the pots in a plastic bag to retain moisture.

    • Option B: Pre-soaking: Alternatively, mix seeds with a moist medium like sand or peat moss in a zip-top bag, refrigerate for 8-12 weeks, and then surface sow them in pots after stratification.

  1. Move to Light: After the stratification period, move your pots to a well-lit area or greenhouse. Ensure they receive plenty of light but avoid direct, harsh sunlight at first.

  2. Water Regularly: Keep the soil consistently moist (but not waterlogged) as the seeds begin to germinate.

  3. Transplanting: Once the seedlings have a few true leaves and the danger of frost has passed, transplant them into your garden or larger containers.

Starting Seeds Outdoors in your garden or raised beds

  1. Gather Seeds: Collect seeds in the fall from mature plants, ensuring they are fully dry. This timing allows you to utilize natural seasonal changes for germination.

  2. Prepare the Planting Area: Choose a well-draining spot in your garden or raised beds. Loosen the soil and remove any weeds or debris.

  3. Surface Sow: Scatter the seeds on the surface of the soil. Many native seeds benefit from light exposure to germinate, so avoid covering them deeply. If the seeds require some soil coverage, lightly sprinkle a thin layer of soil over them.

  4. Watering: Gently water the area to help settle the seeds into the soil without washing them away. Ensure the soil stays consistently moist, especially during dry spells.

  5. Winter Conditions: As winter arrives, the seeds will experience natural cold stratification, which helps break dormancy and prepares them for germination.

Benefits of Cold Stratification By cold stratifying your seeds, you help ensure healthy germination and align plants with their natural growing cycles. This process also supports local ecosystems by enhancing biodiversity, stabilizing soil, and conserving water.

With a little preparation, you can successfully cultivate beautiful native plants that thrive in your region, including wild sunflowers, asters, goldenrods, and lupines. 

Happy gardening!

Sunday, October 8, 2023

Potato harvest time! How do you like them?

One of my favorite vegetables is the humble and oh so delicious potato!  Watch this video for tips on when and how to harvest. You can harvest young potatoes when the vines are still green - or wait until the vines die for final harvest...or both!  

Here's an article about how to have a successful potato garden. Also there are many ways to store and then enjoy throughout the seasons.

My family enjoys it mashed, cubed, roasted, shredded...I don't think there is a potato preparation they would turn down. One of the simplest - and most delicious - is oven roasted potatoes. Easy to prepare and oh so delicious!

Roasted potatoes in a convection oven

3-4 large potatoes, cubed

1 tablespoon of olive oil

salt and pepper to taste

dried or fresh herbs (optional). We love Rosemary or Thyme

Directions: add your cubed potatoes to a large bowl.  Pour the olive oil over the potatoes and then toss them until they are evenly coated.  Evenly coat them with salt and pepper.  

Put them on a rack (we use a cooling rack that is oven safe) on a cookie sheet. Place in a convection oven at 400 degrees for 35-40 minutes or until the edges of the potatoes are crisp and brown.

Remove from oven, and enjoy!  Find more delicious potato recipes here!

Sunday, June 25, 2023

Stay sharp! Maintaining your lawn care equipment.

To keep your mower in tip-top running condition, have a competent service professional thoroughly inspect your mower at least once a year.
Inspection areas:
Sharpening and balancing the blade - A dull blade tears grass and can leave it prone to disease, and an unbalanced blade can cause your mower excess wear and tear.
Check the air filter - If you are using the mower in dry or dusty conditions, you will need to replace the air filter more often.
Check the spark plug - Always ensure that the spark plug is clean and gapped correctly.
Check the carburetor - and have it adjusted if necessary.
Check the oil - and have it changed if needed.
Check the wheels, bags, and
belts
- and replace as needed. Consider blowing off mower after each use.


Your lawn mower is likely the most frequently used piece of outdoor power equipment that you own - here's a maintenance calendar that's handy to use. Proper maintenance is extremely important to maximizing efficiency, reducing emissions, preventing costly repairs and extending the life of your lawn mower. By keeping your mower in proper working order, you can help maintain a healthy environment, pocketbook and lawn.
For more information on lawn care, contact your local University of Idaho Extension office!