Showing posts with label fall. Show all posts

Friday, August 15, 2025

Late Summer Perennial Division: Give Your Plants a Fresh Start

By mid- to late August in Boise, most of our early summer blooms have finished their show. The garden settles into a slower, late-season rhythm: greens deepen, seed heads form, and those long, golden evenings hint at autumn’s arrival. It’s the perfect time to give some of your hard-working perennials a fresh start by dividing them.

Division is like a spa day for plants—it reinvigorates growth, prevents overcrowding, and even gives you extra divisions to plant elsewhere or share with friends. In our high-desert climate, with hot summers and fast-cooling autumn nights, late-summer division is a smart move. The warm soil helps roots reestablish, and cooler evenings reduce transplant stress. As the University of Minnesota Extension points out, dividing perennials stimulates new growth, encourages more vigorous blooming, and improves airflow to help reduce disease pressure. 

The best candidates for this timing are spring- and early summer-bloomers. Day-lilies, bearded iris (divided right after their flowers fade), cheerful Shasta daisies, and peonies all respond well to late August or early September division. Creeping phlox, shade-loving hostas, and sturdy yarrow also benefit from this seasonal refresh. Fall bloomers like asters and mums are best left until spring so their floral display isn’t interrupted.

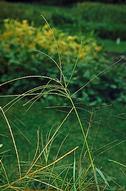
Some of our native perennials can be treated the same way. Coneflowers and goldenrod both respond beautifully to late-summer division, sending up vigorous new shoots the following spring. Blanket flower and prairie smoke also divide well now. Others—like penstemon, globe mallow, and showy milkweed—tend to resist root disturbance and are better propagated from seed or cuttings rather than being dug and split.

Your plants will often tell you when they need attention. A thinning or bare center in the clump, smaller or fewer blooms, or an enthusiastic spread that’s crowding out its neighbors are all signs that a division is in order. When you’re ready, start by watering thoroughly the day before so the roots are well-hydrated. Work carefully with a spade or fork to lift the entire root ball, keeping as much root intact as possible. Then gently tease the clump apart by hand or use a sharp knife to create new sections, each with healthy roots and several strong growing points. Prepare the planting area with compost to give your divisions a nutrient boost, and replant promptly at the same depth they were growing before. If you’re not ready to place them in the garden, you can also pot up divisions in containers, keeping them watered and sheltered until you’re ready to plant, donate, or share them. Water deeply, and keep the soil consistently moist until you see new growth.

For the smoothest recovery, work in the cool of morning or evening, and if the sun is intense, offer a bit of temporary shade for a few days. A light mulch will help regulate soil temperature and hold in moisture.

By tending to this now, you’ll set the stage for stronger, healthier plants next spring—and perhaps even have a few extras to share with friends or donate to a community plant sale. Sometimes, the best way to help a plant thrive is to give it the gift of space and a fresh beginning.

We've included links to show you more:

Friday, October 27, 2023

Soil health? Now is the time to prepare!

The season is winding down. The weather is getting colder and it's about time to start putting away your yard and garden tools. But hold your horses! Now is an excellent time to prepare your soil for next year! 
I recommend 2 articles written by Ron Patterson - from the University of Idaho Extension office. The first article talks about the importance of soil health (found here), and the second article talks about the good and bad (mostly good!) of planting cover crops (found here).
Having healthy soil is worth every effort.  From better tasting vegetables to fewer weeds, it is absolutely worth it! 

Sunday, October 8, 2023

Potato harvest time! How do you like them?

One of my favorite vegetables is the humble and oh so delicious potato!  Watch this video for tips on when and how to harvest. You can harvest young potatoes when the vines are still green - or wait until the vines die for final harvest...or both!  

Here's an article about how to have a successful potato garden. Also there are many ways to store and then enjoy throughout the seasons.

My family enjoys it mashed, cubed, roasted, shredded...I don't think there is a potato preparation they would turn down. One of the simplest - and most delicious - is oven roasted potatoes. Easy to prepare and oh so delicious!

Roasted potatoes in a convection oven

3-4 large potatoes, cubed

1 tablespoon of olive oil

salt and pepper to taste

dried or fresh herbs (optional). We love Rosemary or Thyme

Directions: add your cubed potatoes to a large bowl.  Pour the olive oil over the potatoes and then toss them until they are evenly coated.  Evenly coat them with salt and pepper.  

Put them on a rack (we use a cooling rack that is oven safe) on a cookie sheet. Place in a convection oven at 400 degrees for 35-40 minutes or until the edges of the potatoes are crisp and brown.

Remove from oven, and enjoy!  Find more delicious potato recipes here!

Tuesday, June 7, 2022

Don’t Let Crabgrass Make You Crabby!

Crabgrass is a nuisance! It is a group of weedy grasses in North America - Digitaria sanguinatis (large or hairy crabgrass) and Digitaria ischaemum (small or smooth crabgrass). It likes lawns that are under watered, under fertilized and badly drained or in other words, a “neglected lawn”. Even a well-cared-for lawn will have an occasional visit especially during difficult weather conditions and drought.

Crabgrass was introduced into the United States in 1849 by the U.S. Patent Office as a potential forage crop. It is good in dry and hot areas for summer forage, but we don't want it in our lawns.


Smooth crabgrass.
Smooth crabgrass
Large crabgrass in a lawn.
Large crabgrass in a lawn
Smooth crabgrass seedling.
Smooth crabgrass seedling


As an annual, crabgrass germinates, sets seed, and dies within one year. There is no need for fall expenses to get rid of it. Winter will do it for you.


Even when you mow it closely, crabgrass can still seed and will hurt your lawns vitality. A single plant can produce 150,000 seeds and the can remain viable for three years in the soil. 

DO NOT LET IT GO TO SEED.

Flowering stem of smooth crabgrass.
Flowering stem of smooth crabgrass


There is no biological control to get rid of crabgrass other than livestock, however there are complete treatments you can buy and apply to get rid of crabgrass:

- Preventive treatments

- Organic sprays and treatments

- Selective chemical herbicides

- Non-selective herbicides

Or you can establish practices for maintaining a healthy lawn that naturally discourage crabgrass from thriving:

1)  Planting the right turf grass species (shade, traffic, sun).

2)  Watering correctly (full coverage and depth for good rooting for your variety of grass).

3)  Proper fertilization (periodic application during growing season for your grass variety).

4)  Regular dethatching and/or core aeration every couple of years.

5)  Mowing the proper height for your grass variety and season.

How about here in the Treasure Valley?

For problem lawns in the Treasure Valley, start with applying per-emergent when temperatures in soil reach 50-55 degrees F for at least 4-5 straight days mid-March/April.  Mow proper lawn height for your grass. Apply per label instructions, water in and have no rain for 24 hours. Use a broom and not a blower to remove from concrete. You especially want crabgrass protection between the grass and concrete. Wait a least two days to mow after application to keep from lifting any residue. Apply again in 3 months / 90 days.

For small infections, crabgrass can be removed by hand, the younger the easier. Water area and pull at base of plant gently to remove. Do not put weeds in your compost pile.

For bigger problems, check the following website or your local cooperative extension office for help.    

Wednesday, November 8, 2017

Or I'll huff, and I'll puff, and I'll dry your ground out!


Or I’ll huff, and I’ll puff, and I’ll dry your ground out


One of the trademarks of living in Idaho seems to be wind. Learning how to adapt can be challenging to any newcomer. Unless you are from, say, Chicago? In any case, being aware of how wind affects your landscape can help in protecting them during our often dry, windy fall and winter seasons.

Drying winds strip plants, turf, and the soil of much needed moisture. As the wind blows it wicks the moisture out of the plant, and the soil. As the low humidity and wind blow, plants can’t replenish the water they lose through their leaves, or needles. This is one reason you may have a brown cast on the edge of your evergreen needles.

On perennial shrubs, such as roses or lilacs, damage to terminal growing points can occur.

There are several things to keep in mind about your landscape if you live in these windy areas.


1. Fall and winter watering is not an option. Failure to water your plants is the most common cause of plant stress I see in landscapes. And just because your landscape is mature, does not mean you can stop watering it. You don’t stop drinking water just because you've matured, do you?


2. Mulch can help retain moisture in the soil. Yes, I know, it’s windy and the wind blows your mulch all the way to Kansas. Well, I am sure the people of Kansas appreciate your contribution to their fine state. Really though, mulching can make a big difference in how much water your soils will hold.


3. Add organic matter to your soil. Incorporating 2-3 inches of plant based organic matter at a depth of 4-6 inches will help hold in water if you have sandy soil, or help water drain if you have clayey soil. Either way, adding organic matter such as composted plant material will benefit your plants. Just be careful if you use animal manure as compost as these contain salts and heavy metals that build up in the soil over time, and can increase the risk of food borne pathogens if used improperly in vegetable gardens.


For more information on fall or winter watering, visit your county Extension office.


Thursday, October 20, 2016

Frost dates in Idaho.

Because frosts kill tender plants and seedlings, knowing the average frost free date in your community is an important tool for aiding in successful gardening. 


As a rule of thumb for Idaho, the average last frost free date in the spring is around Mother’s Day. It is important to note that this is an average date. In some years, the last frost can be as early as April, or as late as June.


In the autumn, the average first frost usually occurs around the first week of October. Again this is only an average, and some frost can occur as early as mid September or late October around Halloween.


You can extend your growing season by placing a hoop house or covering your plants with a sheet of clear plastic to protect against light frosts.


For more information on gardening, contact your local University of Idaho Extension Office or visit us on Facebook