Showing posts with label bk. Show all posts

Saturday, October 31, 2026

Chill Out! Cold Stratification for Native Plants

 
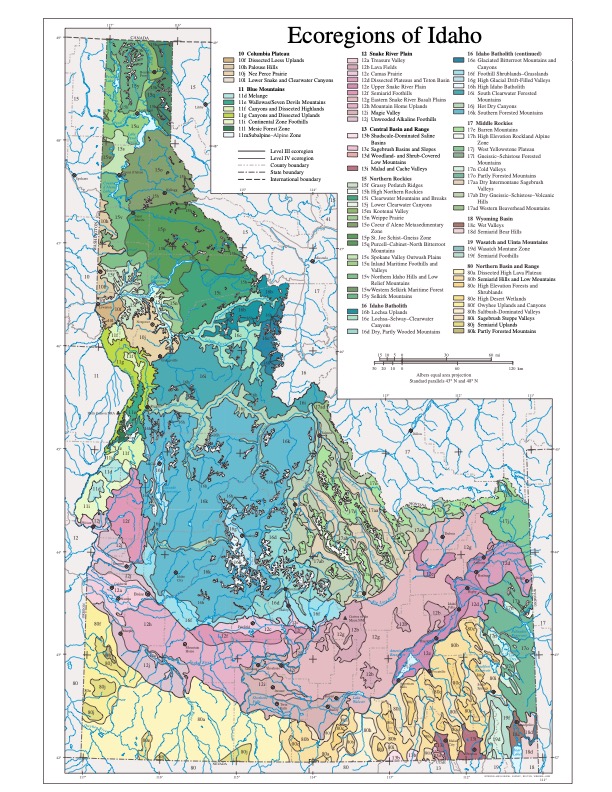
Cold stratification is an important step for growing many native plants in USDA Hardiness Zone 7. This process mimics winter conditions, helping seeds break dormancy and ensuring they germinate at the right time in spring. In the Treasure Valley area, which is situated in Ecoregion Level III 12 (Snake River Plain) and borders Ecoregion Level II 10.1 (Cold Deserts), you have a unique opportunity to cultivate a variety of native plants. Whether you’re interested in wild sunflowers, asters, goldenrods, lupines, purple coneflowers, milkweed, or penstemon, following these steps will help you successfully propagate these beautiful species in your garden.

Understanding the Ecoregion

Ecoregion 12 features a mix of desert and semi-arid environments, characterized by cold winters and warm, dry summers. The region's soils vary from sandy to clayey, which influences the native plant communities that thrive here. Plants in this area have adapted to withstand drought and temperature extremes, making them well-suited for home gardens that aim to support local wildlife and conserve water.

Starting Seeds Indoors or in a Greenhouse

Starting your native seeds indoors or in a greenhouse allows you to control conditions better. Follow these steps:

  1. Gather Your Seeds: Collect seeds from native plants in the fall, ensuring they are fully mature and dry.

  2. Prepare Your Pots: Use seed-starting pots filled with a seed-starting mix. Make sure the pots have drainage holes.

  3. Moisten the Medium: Lightly moisten the seed-starting mix so it's damp but not soggy.

  4. Cold Stratification:

    • Option A: Directly in Pots: Sow the seeds in the pots, covering them lightly with soil only if they don’t require light to germinate. If they do need light, surface sow seeds and place the pots in the refrigerator for 4-12 weeks. Keep the pots in a plastic bag to retain moisture.

    • Option B: Pre-soaking: Alternatively, mix seeds with a moist medium like sand or peat moss in a zip-top bag, refrigerate for 8-12 weeks, and then surface sow them in pots after stratification.

  1. Move to Light: After the stratification period, move your pots to a well-lit area or greenhouse. Ensure they receive plenty of light but avoid direct, harsh sunlight at first.

  2. Water Regularly: Keep the soil consistently moist (but not waterlogged) as the seeds begin to germinate.

  3. Transplanting: Once the seedlings have a few true leaves and the danger of frost has passed, transplant them into your garden or larger containers.

Starting Seeds Outdoors in your garden or raised beds
  1. Gather Seeds: Collect seeds in the fall from mature plants, ensuring they are fully dry. This timing allows you to utilize natural seasonal changes for germination.

  2. Prepare the Planting Area: Choose a well-draining spot in your garden or raised beds. Loosen the soil and remove any weeds or debris.

  3. Surface Sow: Scatter the seeds on the surface of the soil. Many native seeds benefit from light exposure to germinate, so avoid covering them deeply. If the seeds require some soil coverage, lightly sprinkle a thin layer of soil over them.

  4. Watering: Gently water the area to help settle the seeds into the soil without washing them away. Ensure the soil stays consistently moist, especially during dry spells.

  5. Winter Conditions: As winter arrives, the seeds will experience natural cold stratification, which helps break dormancy and prepares them for germination.

Benefits of Cold Stratification By cold stratifying your seeds, you help ensure healthy germination and align plants with their natural growing cycles. This process also supports local ecosystems by enhancing biodiversity, stabilizing soil, and conserving water.
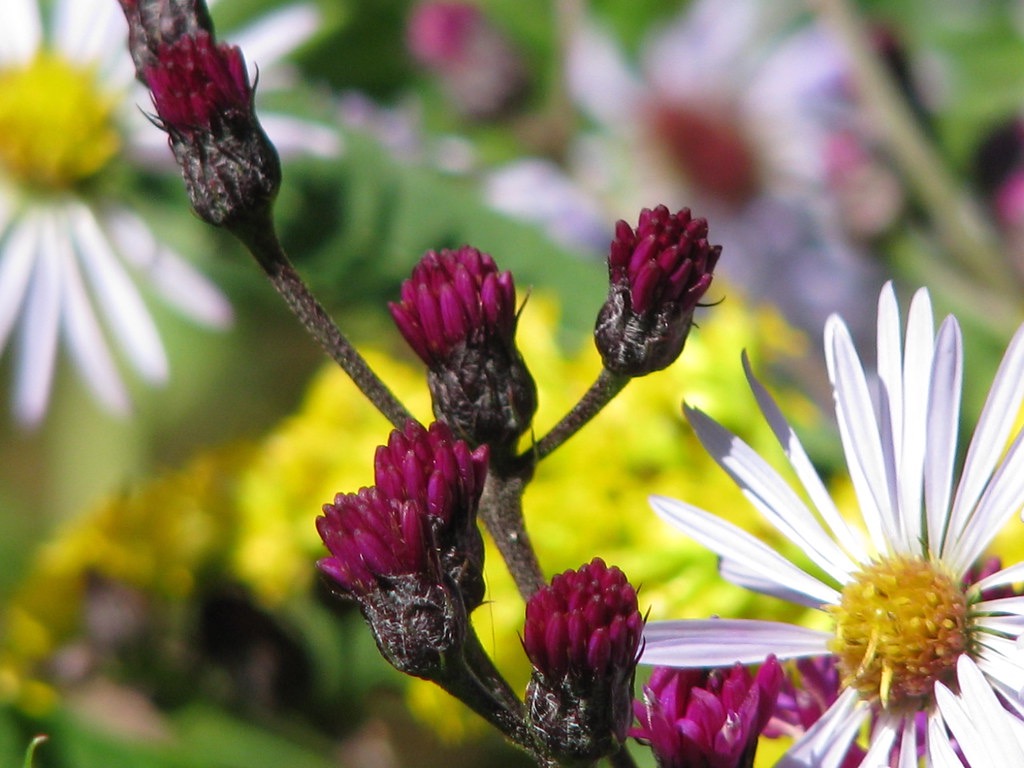
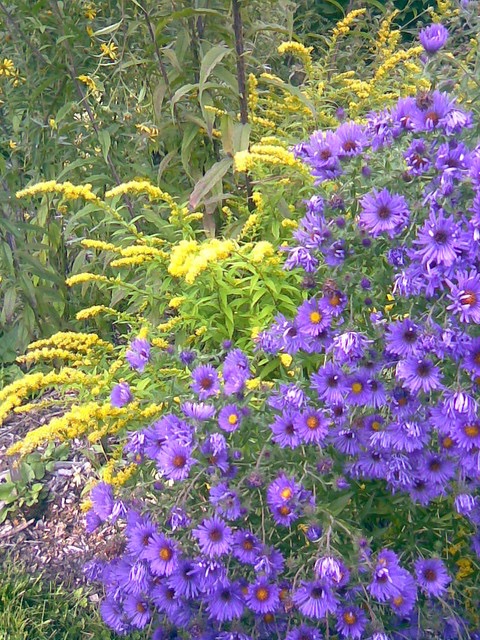
With a little preparation, you can successfully cultivate beautiful native plants that thrive in your region, including wild sunflowers, asters, goldenrods, and lupines. 

Happy gardening!

Friday, October 23, 2026

A Purrfectly Wicked Reputation

A black cat crosses your path. Do you turn around? Knock on wood? Or simply wonder where it's headed?

For centuries, black cats have been blamed for everything from bad luck to witchcraft. They've been accused of casting spells, bringing misfortune, and keeping suspicious company.

All this from an animal that spends roughly half its life sleeping and the other half pretending it hasn't been fed.

So how did black cats get such a spooky reputation?

In medieval Europe, black cats became associated with witches. Some people believed witches could transform themselves into cats, while others thought the animals served as magical assistants, known as familiars.

Imagine being a perfectly ordinary cat, minding your own business, only to discover the entire village thinks you're practicing witchcraft.

Talk about bad publicity!

And if that weren't enough, stories of winged cats added another twist to feline folklore. These mysterious creatures, sometimes described as cats with batlike wings, sound as though they wandered straight out of a witch's spellbook.

A Bat Cat? Apparently, four paws and nine lives weren't mysterious enough!

But here's where the story takes an interesting turn.

Not everyone thought black cats were trouble.

In Scotland, a black cat arriving at your doorstep was traditionally considered a sign of prosperity. Japanese folklore has also associated black cats with good fortune. And sailors sometimes welcomed black cats aboard their ships as lucky companions.

Apparently, whether a black cat brings good luck or bad luck depends largely on where it happens to be walking.

The cat, of course, couldn't care less.

And what about Halloween?

By the time Halloween decorations became popular, black cats had found their permanent place alongside witches, broomsticks, and jack-o'-lanterns.

Vintage Halloween decorations from the early 1900s featured plenty of arched backs, glowing eyes, and mysterious black silhouettes.

Yet there's something rather wonderful about a creature once feared for its supposed supernatural powers becoming one of Halloween's most beloved symbols.

And perhaps black cats really do possess a little magic.

They can appear out of nowhere, vanish without a sound, see things we can't, and convince perfectly sensible humans to serve them dinner on demand.

Coincidence? We think not.

So, on October 29, National Cat Day, give those mysterious black felines a little appreciation.

And if a black cat crosses your garden path this Halloween, don't worry about bad luck.

It's probably just checking whether you've planted any fresh catnip.

Happy National Cat Day!

https://www.aaa.si.edu/blog/2017/10/the-good-the-bad-and-the-black-cat

Friday, October 16, 2026

Green Is So Last Season

Every fall, green leaves turn shades of yellow, orange, red and purple. It may look like the trees are putting on one last show before winter, but what we are really seeing is plant chemistry at work.

During spring and summer, leaves are dominated by chlorophyll, the green pigment essential for photosynthesis. Chlorophyll absorbs light energy that plants use to turn carbon dioxide and water into sugars. There are other pigments in the leaf all along, but the abundance of chlorophyll masks
many of their colors.

As autumn approaches, shorter days and cooler temperatures signal deciduous trees that winter is coming. The tree begins preparing to shed its leaves. Chlorophyll production slows and eventually stops, while existing chlorophyll breaks down.

As the green fades, pigments that were there all summer finally become visible.

Carotenoids produce yellow, gold and orange colors. These pigments help plants capture light and protect leaf tissues from excess light during the growing season. They are responsible for the yellow of aspens and the golden-orange colors seen in many other trees. Carotenoids are also what give carrots their orange color.

Red and purple fall colors work a little differently

Anthocyanins
 produce reds, purples and crimson shades. Unlike carote
noids, which are already present in the leaf, many anthocyanins are produced in late summer and fall. As the tree prepares to close off the connection between the leaf and branch, sugars can become trapped in the leaf. Bright, sunny days encourage sugar production, while cool—not freezing—nights slow the movement of those sugars out of the leaf. Under the right conditions, anthocyanin production increases.

That helps explain why fall color can be spectacular one year and less impressive the next.

Weather matters. A succession of sunny days and cool nights can favor brilliant reds. Drought, an early hard freeze, prolonged warm weather or storms that strip leaves from trees can shorten or dull the display

Eventually, the tree forms an abscission layer where the leaf stem joins the branch. This layer gradually cuts off the movement of water and nutrients. The leaf falls, leaving the tree better prepared to conserve resources through winter.


So when you see a tree changing from green to gold, orange or crimson, you aren't simply watching leaves “die.” You're seeing chlorophyll disappear, other pigments revealed or produced, sugars shift, and the tree carefully shut down a leaf it no longer needs.

Fall color is beautiful—but it is also a pretty impressive chemistry lesson happening right over our heads.


https://extension.illinois.edu/blogs/flowers-fruits-and-frass/2025-10-21-science-and-splendor-fall-foliage

https://www.fs.usda.gov/visit/fall-colors/joy-and-science


Monday, October 5, 2026

What Are All Those Flies in My Fall Garden?

If you’ve noticed an unusual number of large, bristly flies hanging around your flowers this fall, take a closer look before reaching for the fly swatter. They may be tachinid flies, and they are some of the good guys in the garden.

Tachinid flies are a large and diverse family of beneficial insects. More than 1,000 species are found in North America. Depending on the species, they can look a bit like an ordinary housefly—gray, brown or black—but many are noticeably bristly. Some are surprisingly large and robust.

 What makes them beneficial?

It’s what happens during their larval stage that makes tachinid flies important to gardeners.

Female tachinids use other insects as hosts for their young. Some lay eggs directly on a host, while others have different strategies for getting their larvae inside. Once there, the developing fly larva feeds within the host and eventually kills it.


Their hosts can include caterpillars, beetle larvae, grasshoppers, sawflies and true bugs. That means tachinids can help naturally suppress a number of insects we consider garden pests.

The adult flies are much more peaceful. They visit flowers for nectar and can also contribute to pollination. University of Idaho recommends flowering plants as a way to support tachinid flies and other beneficial insects.

Why am I seeing so many in fall?

You may barely notice tachinid flies earlier in the season and then suddenly find them everywhere in late summer or fall. There are many different tachinid species, with different life cycles and hosts, so their numbers and timing can vary considerably.

Late-season gardens can also make the adults much easier to notice. As the number of blooming plants dwindles, remaining flowers become busy gathering places for insects looking for nectar. A successful generation of tachinids developing from insects earlier in the growing season can also mean more adults appearing later.

So a sudden gathering on fall flowers doesn't necessarily mean something is wrong. It may simply mean your garden has provided both the insect hosts and the floral resources these beneficial flies need.

Let them stay awhile

If tachinid flies are visiting your garden, there’s generally nothing you need to do. Keep some flowers blooming as late into the season as possible and avoid unnecessary broad-spectrum insecticides that can kill beneficial insects along with pests.

They may not be as charming as a butterfly or as recognizable as a lady beetle, but tachinid flies are quietly doing some valuable work.

Sometimes a garden full of flies is actually a very good sign.

https://hort.extension.wisc.edu/articles/tachinid-flies/

https://agsci.colostate.edu/agbio/ipm-pests/tachinid-flies/

https://treefruit.wsu.edu/crop-protection/opm/tachinids/


Tuesday, September 15, 2026

A Dead Hedge: An Old Idea Worth Bringing Back

What if some of this fall’s pruning didn’t need to leave your yard at all?

A dead hedge is a simple structure made by placing branches, twigs and woody garden cuttings between two rows of upright stakes. Unlike a loose brush pile, everything is contained in a narrow space, creating something that can look surprisingly intentional while providing habitat for wildlife.

And despite its recent popularity in wildlife gardening, the idea isn’t new.

For centuries, people used branches, brush and woven woody material to create barriers around fields and gardens. Early versions served a practical purpose—marking boundaries, controlling livestock and protecting planted areas. Dead hedges were also associated with traditional woodland management, where branches left from cutting and managing trees and shrubs could be stacked between stakes rather than hauled away. Some of those brush barriers eventually collected seeds and supported living vegetation, helping form the hedgerows that became such a familiar part of the British landscape.

Today, the dead hedge has found another job: backyard habitat.

As branches settle and slowly decay, the spaces between them provide cover and protected areas for insects and other invertebrates, while birds may use the structure for shelter, foraging or nesting. The Royal Horticultural Society notes that dead hedges have long been used in managed woodlands and nature reserves and are increasingly being incorporated into gardens.

That doesn’t mean you need a large property.

In a subdivision yard, a dead hedge might be only three or four feet long. Place it along a back fence, beside a shed, behind a garden bed or around a compost area. Drive two parallel rows of sturdy stakes into the soil and layer woody prunings lengthwise between them. Keep the sides neat and trim anything protruding into walkways.Then simply add to it as you prune.

Fall is an especially easy time to start because branches from shrubs, small trees and woody perennials are already part of garden cleanup. Avoid adding diseased plant material, invasive plants that could spread, or anything treated with pesticides that could harm the wildlife you’re trying to support.

For homeowners who like a tidy garden, a dead hedge offers a nice compromise: less material to haul away, a place to put future prunings, and a little more habitat tucked into the landscape.

It may be called a dead hedge, but there can be quite a bit of life inside.

Sunday, August 16, 2026

Curled Tomato Leaves: Stress or Curly Top?

Seeing curled leaves on your tomato plants can be alarming, but curled leaves do not always mean disease. In many cases, the plant is simply reacting to stress.

Physiological leaf roll is a common response to growing conditions. It usually begins on older leaves near the bottom of the plant. The edges of the leaves cup upward and may roll inward, sometimes forming a tight, tube-like shape. Even though the leaves look unusual, the plant generally stays green, continues growing, and keeps producing fruit. Fruit quality and yield are usually not seriously affected.

Several things can trigger physiological leaf roll. Hot weather, drought, uneven watering, overly wet soil during high temperatures, heavy pruning, too much nitrogen, phosphorus deficiency, or a heavy fruit load can all contribute. Some tomato varieties are also more prone to leaf roll than others. The best response is usually simple: keep soil moisture as even as possible, avoid overfertilizing, and do not remove too much foliage at once. During extreme heat, temporary afternoon shade may also help reduce stress. There is no need to remove the plant just because the leaves are rolled.

Beet curly top disease is different. It is caused by Beet curly top virus and is spread by the beet leafhopper. Tomatoes are commonly affected, but peppers, beans, squash, table beets, Swiss chard, melons, cucumbers, and many weeds can also serve as hosts.

Curly top causes more than curled leaves. Infected plants may become yellow and stunted. Leaves can look thick, leathery, twisted, or brittle, and the veins may turn purple. New growth may be distorted, fruit production may slow or stop, and young plants can die. Unlike physiological leaf roll, plants infected with curly top do not recover.

Take a look at the whole plant before deciding what is wrong.

Is the plant still green and growing normally, with curling mainly on the older, lower leaves? Is it still setting and ripening fruit? That points more toward physiological leaf roll.

Is the plant stunted, yellowing, brittle, or declining? Are the newest leaves distorted? Do you see purple veins, leathery foliage, or very little fruit? Those symptoms are more concerning for beet curly top.

Plants suspected of having curly top should be removed because they will not improve. Managing nearby weeds may help reduce possible host plants. Young transplants can also be protected with row cover or shade cloth while they are becoming established, as long as row covers are removed when pollination is needed.

The bottom line: Leaf curl by itself does not equal curly top. Look at the plant’s color, growth, leaf texture, fruiting, and overall health before reaching a conclusion.

Interested in learning more?

Tuesday, June 9, 2026

Why Are My New Plants Struggling? It Might Be the Soil.

Every spring, gardeners add fresh compost, topsoil, or raised bed mix and expect their new plants to thrive. Instead, plants may wilt, grow slowly, or struggle to establish despite regular watering.

Before reaching for fertilizer, consider a common issue with newly installed soil: it may not be fully hydrated. When very dry, some soil mixes can become hydrophobic, meaning they repel water rather than absorb it.

New Soil Can Be Hard to Wet

Many soil blends contain peat moss, compost, bark fines, or coconut coir. When these materials become very dry during storage or transport, they can resist water instead of absorbing it.

Gardeners may notice water pooling on the surface, running off the bed, or disappearing quickly while parts of the soil remain dry.

The soil isn't necessarily poor quality—it may simply need time to rehydrate.

Infiltration vs. Retention

A common misunderstanding is confusing water infiltration with water retention.

Infiltration is how water enters the soil.

Retention is how well the soil holds that water for plant roots.

A bed may appear to take water because it disappears from the surface, but water can move through cracks or channels in dry soil without fully wetting the root zone. For plants to thrive, soil must both absorb water and hold it where roots can use it.

Rewetting Takes Time

One of the biggest surprises for gardeners is how long it can take to fully hydrate a new bed.

A couple of waterings may not be enough. Depending on the soil mix and how dry it was, it can take several days—or even a week or more—of repeated irrigation to evenly moisten the entire bed. 

The goal is not simply to wet the surface. The goal is to hydrate the entire root zone.

Why New Plants May Struggle

Plants growing in partially hydrated soil often show signs of stress even when watered regularly.

Common symptoms include:

  • Wilting during warm afternoons
  • Slow or stalled growth
  • Yellowing leaves
  • Blossom drop on vegetables
  • Uneven growth across the bed

The soil surface may appear damp while just a few inches below remains dry. Young transplants are especially vulnerable because their roots are still small and concentrated near the planting hole.

Check Below the Surface

A soil moisture meter can help identify dry pockets that aren't visible from above. However, newly filled beds with coarse compost, bark, or large air spaces can sometimes produce inconsistent readings.

The best method is still to dig down a few inches with a trowel and feel the soil with your hand. Ideally, it should feel cool and slightly moist throughout the root zone, not dry and dusty below the surface.

Give the Soil Time to Catch Up

Water slowly, water repeatedly, and check moisture below the surface. Once the soil is evenly moist, apply mulch to help retain that moisture.

Many struggling transplants don't need more fertilizer—they need soil that can absorb and hold water consistently.

Sometimes the healthiest thing you can do for a new garden isn't feed the plants—it's help the soil learn to hold a drink.

Sunday, June 7, 2026

Who Sneezed on the Tomatoes? What Treasure Valley Gardeners Should Know About Plant Viruses

If you've gardened in the Treasure Valley for very long, chances are you've seen a tomato plant suddenly stop growing, develop curled leaves, and never recover. While insects, weather, and nutrient issues often get the blame, sometimes the culprit is a plant virus.

Plant viruses are not as common as fungal diseases, but they do occur in Idaho gardens. Unlike fungal diseases, plant viruses cannot be cured once a plant becomes infected. Understanding how they spread can help gardeners recognize problems early and make informed decisions.

One common misconception is that plant viruses come from the soil. In reality, most plant viruses do not survive freely in garden soil. Instead, they persist in infected plants, weeds, volunteer seedlings, perennial hosts, or occasionally seed. Insects then move the virus from one plant to another.

One of the most common viral diseases in the Treasure Valley is Beet Curly Top Virus (BCTV). It is spread by the beet leafhopper, an insect that migrates from weedy and rangeland areas into gardens and agricultural fields. Tomatoes, peppers, beans, potatoes, squash, and beets can all be affected. Symptoms often include upward leaf curling, thickened leaves, stunted growth, yellowing, and poor fruit production. Unfortunately, once a plant develops curly top, there is no cure.

Other viral diseases found in Idaho gardens include Cucumber Mosaic Virus (CMV), Tomato Mosaic Virus (ToMV), and Tobacco Mosaic Virus (TMV). These viruses can affect vegetables, flowers, and weeds. Symptoms may include mottled or "mosaic" patterns on leaves, leaf distortion, yellowing, reduced vigor, and stunted growth.

One challenge with diagnosing viral diseases is that many other problems can look similar. Herbicide drift, nutrient deficiencies, environmental stress, insect feeding, and even natural genetic variation can sometimes mimic virus damage. A plant with curled or mottled leaves does not automatically have a viral disease.

Viruses are commonly spread by insects such as aphids and leafhoppers. An aphid may feed briefly on an infected weed, pick up virus particles, and then transfer them while feeding on a healthy garden plant. In some cases, transmission can occur in just a few seconds.

Because viruses are spread by insect vectors, gardeners may occasionally see viral diseases even in gardens filled with beneficial insects. Lacewings, lady beetles, spiders, assassin bugs, and other predators help reduce pest populations, but they cannot always prevent a virus from being transmitted before the insect is eaten.

So what should a gardener do if a viral disease is suspected?

First, take a closer look before removing a plant. Not every unusual symptom is caused by a virus. If the diagnosis is uncertain and the plant is otherwise healthy, monitor it closely while watching for additional symptoms. However, if growth becomes severely stunted, symptoms worsen, or a viral disease is strongly suspected, removing the plant is often the best course of action.

Finally, practice good Integrated Pest Management (IPM). Manage weeds that may serve as virus reservoirs, encourage beneficial insects, keep tools clean, and maintain healthy growing conditions.

Most importantly, remember that not every odd-looking plant has a virus. Careful observation, patience, and a healthy dose of curiosity remain some of the gardener's most valuable tools.

Wednesday, June 3, 2026

Fire Blight: Recognizing and Managing a Common Fruit Tree Disease

If you grow apples, pears, crabapples, quince, or hawthorn in the Treasure Valley, fire blight is a disease worth watching for. Caused by the bacterium Erwinia amylovora, fire blight is one of the most destructive diseases affecting pome fruits and many ornamental plants in the rose family.

Fire blight affects apple, pear, crabapple, quince, hawthorn, cotoneaster, pyracantha, and mountain ash. While apples and pears often receive the most attention, many homeowners first notice the disease on ornamental landscape plants.
The bacterium survives the winter in cankers—sunken, infected areas on branches and trunks. As temperatures warm in spring, bacteria become active and may ooze from these cankers as sticky, amber-colored droplets. Insects attracted to the ooze can carry the bacteria to open blossoms. Rain, heavy dew, and splashing water can also spread the disease.

Infection is most common during bloom when temperatures are warm and moisture is present. One of the earliest signs is the characteristic "shepherd's crook," where young shoot tips wilt and bend over. Blossoms may turn brown or black and appear scorched. Leaves often remain attached to infected shoots, giving the tree a burned appearance. As the disease progresses, it can move into larger branches and form cankers. If a canker develops on the trunk or rootstock, it may girdle and kill the entire tree.

Prevention is the best defense against fire blight. When planting new fruit trees, select varieties and rootstocks with documented fire blight resistance whenever possible. Avoid excessive nitrogen fertilizer applications, which encourage lush, succulent growth that is more susceptible to infection. Proper spacing, pruning, and weed management can improve air circulation and help reduce humidity around trees.

Pruning is an important management tool. During the dormant season, remove old cankers and infected branches. Once fire blight is detected during the growing season, prune out infected shoots 12 to 18 inches below visible symptoms. Avoid pruning during wet weather, as bacteria can be spread by tools and splashing water. Severely infected young trees may need to be removed entirely.

Chemical controls are available but must be properly timed. Commercial growers may use antibiotic sprays during bloom when infection risk is high. Homeowners may have access to copper-based products labeled for fire blight suppression. Always read and follow label directions and apply products only according to label instructions.

Monitoring weather conditions and local fire blight forecasts can help determine when infection risk is greatest and when management practices will be most effective.

Sunday, April 5, 2026

Warm Winter? Watch for More Pests

Preparing for Pest Pressure After a Warm Winter
If your garden seems overrun with insects after a mild winter, you're likely spot-on. Mild winters, while enjoyable for us, often lead to heightened pest challenges come spring. Warmer-than-normal temperatures allow more insect pests to survive the cold season, resulting in earlier activity and potentially larger populations throughout the growing season. Typically, harsh winters act as a natural check on pest numbers. Many insects overwinter as eggs, larvae, pupae, or adults in protected spots like soil, leaf litter, plant stems, or bark crevices. Prolonged freezing kills off a portion of these populations, keeping numbers in balance. But during a warm winter, survival rates rise significantly. Pests such as aphids, mites, scale insects, caterpillars, and certain beetles can emerge sooner and in greater numbers. Warmer spring conditions accelerate their development, enabling faster reproduction and sometimes additional generations per season. For instance, experts note that milder winters reduce stress on overwintering insects, boosting spring survival and often giving pests a head start as plants green up earlier.
This dynamic also affects the predator-prey balance. Beneficial insects—like lady beetles, lacewings, and parasitic wasps—overwinter in similar garden debris, such as leaf litter or hollow stems. While many survive mild conditions too, pest populations frequently rebound quicker, creating a temporary imbalance where pests gain an advantage. Both harmful and helpful insects rely on these overwintering sites, so the key isn't total removal of debris but strategic management.
Gardeners are increasingly advised to delay heavy cleanup until spring, waiting until temperatures consistently hit around 50°F (10°C) to allow beneficials to emerge first. This protects pollinators and natural enemies while still permitting thoughtful tidying. Removing everything in fall or early spring can disrupt these helpful populations.
The best defense against elevated pest pressure is vigilant monitoring. As plants break dormancy, check regularly for insects or damage—focus on new growth and leaf undersides, where many pests congregate. Early detection makes control far easier, whether through hand-picking, water sprays, or targeted interventions before outbreaks escalate. Bolstering beneficial insects helps too. Plant diverse flowering species to supply nectar and pollen year-round, sustaining predators and parasitoids. Minimize unnecessary pesticides to preserve these allies, which naturally suppress pests. Healthy plants also fare better: ensure proper watering, sunlight, and soil nutrition so they withstand minor damage more resiliently.
A warm winter doesn't doom your garden to chaos, but it raises the odds of increased insect pressure. By staying proactive—monitoring closely, delaying cleanup thoughtfully, nurturing beneficials, and prioritizing plant health—you can manage challenges effectively while fostering a thriving, balanced ecosystem.

Friday, March 20, 2026

Why Fewer Flowers Now Mean More Flowers Later

Spring is here! 

The garden centers and plant sales are alive with color. Those pots bursting with open blooms are hard to resist—they deliver instant cheer and promise a garden full of flowers right away. But the plants that give the strongest, longest-lasting performance often have the fewest (or no) open flowers when you buy them.


Here’s why this counterintuitive choice usually leads to better results.


Roots Come First

Young plants work with a limited energy budget. In their early stages, they direct most of it toward developing a solid root system and sturdy stems and leaves. Once heavy flowering begins, that energy shifts to sustaining blooms and setting seed.


The vivid flowers you see at the sale are beautiful, but they signal that energy has already gone into reproduction rather than root building. Plants still focused on vegetative growth are investing in the foundation that matters most after transplanting: strong roots for anchoring, efficient water and nutrient uptake, and the capacity to support bushier growth and abundant blooms later in the season.


Transplant Shock Needs Priority

Bringing a plant home means adjusting to new light, wind, soil, moisture, and temperature conditions—all stressful. Recovery and new root growth require energy.


A plant already loaded with blooms has to split its resources between keeping those flowers going and establishing roots. This often shows up as dropped buds, faded blooms, or a temporary slowdown. A non-blooming or lightly budded plant can devote nearly everything to settling in quickly, leading to faster establishment, denser branching, and a far more generous flowering season overall.


Pinch Without Hesitation

Picked up a gorgeous blooming plant anyway? Before you plant, simply pinch or snip off the open flowers and any visible buds. It may feel like a small loss, but this redirects energy straight back to roots and fresh shoots. Most plants bounce back within a couple of weeks—often stronger, bushier, and more floriferous than if the original blooms had remained.


Smart Shopping Checklist

When you’re browsing, look for these signs of a plant built for success:

  • Compact and sturdy growth (avoid tall, leggy ones stretched from low light or crowding)
  • Deep green, healthy foliage (no yellowing, spotting, or wilting)
  • Well-rooted but not severely root-bound (check the drainage holes—roots should fill the pot nicely without a tight circling mass)

The Payoff

Gardening rewards patience every time. Choosing plants focused on root development—or giving blooming ones a quick reset with pinching—sets the stage for healthier establishment, fuller structure, and sustained waves of color all season long.


Healthy roots first. The abundant flowers will follow.


Happy planting this spring! Your garden will shine because of these thoughtful decisions.