Monday, May 20, 2019

Unconventional Beneficial Garden Insects

We all enjoy being outside and, in our gardens, whether it be a vegetable or flower garden. Insects are a necessary part of those gardens,  through pollination or predatory instincts. But all too often we are quick to lump a majority of insects into the “harmful” insect category without really knowing the full story behind their roles in the garden.


Insects like the lady beetle and bees are well known for their benefits to the garden landscape. But did you know wasps are also beneficial to our gardens? Certain wasp species have been proven to hunt down pesky insects and remove them, thus helping the overall health of the garden. 


Mantids are also a great predator for your garden. With over 2,000 species found worldwide, these great hunters are also non-discriminate hunters and have been seen killing many pests like grasshoppers, moths, and flies. 


Another beneficial insect is the European earwig. While some people consider the earwig a pest in their garden, they can actually be beneficial to the overall balance of the garden.They are omnivore, eat leaves or petals from plants,and will eat lots of insects as well. The earwig is nocturnal, so it eats at night.

We have all experienced spiders in the gardens. There are many kind of spiders that are extremely beneficial such as the harvestman spider, also known as a daddy-long-legs. These helpful hunters help keep down the overall populations of a myriad of harmful pests in and around your garden. Pests such as aphids, slugs and other spiders have been shown to be controlled via the harvestman spider.

So maybe next time you’re out in your garden, don’t be quick to judge these pests and allow them to do the dirty work for you.

Sunday, May 12, 2019

Codling Moth Control for the Small-Scale Fruit Grower

Of all of the fruit I have grown in Idaho, my favorite is the apple - not just any apple, a 'Criterion' apple picked fresh off the tree. Biting into one of these juicy, bursting with flavor apples is an orchardist’s delight.

Ironically, for any orchardist, commercial or small- scale operations in which this blog is dedicated to comes with a cost. And for many of those seasoned apple growers, significant cost of time, energy and resource is essential for the perfect marketable fruit. Ideal size (Goldilocks proportions), right color, superb taste and no blemishes. Now if we were living in the Garden of Eden, no problem, but we do not, so comes the consequences of a need for disease management, climate control, soil balance, branch and trunk care, and the dreaded pest control. 

For this article, I am only going to address pest control: one pest in particular that stands head and shoulders of all the other apple pests, the Codling Moth. This moth is a member of the Lepidopteran family Tortricidae. Interestingly, codling means “an unripe, half-grown apple”.  Now add a small worm to this scenario and you have the perfect storm of total destruction of a normal apple. And, just as one perfect apple can bring delight to the dedicated orchardist, it can also bring a grown man to tears when he discovers as he bites into that prospective delicious apple that a black headed cream-colored worm has riddled his sweet meal with several blackened distasteful tunnels…worthless to the core! 
For the untrained eye an outward examination of the suspect apple may puzzle the human consumer for even though many apples may bare the evidence of the unwanted worm that stings and eventually penetrates the skin of the apple many worms find it more convenient to enter through the “calyx end” of an apple. 
Because these worms have such a voracious appetite for apples, the small-scale fruit grower may become discouraged and find it not worth the effort to put up with these pests and so depend on the fruit stand or grocer to be their provider of these sweet worm-less treats. But for the fruit grower who holds to the tenants of religiosity, tenacity and creativity… and who has a plan in place (while these moths are in hibernation) there can be hope and there can be success! One educational source that has done extensive research on the control of the codling moth is Washington State University Research and Extension Services. 
  
 Several practical approaches starting with a better understanding of the life cycle of the codling moth can be helpful in winning the battle of the worm. WSU’s website has numerous charts ranging from life history of the moth to the pesticide spray schedule when the moth is most active throughout the year.  I have in the past used my own method of monitoring moth activity through the use of a molasses-based milk jug traps. I found at a local organic nursery  who recommends this method along with some other valuable advice using a more “organic approach”.
                                  
This is a key component of worm control in your apples. The idea is to know exactly or at least within a couple of days when the moths are on the move and are ready to lay their eggs on strategic apple tree locations to raise their offspring. 
What I like about this website is they take on more of a biological approach in controlling this moth by using pheromone traps and parasitoids I have had little success with these methods but have found a product named Spinosad to be fairly effective if used appropriately with the spray schedule for this area. I have just recently signed up online for the Pacific Northwest Pest Alert Bulletin. I highly recommend this site if you are really committed to being timely with your spray routine which could be several times throughout the life season of the moth.  As mentioned, Spinosad is my pesticide of choice and has some interesting history. In 1982, a distinctive soil dwelling bacterium called Spinosad was discovered on this Caribbean island. Spinosad has become a unique pesticide used in organic gardening.  This year I will be adding another product that meets OMRI standards, an all seasons horticulture oil with Spinosad. This product is considered an excellent fungicide, miticide and pesticide that can be used within 24 hours of harvest. 
            
The above links have some excellent additional advice on how best to control this nasty moth’s offspring appetite so we gardeners and orchardists can better reap the benefits of our fruit tree husbandry. 

Here is wishing you a juicy worm-free apple of your choice this summer. (even though Criterions are the best!) 

Sunday, April 28, 2019

Raised Beds for Your Gardening Ease!

Wouldn’t it be nice to work in your garden on those beautiful sunny days without your back or knees giving out?

Building raised beds is a simple DIY project that could relieve your nagging pains, as well as enhance your garden experience and beauty.

In just a few hours, with a quick trip to your local home-improvement store or lumber yard, you can have elevated raise beds ready for your next planting.

Keep reading for a supply list and tips on planning and building raised beds.  You will also find information on soil selection and planting.

1. Planning: Determine where to install the raised bed(s).  Look for a place where the new bed will have at least 8 hours of summer sun.      

Also, determine the desired size of the raised bed.  For width, consider what is easiest for you to reach across and for height, consider what is easiest for you to lean over, if at all.  A typical standard size is approximately 3.5' x 8.5' x 18".

2. Supply List: For a raised bed of the above mentioned dimensions, the following is needed:
Qty 2: 2" x 12" x 12'
Qty 2: 2" x 6" x 12'Qty 1: 4" x 4" x 8' Corner Post
Large box of Deck Screws #8 x 3"
Tools: miter saw or compound saw; drill bits for pilot holes; screwdriver for drill bit

3. Assembly: 
a. Cut the 12'-length boards to 8.5'; leaving 3.5' for the end piece.
b. From the corner post, cut four 18" sections that you will attach the other boards to.
Note: If you do not want to deal with the assembly process with the 4" x 4" posts, you can try slider connectors or brackets.  With the connectors, you can just slide your board through and use deck screws to secure.


4. Placement: Once the bed is assembled, place it in the desired location in your garden.  If you are placing it in an area that still has sod/grass, a good option is to lay old cardboard boxes down first.


5. Soil Preparation: Compost mixture you’ll be putting inside.  A great place to start is a mixture of 30% compost and 70% topsoil.  To calculate the amount of mixture for the above bed dimensions:
Multiply 3.5 x 8.5 x 1.5 to get 31.25 cubic feet of total soil mixture.  As 27 cubic feet equals 1 cubic yard, it is safe to get 1 yard of topsoil along with 1/3 of yard of compost.  Allow a few days for the soil to settle.  Happy Planting!

Saturday, April 20, 2019

Steps to a Healthy Lawn and controlling Weeds

The first step to having a healthy and attractive lawn and controlling weeds is choosing a grass variety best adapted to your life style and available resources. Factors to consider would be high traffic, shaded and sunny areas, type of soil, available water and amount of time available to care for the lawn.

Irrigate properly to help reduce annual weed infestation. Light frequent irrigation encourages weed seed germination, even if a pre-emergence herbicide has been applied. Water 1- 1.5 inches per watering. Do not water again until you see signs of wilt. Turf will also turn a shade of blue green when it is water stressed. The best time to irrigate your lawn is between 10 pm and 6 am.

Mowing The preferred mowing height for all species of grass is 2 ½ - 3 inches. The minimum height that any lawn should be mowed is 2 inches. Mowing to heights less than 2 inches results in decreased drought and heat tolerance plus higher incidences of insect, disease, and weed problems. The seeds of some weeds require high light intensity to germinate. The shaded environment near the soil surface in high mown lawn helps deter weed germination. Mow frequent enough that no more than one third of the grass height is removed at any single mowing. If the mowing height is two inches. the grass should be mowed when it is 3 inches tall. If the mowing height is 3 inches, it should be mowed when it's about 4 inches. Keep your mower blade sharp to avoid shredding and fraying leaf blades. Grass clippings should be allowed to fall back into the yard to provide natural nitrogen.

Pre-emergence herbicides. A Pre-emergent is activated in the top layer of soil, where the weed seeds sprout, and by design it stops the plant from growing. A pre-emergent is NOT effective once the weeds are showing. Spreading out the herbicide so that it is evenly distributed is critical. It must also be watered into the soil within the appointed time period. The soil must remain undisturbed in order to maintain the barrier. A pre-emergent has to be replaced, or replenished. Pre-emergence should be applied two to four weeks before when seeds germinate in mid March to early April depending on weather. Warm moist springs cause earlier germination The temperature of the soil ( 55-60 degrees) as it starts to warm up in the spring, will be the primary indicator of the pending arrival of various weed species. With normal weather patterns, pre-emergence herbicides give good to excellent control of crabgrass, foxtail, and barnyard grass. Do not over seed into areas that have recently been treated with pre- emergence.

Post- emergence herbicides. Perennial broadleaf weeds can be controlled by post emergent herbicides. It is important to properly identify the weed before choosing an herbicide. Some common perennial broadleaf weeds in lawns are dandelion, field bindweed ( morning glory) White clover, curly dock, ground ivy, Canada thistle, broad leaf plantain, buckhorn plantain and yarrow. The best time to control perennial weeds is in late summer or early fall when weeds are preparing for winter.

Core cultivate (aerate) the lawn at least once a year to reduce compaction and to control thatch.
Fertilizer may be needed if lawn has poor color and vigor, doesn’t recover from traffic or has more weeds present. Nitrogen is the most important nutrient for lawns. Do not use Phosphorus or Potassium unless a soil test indicates it is needed. Cool season grasses should be fertilized in fall, late spring and little in the summer. Warm season grasses should be fertilized late May, June, avoid late summer and fall.

Check out the resources below:

Spring Soil Prep - What you can do Now! (or as soon as the ground thaws :>)

The best way to begin preparing your soil is with a soil test. 
Your local University of Idaho Extension office can help you with this. This test is a great place to start because it tells you what to add to your soil to help your garden perform better. 
soil sample probe
Organic soil amendments also provide an important source of nitrogen for your plants.  Till or turn under with a spade 3-4 inches of compost into your soil at a depth of 6-8 inches and rake your bed smooth.

With a soil sample probe, the task is much  easier... and worth the cost - since you'll probably check your soil many times over the years.

This video shows how to gather your soil sample.

The most important thing you can do for your garden’s soil is to add organic matter. Organic matter aids in drainage and minimizes soil compaction, which reduces soil oxygen.


When choosing an amendment, consider carefully what you use. Animal based products and bio-solids are high in salts and heavy metals which build up in your soils. Consider using well aged plant based compost instead.


Now...check your plant temps, and frost days and...enjoy planting! 


Sunday, April 14, 2019

Salad or Bolt


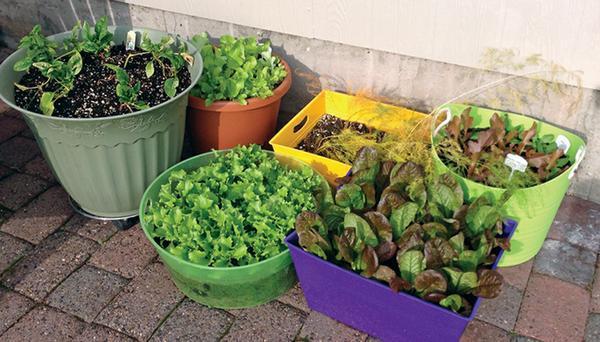
When the gardening bug bites in early spring and you’re itching to get into your garden early, growing salad greens is an excellent place to start.

With more than a hundred varieties of lettuce, this delicious salad green is often the most recognizable. However, there are a multitude of other tasty greens to be added to the home garden that offer just as many different ways to mix up that salad!

Consider adding some spicy greens like arugula to your salad mix.

Generally fairly cold tolerant, salad greens can be directly sown into prepared garden beds in early spring (3 to 4 weeks before the average last frost date). They thrive in fertile soil with organic matter. They can be planted even earlier, if you use cold frames to protect them.

Limited on garden space? Salad greens also do well grown in containers. If you are looking to have a continuous supply of salad throughout the season, opt for successive plantings of greens. Sow another succession when your greens are about an inch tall.

Leafy greens enjoy frequent watering, but be careful to not over water. To avoid possible leaf diseases, avoid overhead sprinkling or water in the mornings to ensure the leaves will dry during the afternoon warmth.

When cultivating, be mindful of their shallow roots. Careful hand-pulling of nearby weeds will keep them very happy.


Plants can be harvested by cutting the plants almost to the ground when they are a usable size. The greens will then grow new leaves from the base that has been left in the garden. If it is preferred, the entire plant can be harvested. Baby greens can be harvested in about a month after planting.

When the weather becomes hot, greens tend to bolt. The plants begin to grow rapidly and, rather than producing mostly leaves, they will produce seeds and become bitter. It is possible to grow greens in warmer weather, but it takes some extra planning and TLC.

Wherever you decide to grow them, salad greens are a nice addition to any garden. Spring is the easiest time to grow them and the perfect time to get some early fresh garden produce into your diet. 


Thursday, April 11, 2019

Your Lawn Needs Care Now!

Image result for early spring lawn
Spring is here! The days are getting warmer and longer. We look out at our lawn coming out of a long winter that has not been fed for a while. Its color is off and we think: if I hit it with lots of water, dump some fertilizer on it that will fix it. But wait… there are a few things to consider about feeding and watering your lawn before you start.

When to Fertilize
C:\Users\jbbow\AppData\Local\Microsoft\Windows\INetCache\Content.MSO\A278CA17.tmpA program that applies fertilizer four times a year, using the holidays of Easter, Memorial Day, Halloween and Thanksgiving as a guide is desirable.
An application of a quick release formula, where the nitrogen is quickly available to the plants, is best in the spring and slow release formulas, where the release of nitrogen is slower can be used for the rest of the applications.  It is better if the late fall application is slow release so the nutrients are released into the soil during the winter to help with lawn recovery in the spring.

What Type of Fertilizer
Image result for lawn fertilizerThe ratio of nutrients on any plant food is represented by Nitrogen- Phosphorus- Potassium (N-P-K) in numbers. The numbers state the amount of each. For instance, a 10-10-10 is a balanced food with equal parts nitrogen, phosphorus and potassium. A fourth number would represent Sulfur (S).
Nitrogen promotes foliar growth and color. Phosphorus is useful in encouraging flower and root growth. Potassium in lawns enhances the plant’s ability to use nitrogen.
Lawns in southern Idaho can be fertilized by following one of two strategies: soil testing or nutrient ratios. In one, fertilizer rates for the lawn are based on a laboratory analysis of a soil sample. The other is based on the fact that lawns do best when fertilized with a fertilizer having a 3:1:2: ratio of N, P, K.  Spring applications can use a ratio where the phosphorus ratio is higher to promote root growth.                                 
Watering
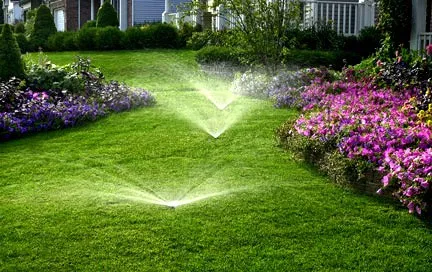
Water deeply and less often to promote deep roots. Apply between 1”-1 1/2” of water weekly, depending on weather conditions, soil type, and landscape terrain (slopes, etc.). Soil should be moistened to a depth of about six inches. To test sprinkler output, place empty tuna fish cans or cat food tins along the water arc to see how long it takes your sprinkler to put down this amount of water. Output is greater the farthest point from the sprinkler head. (You can allow the cans to fill 1/4” or 1/2” and multiple accordingly.) One application a week may be all that is necessary, or you can divide the time into two or three applications per week. Also, take into consideration the areas where sprinklers overlap an area, and that sprinkler output varies. During hot weather, increase the water to 2” per week and apply more frequently if necessary. Visual clues that the lawn needs watering are when the grass begins to take on a blue-green color or has lost its spring, leaving an imprint behind when walked upon.

Aeration
Core aeration opens up avenues for water and fertilizer to reach down to the root zone, thus stimulating the activity of soil microorganisms and increasing root development. Lawns that have not been aerated before or those that get heavy foot traffic may benefit by aerating twice per year, once in the spring and again in the fall for the first two or three years, then drop back to once per year. On lawns that are regularly core aerated once per year in the spring is enough. Do not rake up plugs afterwards, these are topsoil and will decompose naturally, mow over them and they will soon disappear. An application of no more than a ¼” of compost after spring aeration is beneficial for all lawns.
Thatch
Thatch is not caused by leaving grass clippings on the lawn, as is commonly believed. It is an accumulation of dead and partly decomposed leaves, stems and roots above the soil surface but below the green leaves. Up to 1/2 inch of thatch is beneficial, acting as natural mulch, insulating the soil, reducing water evaporation and soil compaction, and increasing the lawns spring and wear tolerance.
Image result for lawnToo much thatch serves as a barrier preventing air and moisture from moving into the root zone of the plants, causing the turf to dry out much too rapidly. This provides a haven for insects and disease. If thatch is over 1/2 inch, power raking in early spring is advised. Power raking every year is not necessary and may actually damage the lawn.
Giving your lawn an application of a slow release fertilizer in the fall will give your lawn a jump-start in the spring.